This comprehensive guide is aimed to help iPhone 16 users choose the best way to set up their new devices. I cover backup methods, setup/restore options, and tips on how to transfer everything from iPhone to iPhone if you set up your new device manually.
Below, I compiled all the necessary info and tutorials on setting up new iPhone 16 (mini, Pro, Pro Max). But if you have any questions left after finishing the article, you can leave them in the comments below.
Related: How to switch from Android to iOS
Please note that I mainly focus on the Apple device + Windows PC combination.
How to back up iPhone
Even if you don’t plan to set up the new iPhone by restoring data from a backup, it feels right to make one before the transfer to be on the safe side. Apple users have three ways to back up an iPhone to a Windows PC: iTunes, iCloud, and third-party software. What is a backup?
— iTunes Backup
Not many people still use iTunes (and I can see the reasons why!). The program is bulky. Backups created with it won’t include MP3s, videos, books, and photos that have been imported from the PC or Mac, data already stored in iCloud, Face ID or Touch ID settings, Apple Pay information, and more (scroll down).
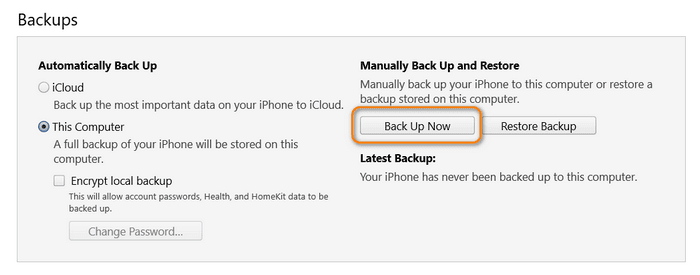
But still, it’s a very safe way to back up your device to the PC without depending on Wi-Fi or iCloud storage space (although please mind that if a backup turns out to be corrupted, iTunes won’t notify you until you try to restore from it. Yikes.)
Here’s how to back up your iPhone on iTunes.
— iCloud Backup
With a Wi-Fi network connection, you can back up your iPhone with iCloud. You won’t need to plug your device into a computer. Contrary to popular assumption, iCloud backups don’t include iCloud Photos and all the other stuff stored in your iCloud space.
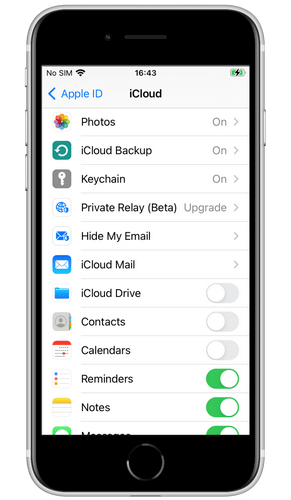
These data types get downloaded from iCloud to the device after you sign in with your Apple ID. iCloud backups also don’t include Apple Pay information, Face ID or Touch ID settings, and some other stuff.
Here’s how to back up iPhone to cloud.
— Other apps
I’m not going to lie, we have our own tool to back up Apple devices to a Windows PC. Its main advantage is that it can restore certain data types from iTunes backups to iPhones selectively without overwriting the rest of the data — in case you don’t want to transfer all the debris and bugs from the old device to the new on and move only the necessary stuff over.
It also works with password-protected backups, backs up apps in the .IPA format, and salvages data from corrupted iTunes backups.
Here’s how to back up your iPhone with CopyTrans Shelbee for free.
How to set up iPhone 16
The easiest way is to automatically migrate all the data from the old iPhone to a new one with iPhone Quick Start. You can also choose to set up new iPhone 16 manually by restoring it from an iCloud or iTunes device, or start from scratch and set it up as a new iPhone.
Choose your fighter:
— Quick Start
The Quick Start feature lets you directly transfer your data from your old phone to your new device. You don’t need to back the old device in advance.
Just put the two of them next to each other, make sure they’re both connected to the same Wi-Fi network, and let Apple creations work their magic. Both of your devices have to be running iOS 11 or later and to be plugged into power.
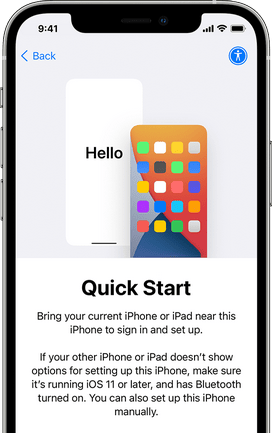
The process is intuitive. If you feel that you need help, you can follow this official Apple guide, but I prefer this much more detailed manual by Tom’s Guide.
The only downside is that a device-to-device migration means that bugs, bits of old apps, temporary files stuck in the system, that gray Other stuff eating up the memory, etc will get migrated across, too.
— Restore from iCloud Backup
To restore from iCloud backup, make sure that the device is connected to Wi-Fi and plugged into power. After you tap on this option on the Apps & Data screen, you will need to sign in to iCloud with your Apple ID and follow the simple instructions on the screen.
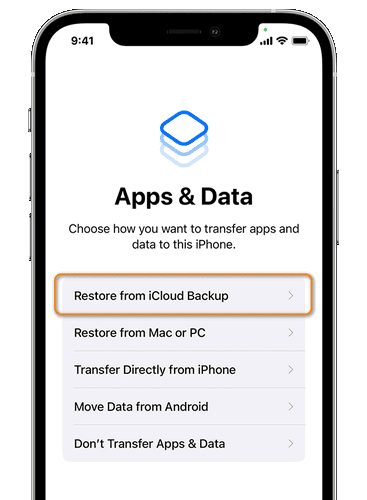
The data stored in iCloud and thus not included in the backup will continue to restore in the background after the setup is complete for the next several hours or days depending on its size.
Here’s how to restore iPhone from iCloud backup.
— Restore from iTunes Backup
To restore from iTunes Backup, you won’t even need the previous device or Wi-Fi-connection. Connect your iPhone to the PC and launch iTunes. Wait until your iPhone appears on the iTunes top panel and click on the iPhone icon. For more details and screenshots, follow this guide on how to restore iPhone from iTunes backup on a PC or a Mac (scroll down a little bit).
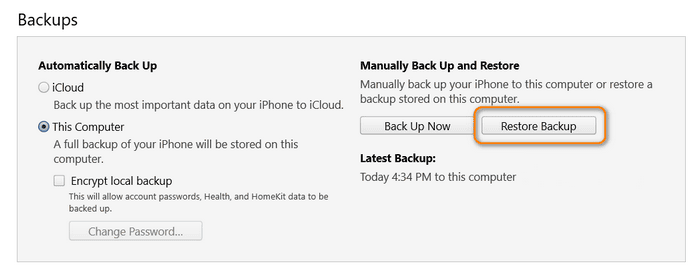
Please note that you will need the old iPhone to manually migrate content synced from Finder or iTunes since it’s not included in the backup. Content from the iTunes and App Stores will be automatically re-downloaded onto the device after the setup.
— Set Up as New iPhone
Lastly, you can forgo transferring any of the old data to a new phone altogether and start fresh, just as this tech journalist did. To get rid of the past and embrace uncertainty, choose the Set Up as New iPhone option.
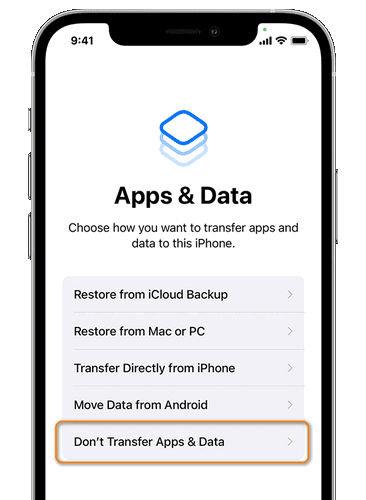
Note: If you have iCloud sync enabled for certain data types (photos, contacts, messages, notes, etc), they will get re-uploaded to the device once you sign in with your Apple ID. To check what data types are synced to iCloud, go to Settings > your Apple ID > iCloud and scroll down.
How to transfer everything from iPhone to iPhone without iCloud
I’ll repeat myself in case you scrolled through the previous sections of our setup guide: if you have iCloud sync turned on, types of data that get synced to it will get re-uploaded to the device once you sign in with your Apple ID. To check, go to Settings > your Apple ID > iCloud and scroll through the list.
The catch is that you can’t just turn it on for setting up new iPhone and then disable it. Items you created before enabling iCloud, such as older notes or reminders, won’t be synced.
Here’s how to transfer data from one iPhone to another without iCloud sync or if Quick Start failed to transfer some data:
— Photos
Photos synced via iTunes or Finder
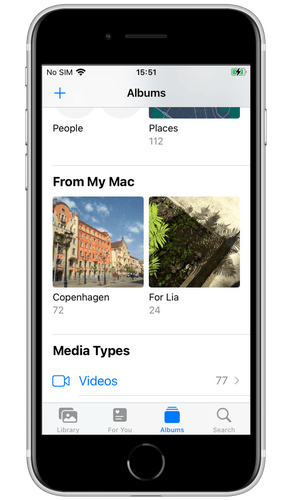
Photos imported from the PC (the From My Mac section in your iPhone photo gallery) don’t get synced to iCloud. What is more, they can’t even be edited on the device. Those can only be manually moved to the PC and then to the new iPhone. You can do it with this app. Usually, there are not so many such photos, and the app has a trial period, so it should suffice.
Photos taken with the iPhone and stored on the iPhone
If you only have photos taken with this particular iPhone on the device, use the Windows Photos app to transfer photos from an iPhone to your PC. I’m surprised Apple doesn’t advertise this method more, it’s very user-friendly and easy.
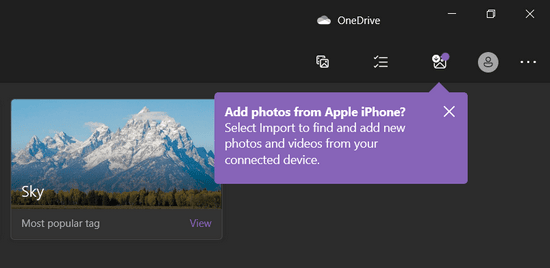
Alas, the Photos app didn’t display and transfer all of my photos. If it’s your case too and you’re open to the idea of a third-party app, you can try our app for photo transfer. It’ll also help you move these photos from the PC to the new phone. Otherwise, you’ll need to set up iCloud Photos and upload photos to it via iCloud.com.
— Music
Purchased music (iTunes and Apple Music) will be available to you on a new device as soon as you log in to these services with your Apple ID. But if your music library consists of music ripped from CDs, none of Apple’s transfer/restore options will let you move it.
You can back up the music library you have manually uploaded to your iPhone or iPod and then put it onto a new device.
— Apps and App Data
Apps are a hard case. There are many things to take into consideration:
Purchased apps
The App Store keeps track of all the apps you ever purchased or downloaded on the iPhone or iPad, which means you can simply re-download them onto the new device. But all files stored in them, scores, ratings, and settings won’t be restored.
Old app versions
Unfortunately, there’s no way to transfer an older version of an app in a couple of clicks. But there’s a slim chance you can do it using an iCloud backup as the last resort. Please keep in mind that as a rule, apps are downloaded directly from the App Store rather than from your existing iPhone both with Quick Start and an iCloud backup.
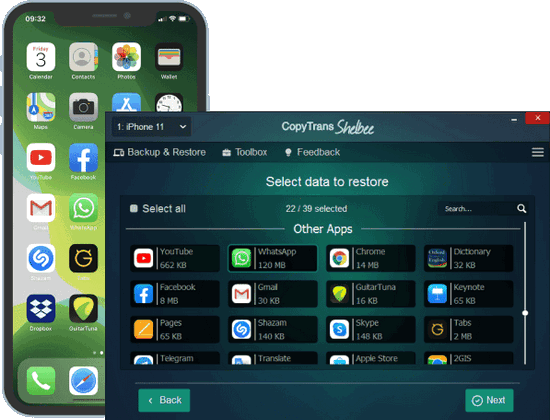
To avoid this situation in the future, back up your apps with CopyTrans Shelbee. It downloads .ipa files from the App Store server while creating the backup (as opposed to iTunes and iCloud which does at the time of the restore).
Local app documents, scores, and settings
The same goes for app data. Only a third-party app will help you if you choose to avoid Quick Start and restoring from a backup. Here’s more on how to transfer apps to new iPhone.
What is more, some app documents, such as videos in VLC for Mobile, cannot be backed up. Transfer them as part of the iPhone gallery.
— iMessages and SMS
The only way to transfer iMessages, text (SMS) and multimedia (MMS) messages without restoring from a backup is to use third-party software. I swear by our CopyTrans Shelbee.
— Contacts
My advice is to copy your local iPhone contacts to your Gmail or Outlook account. To do it, you’ll need to add this account to the list of iPhone accounts, turn the Contact sync on, and then add your Gmail or Outlook account to the list of accounts on the new iPhone.
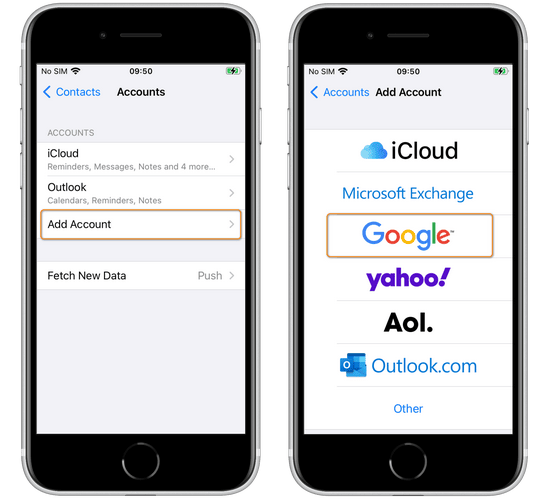
For screenshots of the process, go here: steps for a Google account and Outlook account.
— Calendars and Notes
The above said about contacts applies to calendars and notes as well. You can sync them to a Gmail or Outlook account and then add this account to your new phone. Flip the Calendars and Notes toggles on while adding accounts to the iPhone to do that.
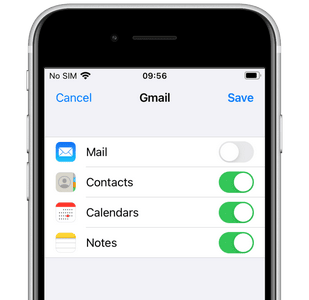
Additionally: If you want to manage your local iPhone calendars manually, refer to this guide on how to transfer calendars from one Apple device to another.
You can export your notes as documents to the PC, but there’s no way to import notes to an iPhone.
— Passwords and settings
Netizens will tell you that a device-to-device migration is hands down the best way to migrate sensitive data across to a new phone (or restoring from an encrypted backup if you have a Mac).
How to set up new iPhone
The guide covers backup options, restore modes, and ways to set up new iPhone. I also list nethods to transfer data to new iPhone after setup without iCloud or Quick Start.
This is it from me. What data types or info should I add? I’m still working on the guide, so any suggestions, corrections, and comments will be highly appreciated!
