
 (7 votes, average: 4.57 out of 5)
Today, it’s a couple of cute cat photos. Tomorrow, you’re already looking through 17 versions of the same sunset, receipts from last year, and screenshots you meant to delete “later.” Sound familiar? Your photo library deserves better.
This guide is for anyone who’s ready to bring a little calm to the chaos. Just simple ways to tidy up your gallery. I’ll show you how to organize photos on iPhone using albums, favorites, and smart tricks that won’t take much time. You’ll also learn how to rearrange photos on iPhone albums so your best shots don’t get lost among birthday cake photos and blurry concert videos.
And if you’re one of those people who’s always been meaning to get organized “someday”, maybe today is that day.
Best way to organize photos
on iPhone
If you ever dealt with the awkwardness of iTunes functionality, search no further. We built our own tool, CopyTrans Photo, which will keep it simple and let you play and organize photos on iPhone as you wish.
Click on the feature that interests you the most:
| Organize photos on iPhone or iPad | iTunes | CopyTrans Photo |
| Save iPhone photos by date | ✗ | *with CopyTrans Studio |
| Add photos to iPhone from PC | ✓ | ✓ |
| Add more than 1 folder at a time | ✗ | ✓ |
| Create new albums | ✗ | ✓ |
| Rename albums | ✗ | ✓ |
| Rearrange photos inside an album | ✗ | ✓ |
| Change the album cover | ✗ | ✓ |
| Help print pictures from iPhone | ✗ | ✓ |
| Other features | ||
| Transfer photos and videos from PC to iPhone | ✓ | ✓ |
| Transfer photos and videos from iPhone to PC | ✗ | ✓ |
| Delete selected photos and videos from iPhone | ✗ | ✓ |
| Play Camera Roll videos | ✗ | ✓ |
| Convert HEIC images to JPEG | ✗ | ✓ |
| Move full-resolution photos from PC to iPhone without loss of quality | ✗ | ✓ |
One more way to easily organize your photos is to use a program that is integrated into Windows Explorer – CopyTrans Studio.
Find out our detailed guide on how to make your Photo Library well organized.
How to create an album on iPhone
iTunes lets you sync only one photo folder at a time. If you sync another folder, the previous images will be gone! Truly generous of you, Big Brother! CopyTrans Photo, on the contrary, shows all your photos added from PC under “Photo Library” and lets you manage photos on iPhone in multiple folders.
⚡ For more info, see the difference between Camera Roll vs Photo Library.
-
First, download and install CopyTrans Photo:
Download CopyTrans Photos for free
-
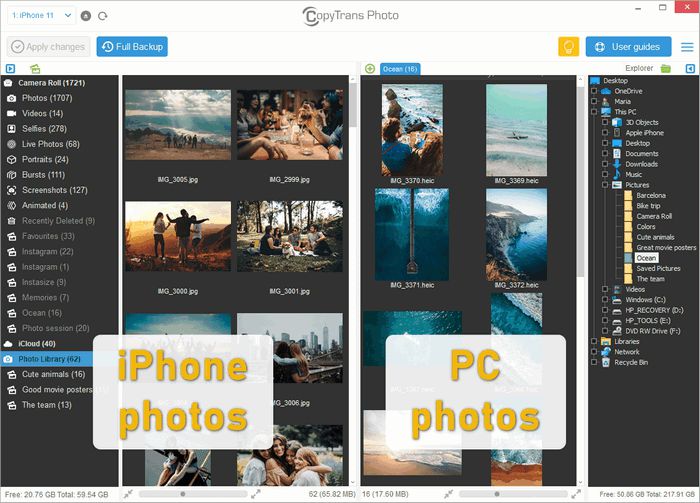
Connect your iPhone to PC. The program will show your existing iPhone photos on the left, and PC photos on the right.
💡 The leftmost and rightmost panes are for navigation; use them to switch between different folders and albums.
-
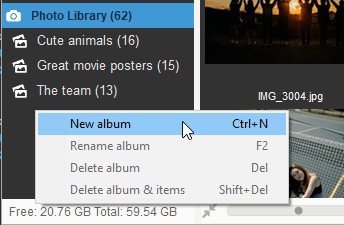
To add a new photo album, right-click on the empty space under the album list and select to create an album on iPhone.
-
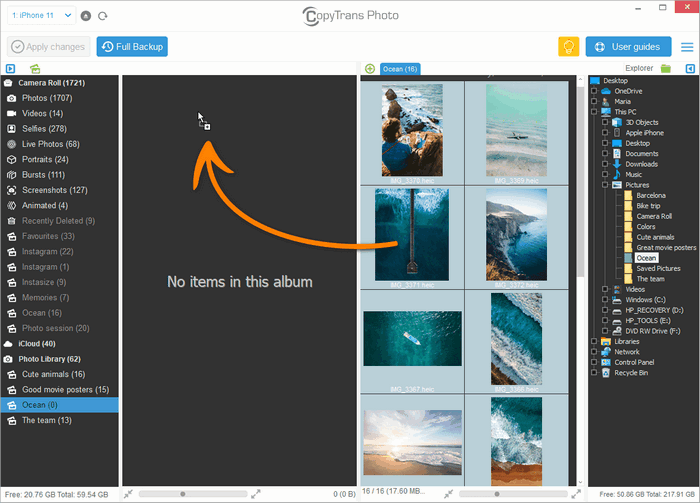
Give the new album a name and click OK. A new album will appear on the list, and it will be empty.
-
To add photos to the new album, select the images from the folder in the PC pane and drag and drop them into the iPhone “your new album” pane, from right to left.
💡 To select all the images in a folder use Ctrl+A shortcut on the keyboard.
💡 To select several single photos, click on them one by one while holding down Ctrl. -
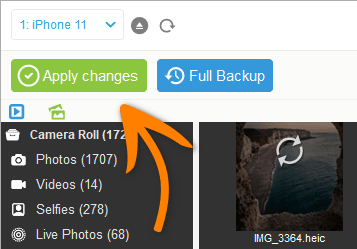
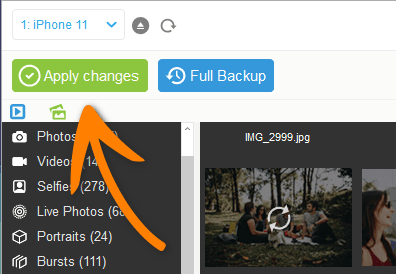
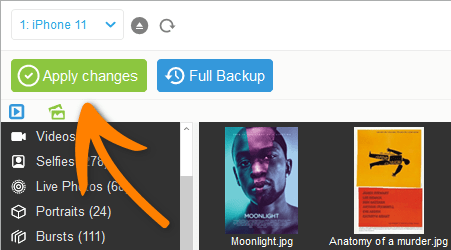
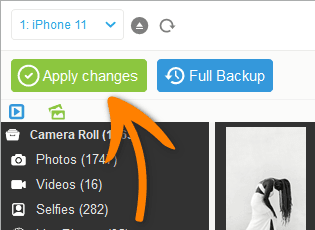
Don’t forget to Apply changes!
-
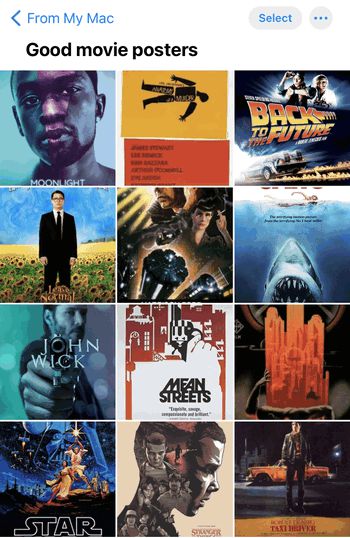
The new album and its photo contents are added to the iPhone, iPad, or iPod Touch.
NOTE: Look for your images in the “FROM MY MAC” section. Due to Apple limitations, Camera Roll stores only photos or albums that were created on the iPhone.

💡 You can also import these albums to Camera Roll where they will be much easier to manage.
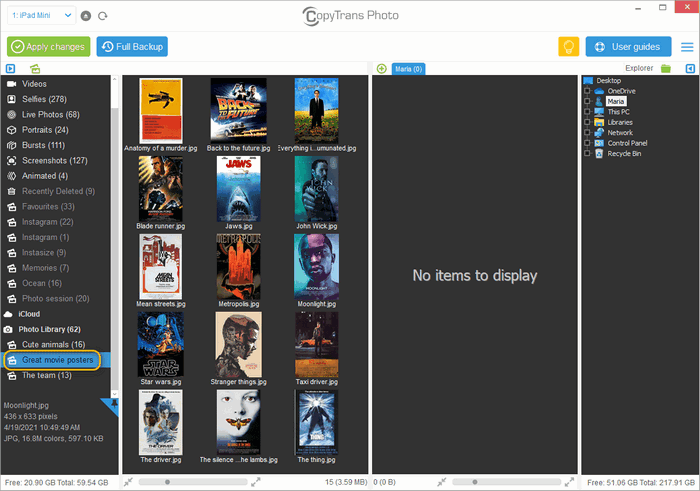
Copy photo albums from PC to iPhone
If you already have photo albums organized on your computer and you would also like to have them on your iPhone, there is nothing simpler.
-
Launch CopyTrans Photo and navigate to Photo Library in the leftmost pane.

-
Select one or more folders on your PC that you would like to turn into iPhone albums. Then, drag and drop them to the left half of the interface.
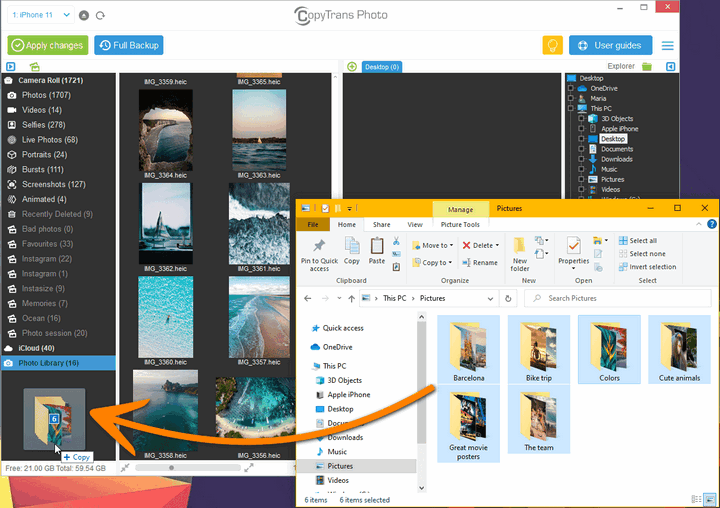
-
Don’t forget to apply changes!
-
The folders along with the photos inside are automatically imported to your iPhone.
NOTE: Look for your images in the “FROM MY MAC” section. Due to Apple limitations, Camera Roll stores only photos or albums that were created on the iPhone. 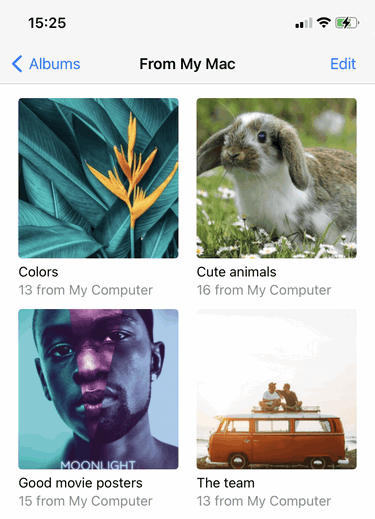
💡 You can now import these albums to Camera Roll where they will be much easier to manage.
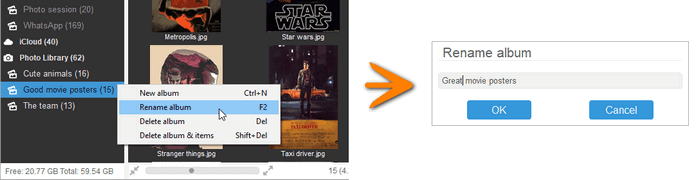
How to change album name on iPhone
This method will work for albums added to your Photo Library. To change the name of an album on iPhone through PC:
-
Launch CopyTrans Photo and connect your device, as shown in the previous sections. Wait until all the albums are loaded:
-
If you want to rename an existing album in Photo Library, right-click on it, choose “Rename album” and change it as you please.
How to organize iPhone photos on computer
Rearranging Camera Roll photos within albums is easy enough and can be performed on the device. But you are not here for that, are you?
⚡ This method will work for photos added to iPhone from your PC.
-
To sort and organize photos on iPhone from PC, download and install CopyTrans Photo:
Get CopyTrans PhotoIf you need help installing CopyTrans Photo, please refer to the installation guide.
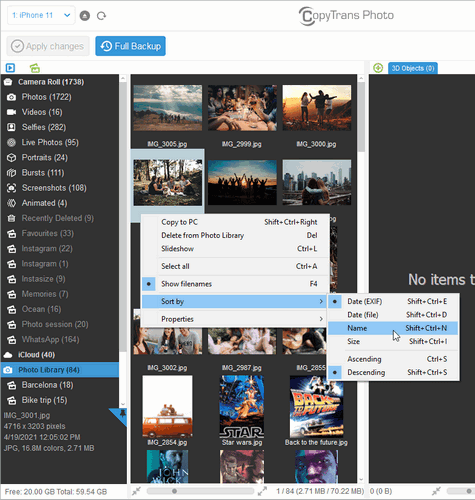
-
Connect your device. Once the photos are loaded, you can rearrange photos in Camera Roll or Photo Library for more convenience. Select one of the main directories, right-click on the working area and choose “Sort by”.
Here’s how to organize photos on iPhone by date, name, etc.:
-
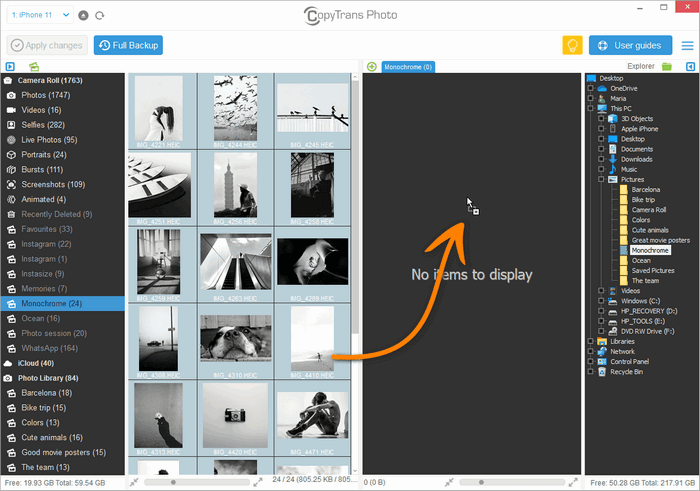
To organize photos inside an album, open it using the folder tree on the left (the album must be shown under Photo Library).
-
Select one or multiple photos, then drag and drop them to the location of your choice.
➕ To set a Key photo for the album, choose an image and drag it to the first position.
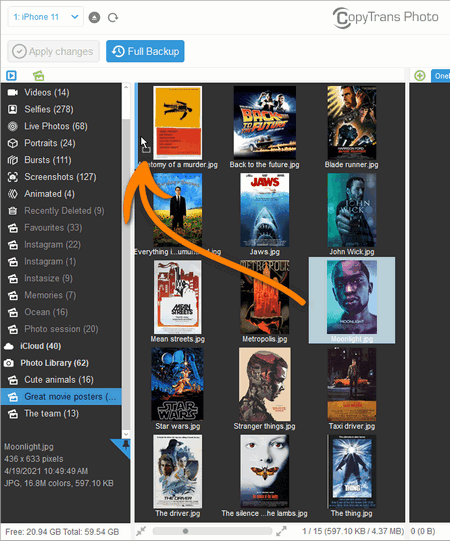
-
Apply changes.
-
Your iPhone photos are positioned in a new way and the Key photo is changed too!
💡 If you copy this album to Camera Roll later, the photos will be added in the same order.
How to print photos from iPhone
If sending countless emails to yourself with pictures you want to print doesn’t work for you, here is a way that will not cram your inbox and allow you to transfer as many pictures as you want.
Here’s how to print pictures from iPhone:
-
Launch CopyTrans Photo and connect an iOS device as demonstrated above.
-
Select the photos you need in the iPhone pane. Select the destination folder on PC in the rightmost pane.
💡 To select all the images in a folder, press Ctrl+A on the keyboard.
💡 To select several single photos, click on them one by one while holding down Ctrl.
-
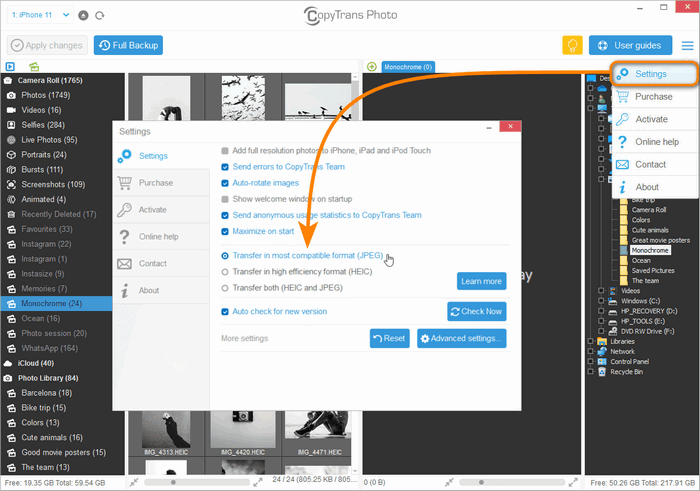
If you’re not printing from home, it may be best to transfer the pictures in JPEG.
Just go to More -> Settings and choose Transfer in most compatible format.
💡 If you’re printing from home, just install CopyTrans HEIC (free plugin) and you’ll be fine.
-
When ready, drag the images to the working area on the right.
-
Apply changes.
-
Done! Now, navigate to the right folder on your PC -> select the image(s) -> right-click on them -> select Print.

-
Choose the printer, the orientation, the size of the image, and finalize your choice.

-
Your photos are ready and printed. Enjoy!

Organize photos on iPhone
FAQ
1. Why does my iPhone photo gallery resemble a digital attic?
Because that is precisely what it becomes when there is no system in place. Screenshots, duplicates, photo series: all of these accumulate quickly. Learning to organize photos on your iPhone is like finally putting things in labeled boxes instead of throwing them all into one big box.
2. Is it possible to move photos without turning it into a full-time job?
Yes. It doesn’t take much time, just a few small habits. Creating albums, marking favorites, and being able to reorder photos on your iPhone yield huge results without taking up much of your time.
3. Why rearrange photos in albums? Isn’t chronological order good enough?
Chronological order is fine… until you want your vacation album to tell a story. Being able to rearrange photos on your iPhone means you can set the mood, group moments together, or start with an epic sunset instead of a blurry airport selfie.
4. Will organizing my photos affect my iCloud or the originals?
No. Moving photos within albums or creating new albums does not affect the originals or your cloud backups. You are simply making it easier to find them — without changing the files themselves.
How to reaarange photos on iPhone
Final Thoughts
It turns out that learning how to organize photos on your iPhone doesn’t require endless scrolling, or sorting through years of digital chaos. With a few tips from this article, your photo library can become more like a personal gallery than an endless to-do list.
The beauty of organizing photos isn’t just about neatness. It’s about being able to find what’s really important — that one photo of your dog wearing sunglasses, the recipe you photographed, or your favorite moment from last summer’s trip. And once you master how to rearrange photos on your iPhone, those stories can finally be told in the order they deserve.
So no, you don’t have to sort everything at once. But a few minutes here and there — moving a photo to an album, deleting screenshots, renaming folders — add up. Over time, what once seemed like chaos begins to look like a carefully curated collection. You don’t need a system. You just need to get started.