

 (80 votes, average: 3.78 out of 5)
If you’ve come looking for how to download photos from iPhone to computer, you already know this is where Apple sets you a series of challenges. This article is here to help. It will also help those searching for how to transfer photos from iPad to computer – or any other iOS device.
So, how to copy pictures from iPhone to PC? Here’s how:
- How to download photos from iPhone to computer
- How to download photos from iPhone to computer – YouTube tutorial
- How to download selected photos from iPhone to PC
- How to view iPhone photos on PC
Alternative ways:
- How to download photos from iPhone to computer using Windows Explorer
- Import photos from iPhone to Windows 10
How to download all photos from iPhone to Windows computer
Find out in this chapter on how to do a full save of all iPhone photos, including iPhone albums structure, dates and EXIF data.
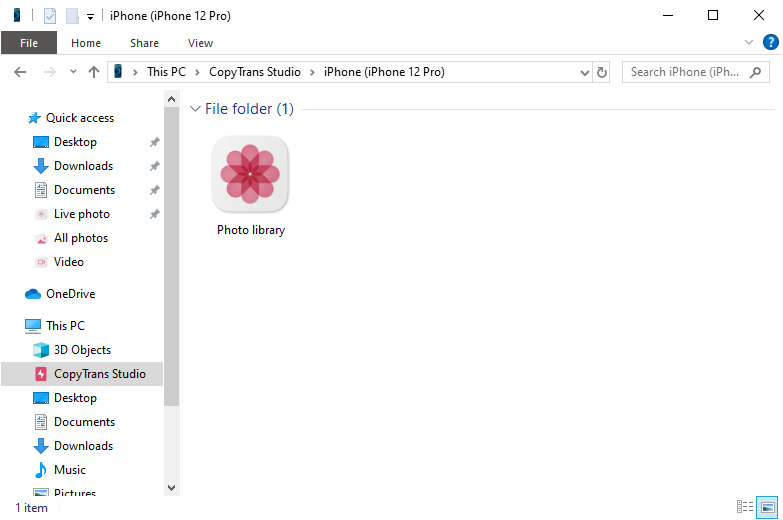
- Download and install CopyTrans Studio. If you need help, follow this Setup guide. Download CopyTrans Studio Now!
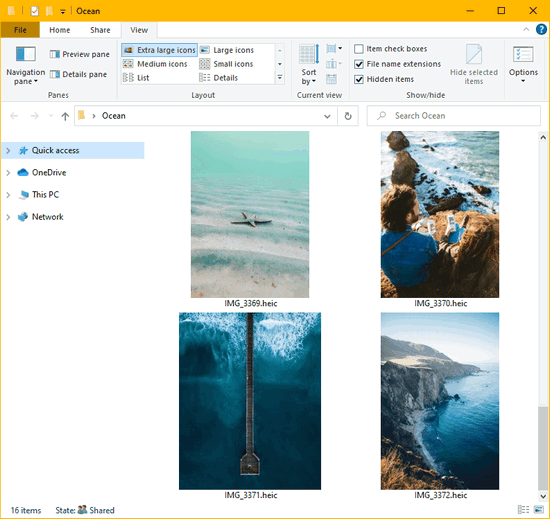
- In your Windows Explorer, select CopyTrans Studio > your device > Photo library to open your iPhone Photo library on PC:
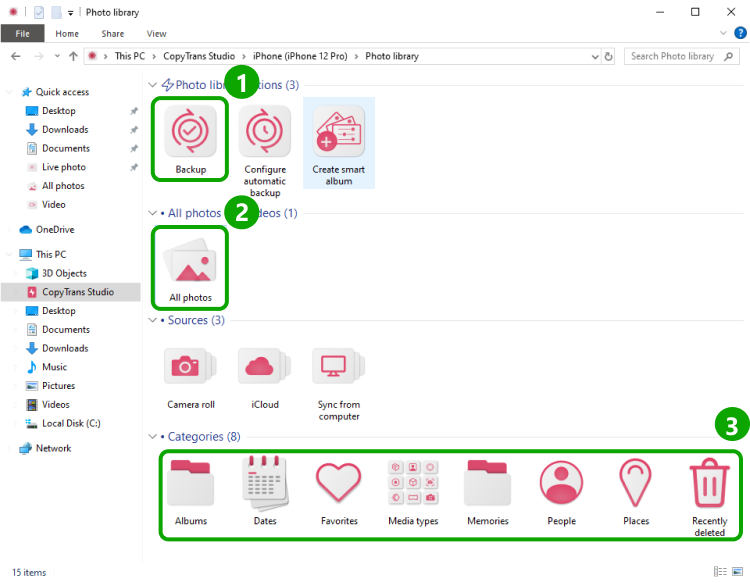
- Now you can select what iPhone photos would you like to download to PC:
(1) Backup: select this option to do a full backup of all iPhone photos and videos to a folder of your choice. Check this guide to find out how to configure iPhone photo library backup.
(2) All photos: access all iPhone photos in one window and select the ones you want to save. To download them to PC, just drag the photos to a folder of your choice.
(3) Categories: Select a category to find and download the photos you need. Easily download your iPhone photo albums (by dragging them to the PC), or select all photos of a particular Media type (photos, selfies, videos, live photos or panoramas).
Your iPhone Photo Integrated into Windows Explorer
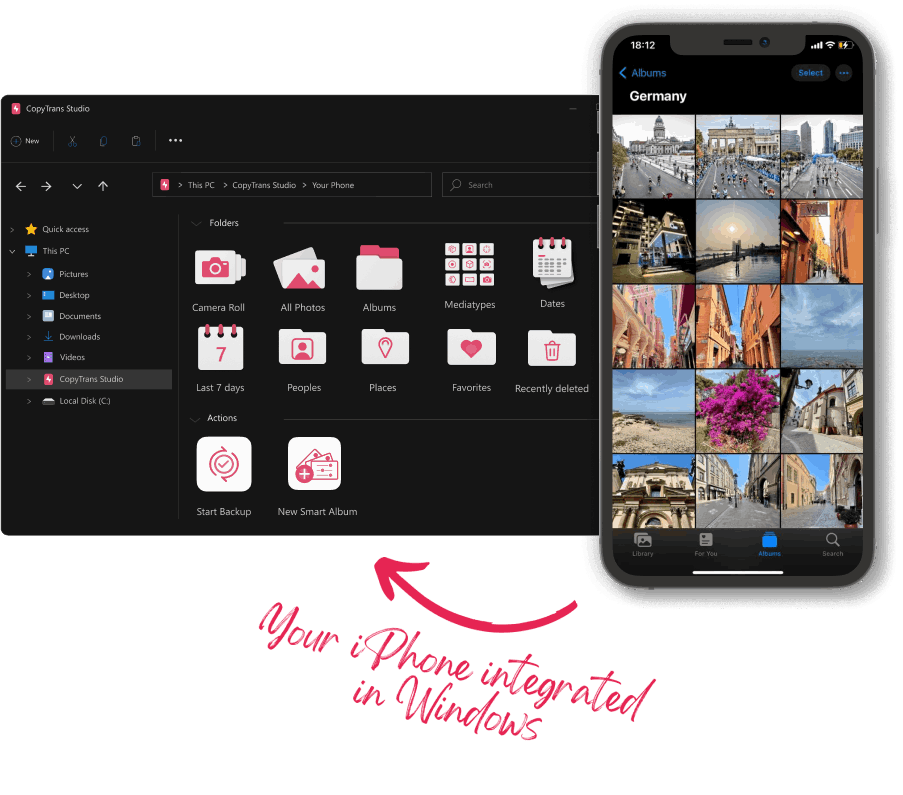
With CopyTrans Studio, you can:
- Access your iPhone and iPad Photos as if they are stored on a USB key
- Use 1-Click Backup or Automatic Backup to never lose a photo anymore
- Organize your photos with Smart Albums
- Say goodbye to HEIC photos and convert them to JPEG
- View Live Photos in motion and all Apple tricky formats on your PC with the built-in viewer
How to import photos from iPhone to computer
Full Backup with CopyTrans Photo
Photos are one of the most valuable things we have. They help us remember our past, show off with friends and family, or share moments with people who couldn’t be there. When you take photos on your iPhone, it is important that you don’t lose them when you need them the most.
There are many ways to download photos iPhone – but some are more successful than others. To save you the trouble, we designed CopyTrans Photo. It will:
⚡ show all your device photos in one place;
⚡ back up your Live Photos from iPhone to PC and back;
⚡ keep the original EXIF data such as quality, date taken, location and filters;
⚡ convert HEIC photos to JPEG if necessary.
So, here is how to download photos from iPhone to computer:
-
Download and install CopyTrans Photo.
Download CopyTrans PhotoIf you need help installing the program, please refer to the installation guide.
-
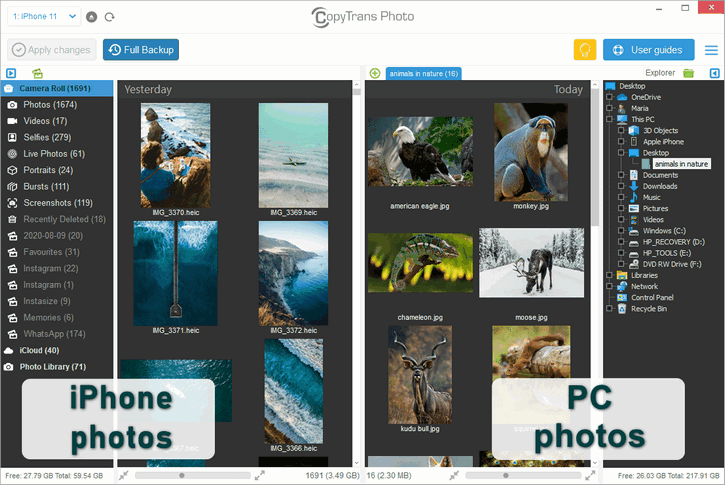
Run CopyTrans Photo and connect your iPhone. iPhone or iPad photos will be displayed on the left-hand side of the main program window. Your PC folders will appear on the right:
-
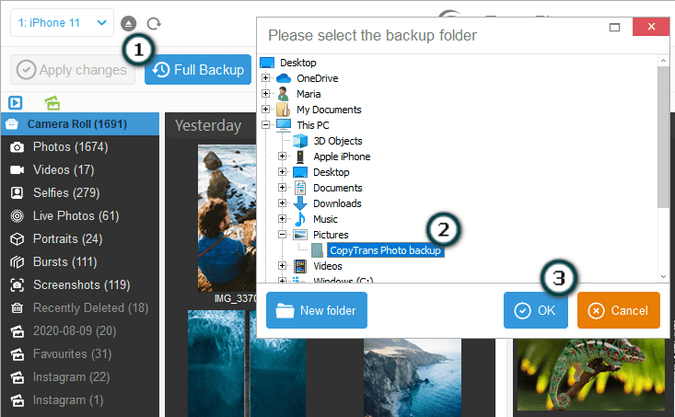
To download all iPhone photos and albums at once, click on the “Full Backup” button in the top-left corner of the app, then select the destination folder.
-
Wait until the backup is complete.

-
The iPhone photos are now transferred to the computer folder of your choice!

How to download photos from iPhone to computer
YouTube tutorial
If you prefer text instructions, follow our written guide above.
How to download photos from iPhone to PC
The selected ones
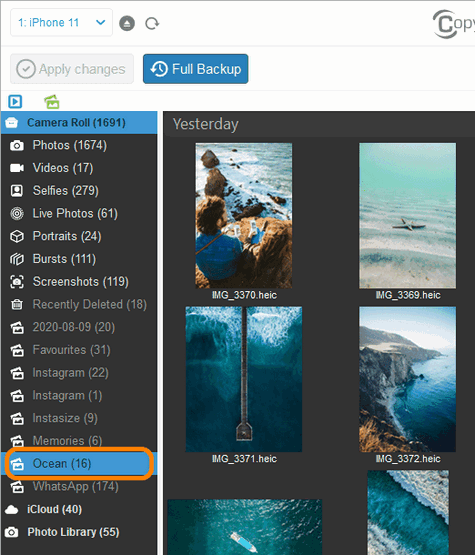
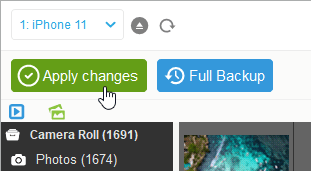
Alternatively, you can select the photos you want to transfer from Camera Roll. You can also choose one of your photo albums on the left to transfer it from iPhone to PC.
-
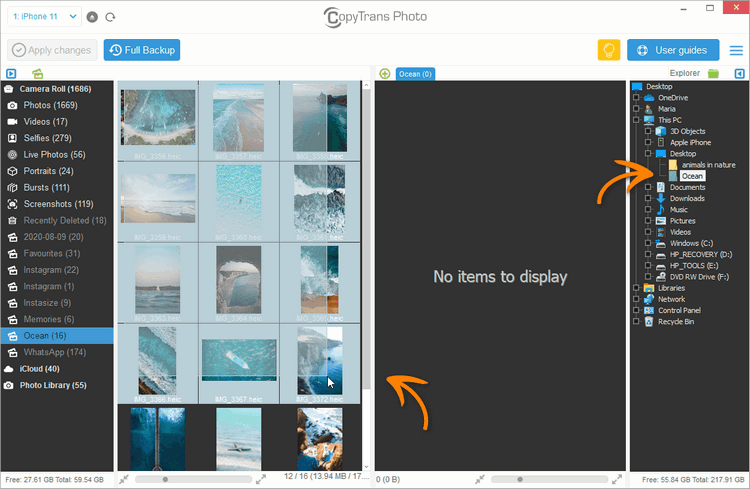
First, select the images you want to transfer (on the left) and the destination folder (on the right).
Tips:
⚡ To select individual photos, hold down Ctrl while clicking on each one.
⚡ To select all photos in an album, navigate inside and press Ctrl+A. -
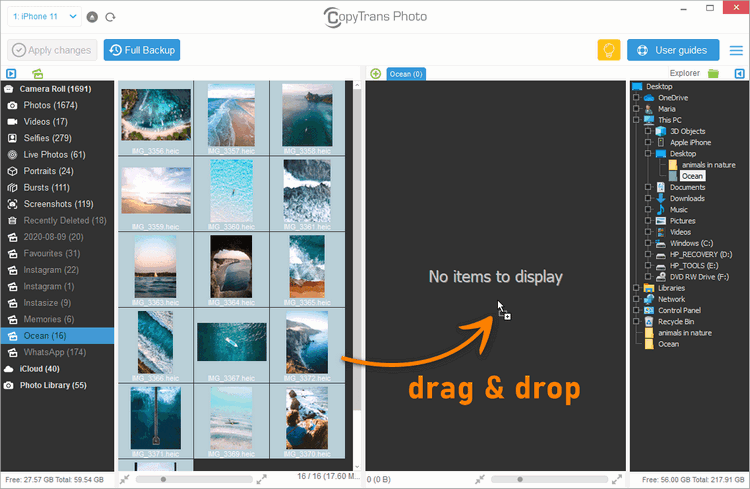
Now, import photos from iPhone to PC using simple left-to-right drag and drop.
-
Finally, click on the “Apply changes” button that will download photos from iPhone.
-
Your iPhone photos are now imported to your PC. It’s that easy!
Why people choose CopyTrans Photo:
Download and try for freeHow to view iPhone photos on PC
Now you know how to download iPhone photos to PC. Only the photos may not be in JPEG.
By default, your iPhone saves images in HEIC format – and if you import them to PC, you will just see broken icons instead of thumbnails.
To view your HEIC pictures on Windows, use CopyTrans HEIC for Windows – a free tool to view HEIC images in Windows Explorer.
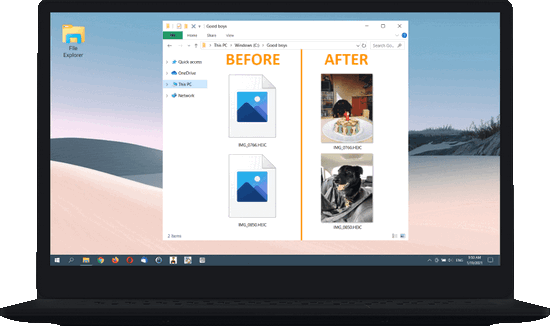
It works automatically and allows you to convert up to 100 HEIC images to JPEG at a time.
How to download photos from iPhone to computer
using Windows Explorer
The most straightforward, but also the most time-consuming and the least convenient way to transfer photos is through File Explorer.
Here is how to do it:
- Connect your iPhone to PC using a USB cable.
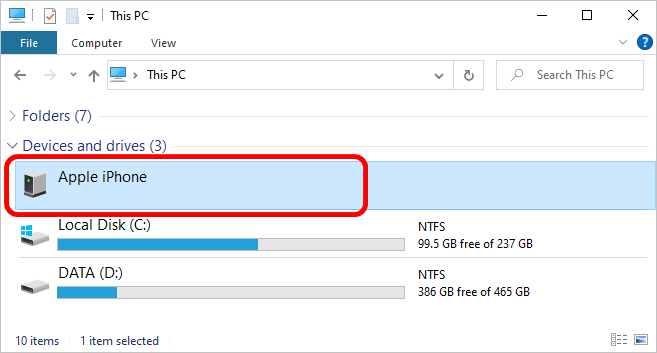
- Open File Explorer. There should be an icon representing your iPhone – double-click on it.
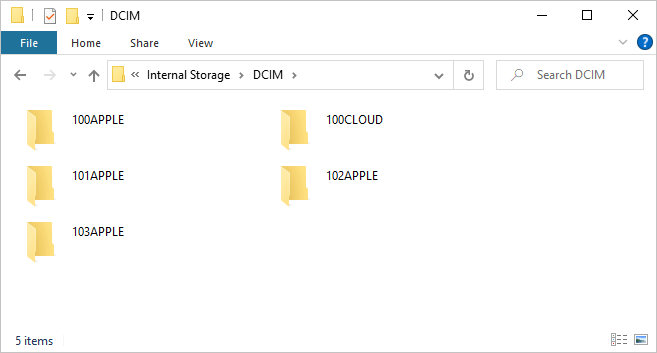
- Open the DCIM folder. The folder contains all the pictures from your iPhone.
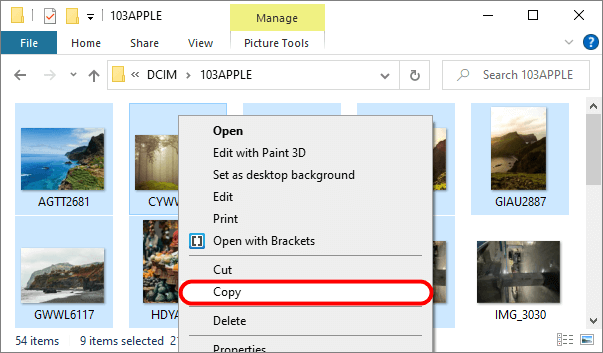
- Select the pictures -> right-click on them and select Copy.
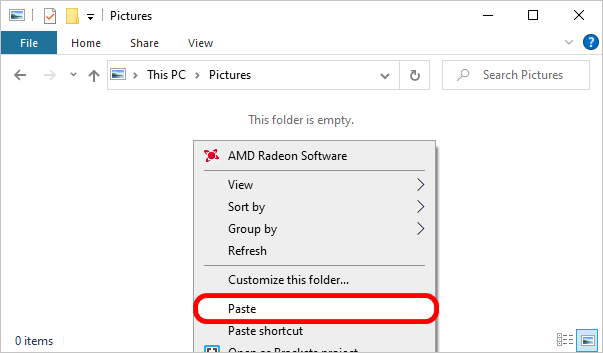
- Navigate to any folder on your PC, right-click again and select Paste. Done.
Problems of this method:
❌ Possible issues with iOS drivers and device recognition
❌ Difficult navigation (unlogical pictures distribution between folders)
❌ Images are HEIC encoded (Incompatible with Windows)
❌ No access to live photos
Import photos from iPhone to Windows 10
The other way to import iPhone photos to PC is to use the native Microsoft Photos app (Windows 10 only).
Follow the steps:
- Connect your iPhone to PC with a USB cable, then unlock your device.
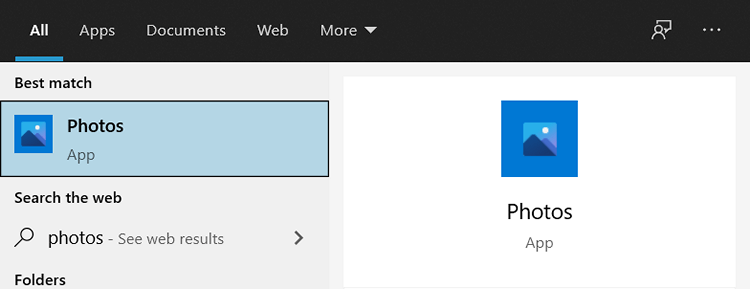
- Go to Start -> Search for Photos app and run it.
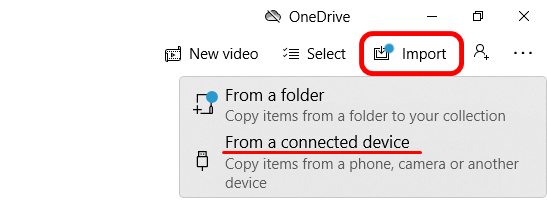
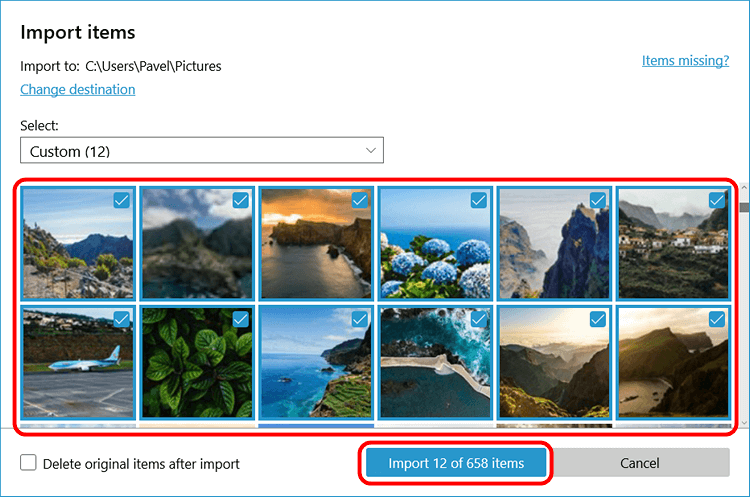
- In the top-right corner, select Import -> From a connected device.
- Select the photos you want to save to the PC and click on Import.
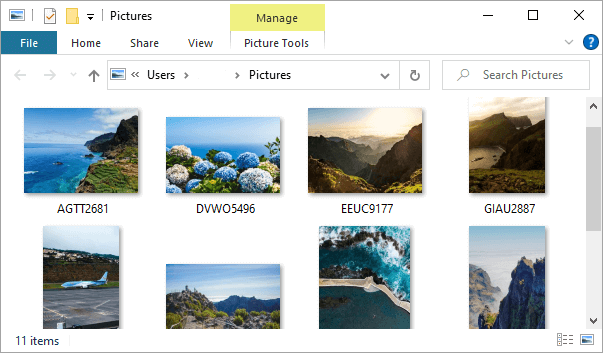
- Find the photos in your Pictures folder.
Problems of this method:
❌ You need to install iTunes 12.5.1 or later
❌ Difficult navigation (no access to albums)
❌ You cannot manage your iPhone photo library from your computer
❌ Possible freezes and interruptions