

 (55 votes, average: 3.67 out of 5)
If you are trying to learn how to get photos from iCloud to iPhone, you have probably noticed that battling iCloud is not that easy. You may find yourself facing one of these issues:
✘ iCloud Photos not syncing;
✘ photos not showing up in your gallery;
✘ you are running out of iPhone storage;
✘ you don’t want to install iCloud for Windows.
Storing photos directly on your iPhone is important. It means they’re always ready to view, edit, or share, even without Internet access. The good news? There are several reliable ways to download photos from iCloud to your iPhone. In this guide, we’ll walk you through 4 simple methods so you can choose the one that works best for you.
- How to get photos from iCloud to iPhone ⭐ without iCloud ⭐
- How to get photos from iCloud from a backup
- How to restore photos from iCloud to iPhone
- How to download iCloud photos
These methods will work for both iPhones and iPads.
Check this guide if you need to transfer iCloud photos from iPhone to PC >>
How to download photos from iCloud to iPhone
without iCloud
To manually download photos from iCloud to iPhone without installing iCloud for Windows, we will download iCloud photos to the PC first and then transfer them to the iPhone. We will do so by using CopyTrans software.
CopyTrans apps will let you:
✓ download more than 1000 items at a time,
✓ manually select the photos to transfer to your iPhone,
✓ and keep all the other iPhone data intact.
If you are ready, let’s get started.
How do I retrieve photos from iCloud to my iPhone
Step 1: Download iCloud photos to your computer
Download photos from iCloud to PC in 1 click using CopyTrans Cloudly. It’s super easy, you’ll see! Just follow the steps:
- Download and install CopyTrans Cloudly by clicking on the link below:
Get CopyTrans Cloudly
If you need help, please refer to the installation guide. -
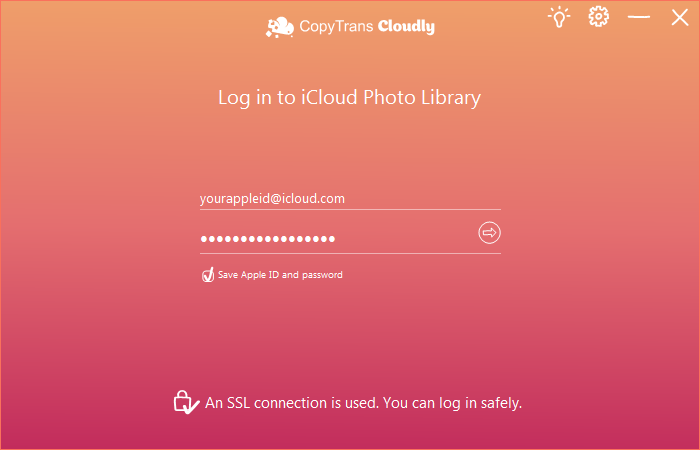
Run CopyTrans Cloudly. You will see a login screen. Enter your Apple ID and password.
NOTE: We use a secure SSL connection and do not store your account data unless you want us to save it for faster login. In this case, it will be saved on your PC within the app’s settings.
-
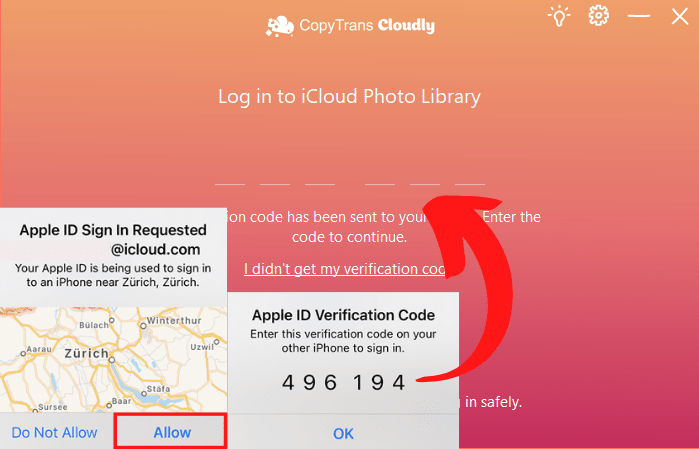
If you have two-factor authentication enabled, make sure to allow the connection on your device:
-
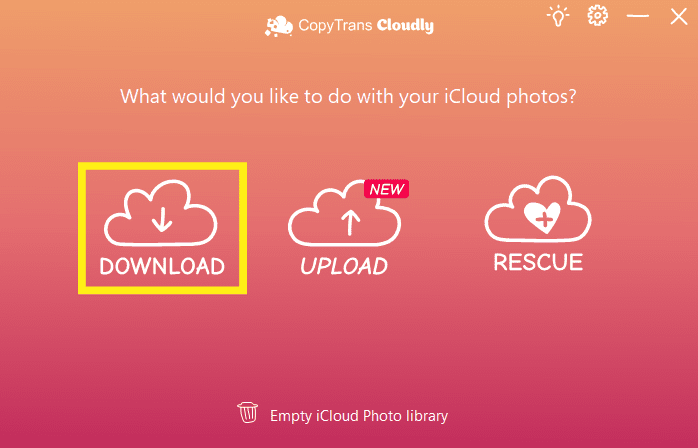
Wait until your iCloud photo library is loaded. To download all photos from iCloud, click Download and select the destination folder:
-
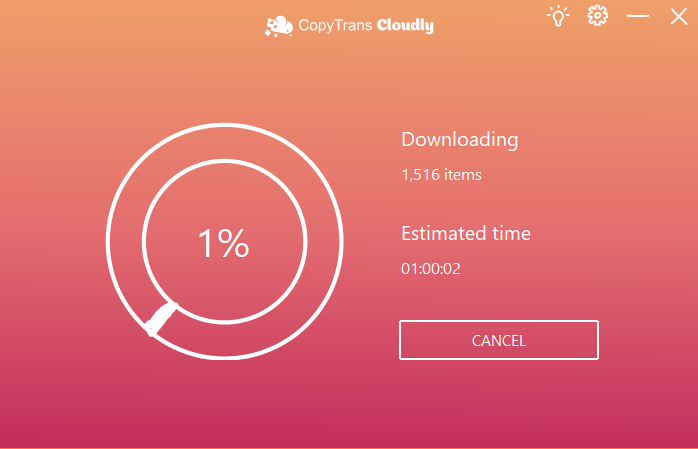
Voila! All you need to do now is wait until all your photos and videos are downloaded from iCloud.
NOTE: If you need to delete these photos from iCloud afterward, have a look at this guide: How to delete photos from iCloud.
YouTube guide
If you are still not sure about CopyTrans Cloudly, check out this comparison table of ways to download photos from iCloud to PC. We have compared three ways including one of our own invention:
| CopyTrans Cloudly | iCloud.com | iCloud for Windows | |
| Downloading all photos | Downloads everything at once | Downloads only 1000 items at a time | Downloads everything at once |
| Preserving album structure | Yes | No | No (downloads by year) |
| Downloading originals | Yes | Yes | Not always |
| Incremental download of new photos (without creating duplicates) | Yes | No | No |
| Deleting all photos | Deletes everything at once | Deletes only 1000 items at a time | No |
| Retrieving permanently deleted photos | Yes | No | No |
| Speed (depends on the internet connection speed) | 15-30 minutes for every 5 GB | Eternity | 1,5-3 hours for every 5 GB |
| Viewing and selecting photos before downloading | No | Yes | No |
| Using on a Mac | No | Yes | No |
| Uploading photos to iCloud | Yes | Yes | Yes |
Step 2: Transfer photos from PC to iPhone
We are ready to download iCloud photos to iPhone! For a smooth transfer, use CopyTrans Photo.
😉 Check out the discount coupon for those who are planning to buy two apps at the end of the article.
-
Download and install CopyTrans Photo by clicking on the link below:
Get CopyTrans Photo
If you need help, please refer to the installation guide. -
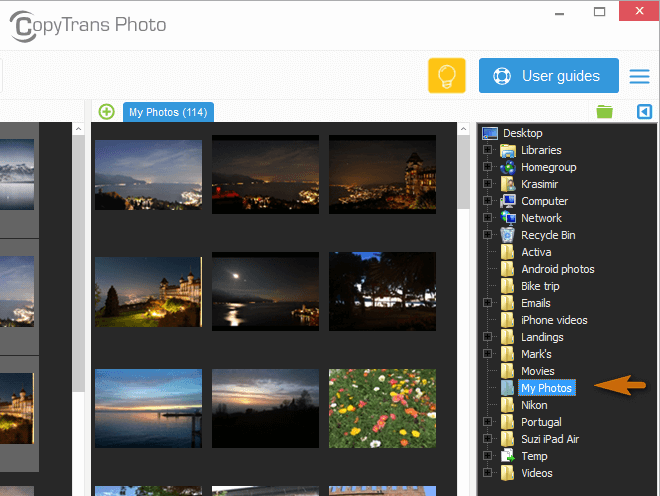
Start CopyTrans Photo and connect your device. iPhone photos are displayed on the left while PC photos appear on the right.

-
Select a PC folder with your iCloud photos in the right pane. Then select the photos you wish to transfer to the iPhone.
TIP: To select multiple photos, press and hold CTRL while clicking on individual photos. To select all the images at once, press CTRL+A.
-
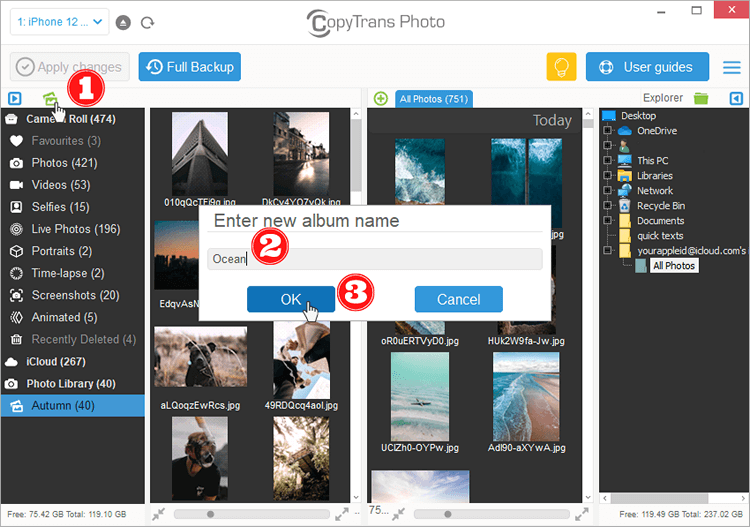
Next, choose the iPhone album on the left to add photos from the computer.
NOTE: Due to Apple limitations, you cannot add photos to the albums that were created on the iPhone. Please create a new album to download iCloud photos to iPhone.
-
To put pictures from computer to iPhone, just drag and drop the selected files to the iPhone photo pane on the left.
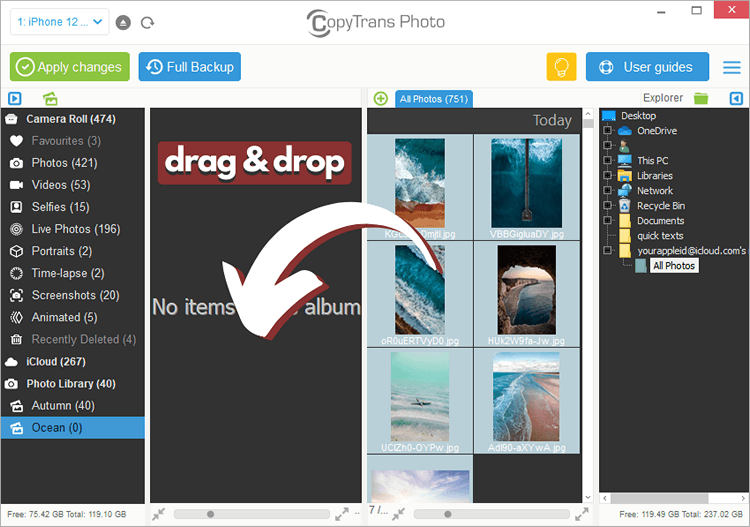
If you don’t have enough storage space on your iPhone, consider freeing up your iPhone storage space before downloading the images.
-
To finish transferring iCloud photos to iPhone, click Apply changes.
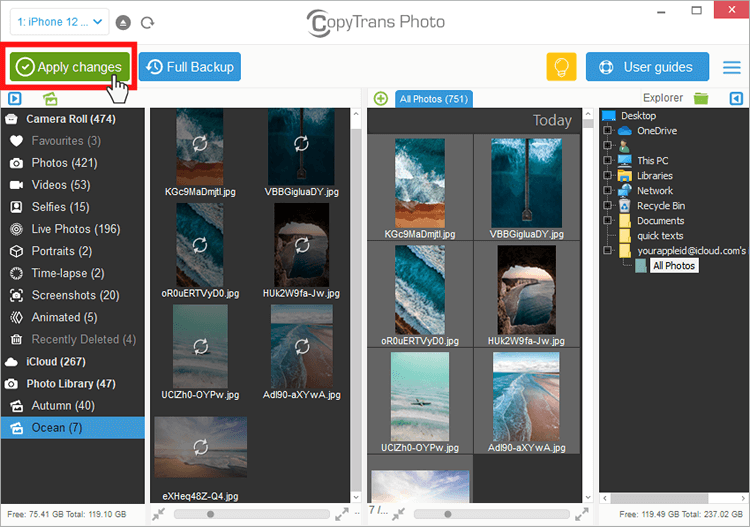
And that’s it! Now you know how to move photos from iCloud to iPhone in a matter of minutes!
Advantages of CopyTrans Photo
✔️ Transfers photos and videos between iPhone and PC;
✔️ Saves EXIF data;
✔️ Makes a full backup;
✔️ Converts HEIC to JPEG on the fly;
✔️ Works offline.
Try CopyTrans Photo for free
How to get photos from iCloud
from iCloud backup
If iCloud Photos is disabled on your device and your photos are not in iCloud, it means that they are included in iCloud backups. You can look for one, see what your iCloud backup contains and save these files to a PC with CopyTrans Backup Extractor.
- Download and install CopyTrans Backup Extractor by clicking on the link below:
Download CopyTrans Backup Extractor
If you need help, please refer to the installation guide. -
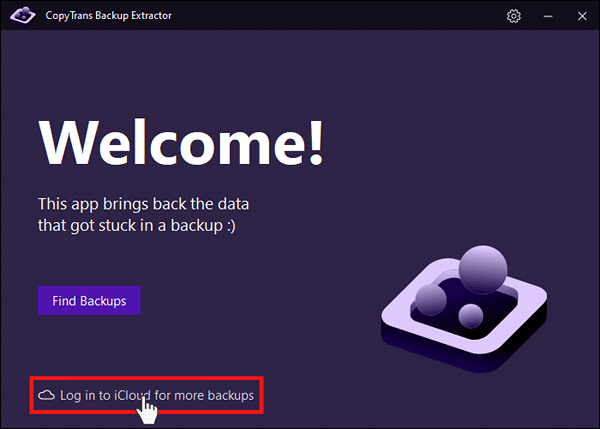
On the welcome screen, choose Log in to iCloud for more backups.
-
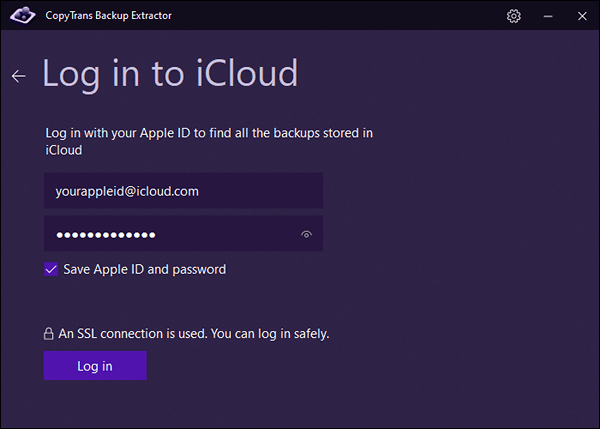
Enter your Apple ID and password.
-
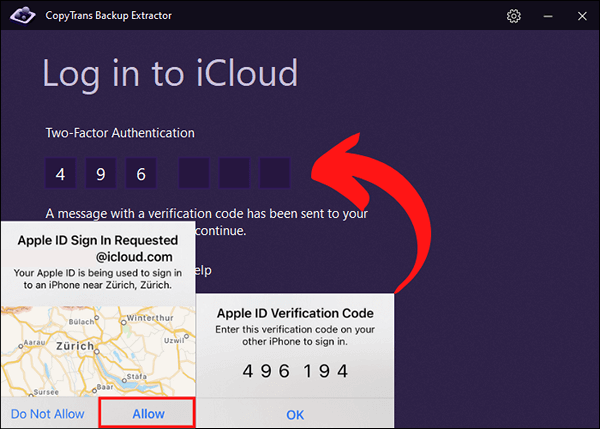
If you have two-factor authentication enabled, you will also need to enter a verification code sent to your device.
-
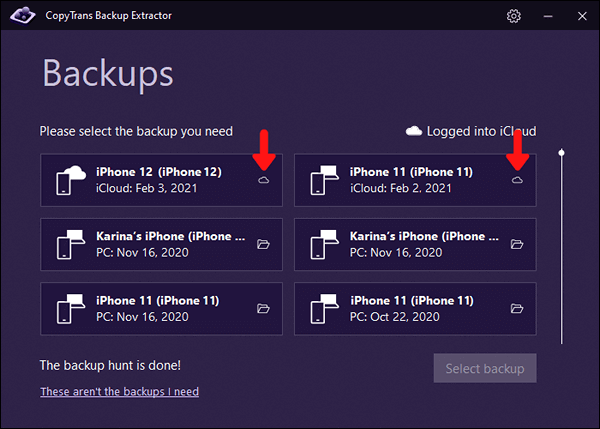
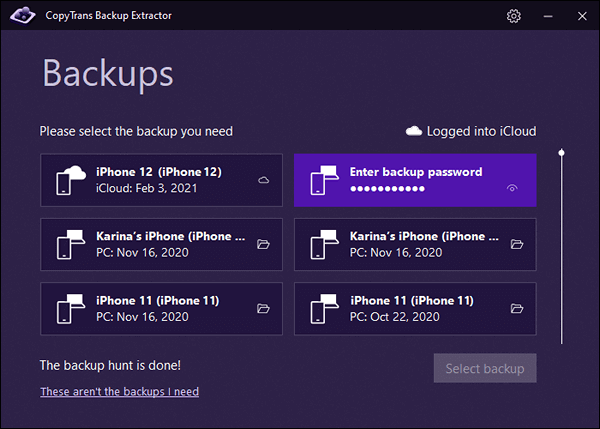
There you are! After a short search, CopyTrans Backup Extractor will display all your backups, both on PC and in iCloud. iCloud backups are marked with a cloud icon, while PC backups have a folder icon next to them.
-
To download iCloud photos, choose the backup that contains your photos. If the backup is encrypted, enter the backup password to proceed.
-
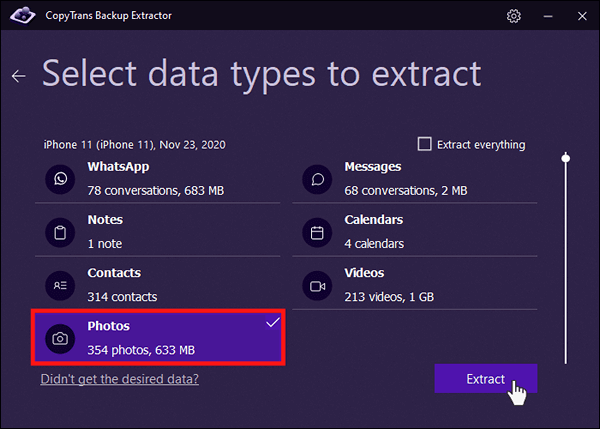
Click on Photos.
-
Finally, select the folder you want to extract the photos to and wait for the process to complete. Voila! You can now click Open containing folder to see all the extracted photos.
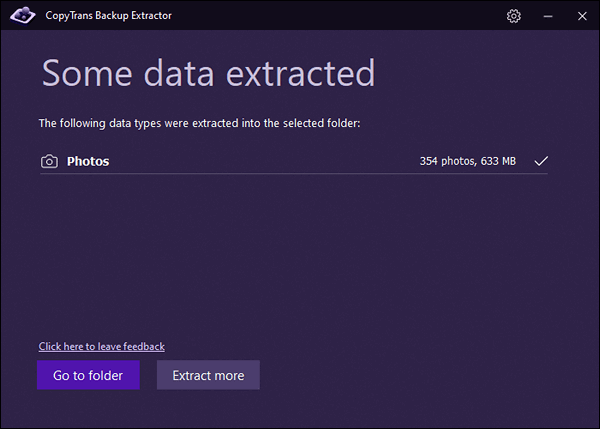
-
Your photos are successfully retrieved from the backup! You can now transfer them to your iPhone.
Advantages of CopyTrans Backup Extractor
✔️ Compatible with different backups: iCloud, iTunes, CopyTrans Shelbee, or other programs;
✔️ Save photos, contacts, notes, messages, chats, and all the attachments to the PC;
✔️ Looks for all the backups automatically;
✔️ Free version allows you to view what a backup includes.
Start with CopyTrans Backup Extractor
How to restore photos from iCloud
to iPhone
If your photos are not in iCloud (they weren’t synced), it means they are included in iCloud backups. You can now restore photos from iСloud directly to your iPhone using iCloud restore. But this method has some huge disadvantages:
❌ you won’t be able to restore only iCloud photos;
❌ restore will erase all other data on your iPhone first.
If you would like to selectively restore photos from iCloud to iPhone, use CopyTrans Backup Extractor: it will find your iCloud backups and extract data to your PC. After that, you can easily import them to the device.
If you wish to proceed with Erase and Restore, follow the steps below:
-
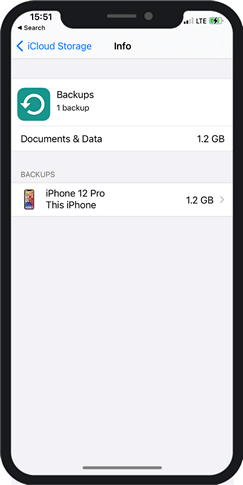
First of all, let’s make sure that you have a valid iCloud backup. Go to Settings and tap on your name > iCloud > Manage Storage > Backups.
-
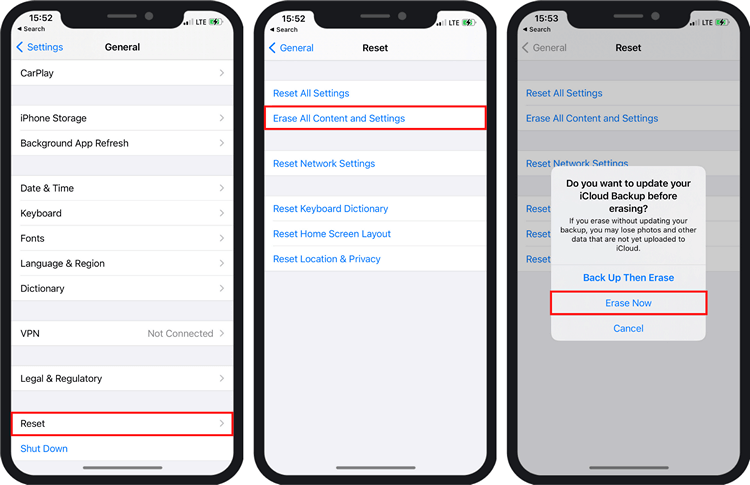
To restore photos from iCloud backup, go back to Settings and choose General. Scroll down and find the Reset tab. Choose Erase All Content and Settings. Select Erase now.
TIP: If you are not comfortable with erasing your data, try taking a roundabout route. -
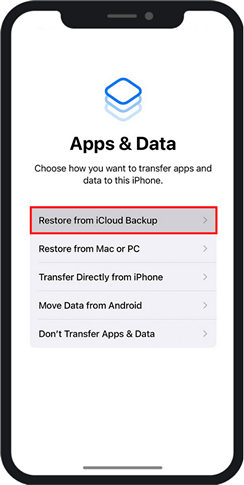
After the reset, your iPhone will reboot and take you through the setup steps. Once you are offered to restore your device from an old backup, choose the backup with your iCloud photos.
How to download iCloud photos
directly to your iPhone
One of the most obvious ways of getting iCloud photos on iPhone is actually hidden in the iPhone Settings. The major drawback of this method is that you have no control over the downloading process and have no estimate of the download time. If you don’t mind waiting, check the Apple guide or follow the instruction below:
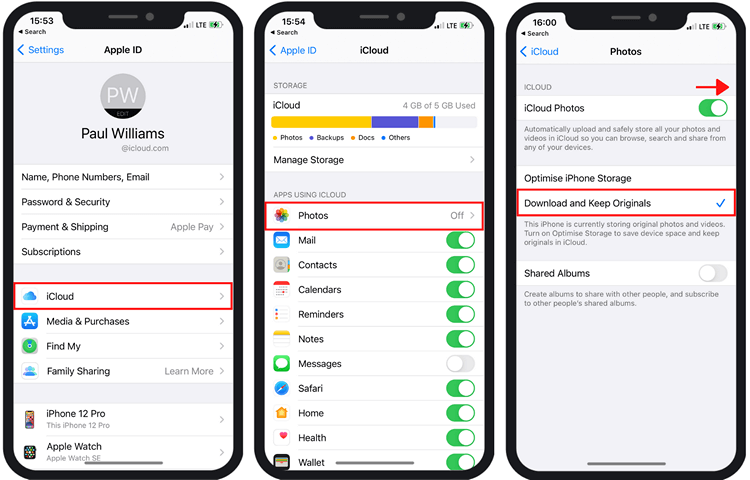
- On your iPhone, go to Settings. Tap on your name > iCloud. Select Photos, then toggle off iCloud Photos (or iCloud Photo Library for older iOS versions). Make sure that you have opted to Download and Keep Originals.
- Now, all you have to do is wait until your iCloud photos are downloaded to the iPhone. Make sure that you have a strong Wi-Fi connection. It’s even better to leave it working overnight.
How to get photos back from iCloud
FAQ
How can I download photos from iCloud to iPhone?
To download photos from iCloud to your iPhone, you will need to ensure that you are logged into your iCloud account on your device. Start by opening the Photos app on your iPhone. Go to the “Albums” tab and select “All Photos”. If you had previously enabled iCloud Photos, your photos should automatically appear. Or another way is to use CopyTrans Programs.
What do I need to do before downloading?
Before you download photos from iCloud, ensure that you have a stable internet connection, either via Wi-Fi or cellular data. Check that you have sufficient storage space on your iPhone to accommodate the photos. It is also advisable to sign in to your iCloud account to ensure that you can access your iCloud Photo Library.
Is it possible to transfer photos from iCloud without using the Photos app?
Yes, you can transfer photos from iCloud using the CopyTrans Cloudly. Once downloaded, you can transfer the files to your iPhone via CopyTrans Photos.
Can I download all photos from iCloud at once?
Yes, you can download all photos from iCloud at once if you have previously enabled the iCloud Photo Library. Use CopyTrans Cloudly and download all photos in a few clicks. You can even restore deleted photos from iCloud.
How to download from iCloud
Conclusion
In conclusion, we have covered the different ways to transfer photos from iCloud to iPhone. Whether you choose iCloud Photo library, iCloud backup, or CopyTrans apps, the key is to choose the method that best suits your needs and preferences.
Efficiently download photos from iCloud to iPhone so you can enjoy your favorite moments on the go, without the need for a computer or additional devices. This seamless integration between iCloud and iPhone provides a convenient way to keep your photo library up-to-date and accessible.
Remember, properly setting up your iCloud account and connecting your iPhone to a stable internet connection are the most important steps in the process. Take advantage of iCloud and enhance your iPhone experience by synchronizing your photo library for easy access, sharing, and enjoyment.