
 (6 votes, average: 4.00 out of 5)
Videos are cery important part of your memories. Watching videos of the best, interessting and happy moments of your life will make any day better. And we’re sure you’re concerned about the safety of your video. iCloud is an easy and obvious solution. iCloud Photos lets you securely store your photos and videos on Apple’s servers and seamlessly sync your images across all your Apple devices (iPhone, iPad, iPod touch, and Apple TV). But there can appear some questions:
❓ Why to save my videos to iCloud?
❓ How to upload videos to iCloud?
❓ How do I manually save videos to iCloud?
❓ How do I save files to iCloud only?
Please, don’t worry! We are here to help you and resolve all your problems and answer your questions! Here are two solutions for you:
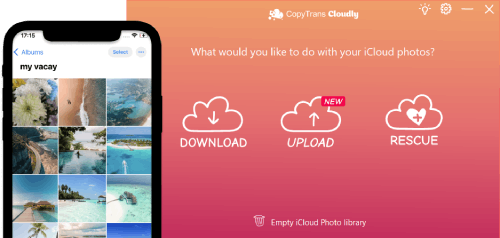
Upload videos to iCloud:
iCloud videos
How to upload videos to iCloud from PC
With iCloud for Windows, you can use your Windows computer to upload photos and videos to iCloud Photos. However, many users report that the app is unstable and buggy, with unintuitive and confusing interface.
Luckily, you can get things done with an alternative way – CopyTrans Cloudly that is easy to navigate and can upload big amounts of data to iCloud in just a couple of clicks.
💗 What CopyTrans Cloudly can transfer for you:
Videos: upload MOV, MP4, M4V files to iCloud;
Photos: upload HEIC, JPEG, PNG images to iCloud in great numbers;
👍 After you’ve uploaded your files to iCloud, you can move or delete them from the PC folder – they will still be available in iCloud.
Uploading videos to iCloud using CopyTrans Cloudly is easy. Here is what you need to do:
-
Download and install CopyTrans Cloudly
Advantages of CopyTrans Cloudly
✔️ Download all iCloud photos in a few clicks
✔️ Save your iCloud photos to an external hard drive
✔️ Upload all your photos and videos in one click
✔️ Add photos in JPG, HEIC, or PNG format to iCloud
✔️ Keep your album structure
✔️ Rescue “permanently deleted” photos -
Run the program and log in to your iCloud account.
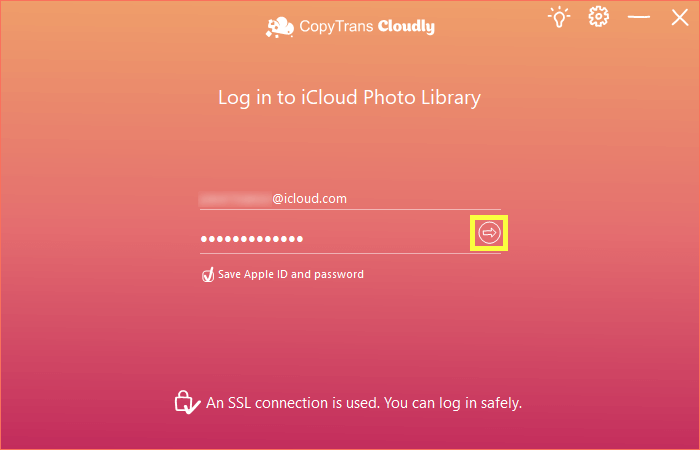 We use SSL connection to exchange data with iCloud and guarantee 100% safety: you can read more about SSL connection on Wikipedia to make sure.
 -
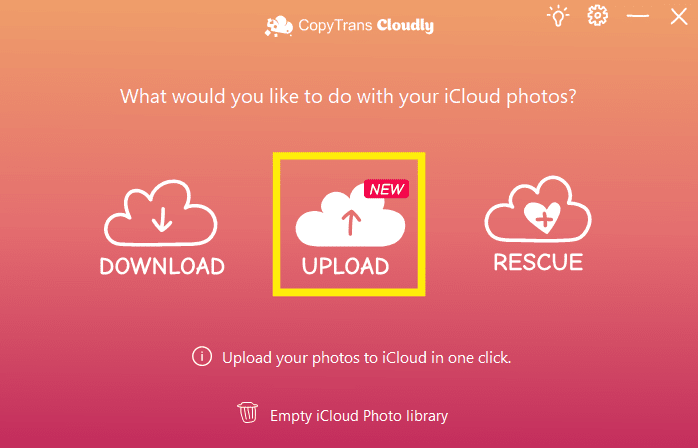
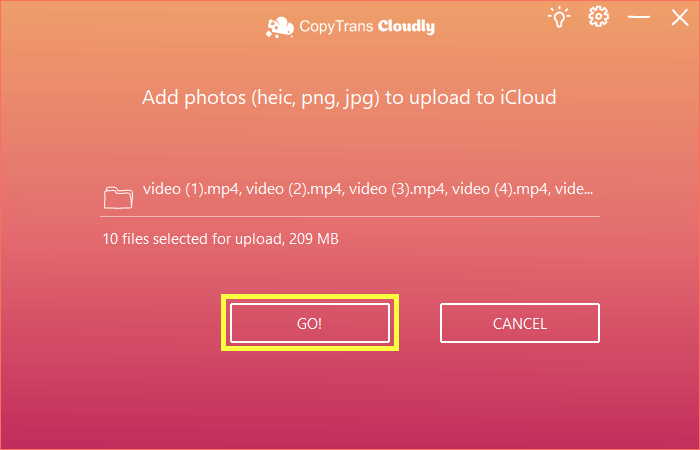
Then, click Upload.
-
Select the videos you wish to upload from your PC and click Open.
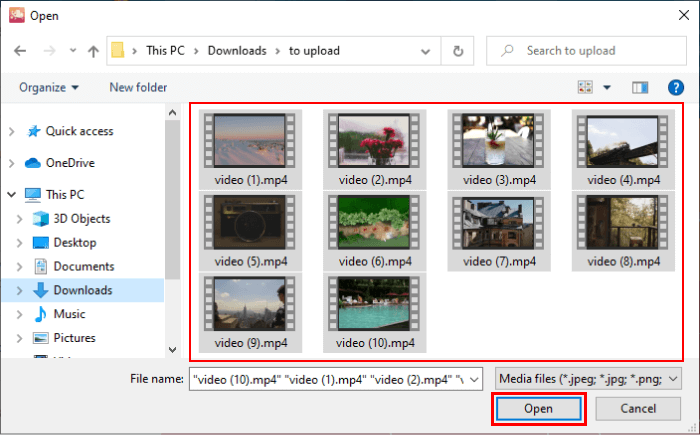
The supported video formats are MOV, MP4, M4V. -
After that, confirm the upload by clicking OK.
-
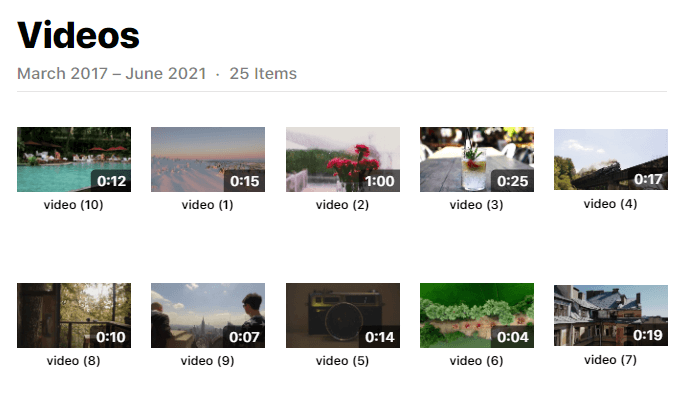
Wait while the program is doing the job. Check the result on icloud.com.
How to upload video to iCloud
YouTube tutorial
How to upload videos to iCloud from iPhone
Four conditions must be met for iPhone videos to appear in your iCloud library:
-
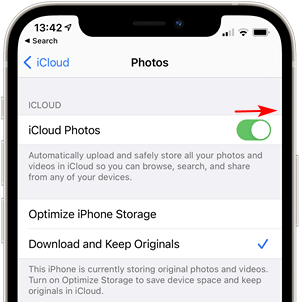
Check that you have iCloud Photos enabled in Settings.
Go to Settings → Your Name → iCloud → Photos → and turn on iCloud Photos.
-
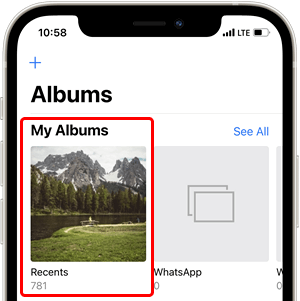
The videos should be in the Photos app.
Open Photos → Albums → Recents and make sure the video files are in the album.
-
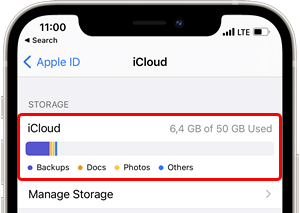
Make sure you have enough iCloud storage available.
Go to Settings → Your Name → iCloud and check how much storage is available.
-
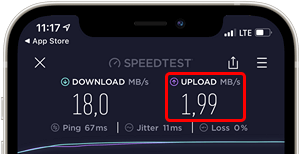
Check the upload speed of your internet connection.
Good upload speed is required for your videos to get to iCloud quickly.
Use speedtest.net to check the upload speed. If the upload speed is low, use WiFi or check with your mobile network operator.
Note:
To keep track of the upload progress, go to Photos → Albums → Recents and scroll to the bottom of the screen.

Why Upload Videos to iCloud?
If you’re still not sure if you need to upload videos to iCloud, we’ll tell you about some of the benefits here.
-
Free up iPhone space: videos, especially in good quality, take up a fair amount of iPhone memory space, which is often a problem for all users. Upload videos to iCloud allows you to free up valuable space on your device without losing access to your videos.
-
Backup and security: By uploading your videos to iCloud, you ensure they are securely stored and protected from potential disruption, damage or loss. iCloud provides a reliable backup solution, allowing you to be sure that your videos are safe.
-
Access from multiple devices: once you upload a video to iCloud, you can access it from any Apple device, whether it’s an iPhone, iPad, Mac, or web browser. This makes it easy to view and share videos across multiple platforms.
Upload videos to iCloud
Conclusion
In summary, uploading videos to iCloud is not complicated at all. By following the steps outlined in this guide, from enabling iCloud Photos to selecting the right video to starting the upload, you can keep your media safe and organized in the cloud.
Personally, I find it invaluable to have my videos safely uploaded using CopyTrans Cloudly. There’s nothing better than the peace of mind that comes with knowing all your family celebrations, vacation memories, or creative projects are securely stored and just a few clicks away. With CopyTrans Cloudly, managing your videos becomes effortless: you can easily upload, organize, and even download them whenever you need. Plus, sharing your videos with friends and family is simple, without worrying about file size limits or complicated transfers.
Remember: consistency is key. By regularly uploading your videos to iCloud, you’ll never lose those special moments, and your device will run smoothly without storage issues. So get started, take the first step today, upload your videos to iCloud, and experience the convenience and security of storing your media safely in the cloud. With iCloud, it’s never been easier to stay organized, back up your content, and share memories.