
 (23 votes, average: 4.22 out of 5)
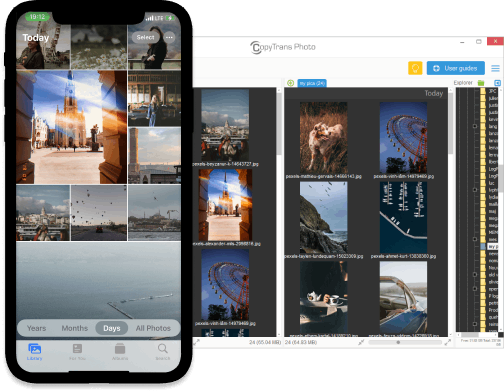
If you’re like me, you’ve probably found yourself in one of these situations: your iPhone is running out of space, and those videos you’ve been meaning to save are taking up all the room. Or maybe you’ve captured some amazing videos and want to edit it on your computer for a special project. Either way, figuring out how to get videos from iPhone to computer doesn’t is easy!
In this guide, I’ll walk you through exactly how to transfer videos from iPhone to computer easily and efficiently. No complicated tech talk, just straightforward steps to make the process smooth and stress-free.
Here’s what you’ll learn:
- How to quickly and safely transfer videos from iPhone to computer in their highest quality.
- How to browse, select, and manage your iPhone’s Video Library directly from your PC.
- Tips on how to delete videos from your iPhone after transferring, freeing up valuable space.
You don’t need to deal with the frustrations of using iTunes — there are much simpler ways to get this done. So let’s dive in and explore the best methods to move your videos to your computer. Whether you’re a beginner or someone who’s tried before without much luck, I’ve got you covered!
If you prefer video to text, here is our YouTube tutorial.
Transfer videos from iPhone to PC
without iTunes or iCloud
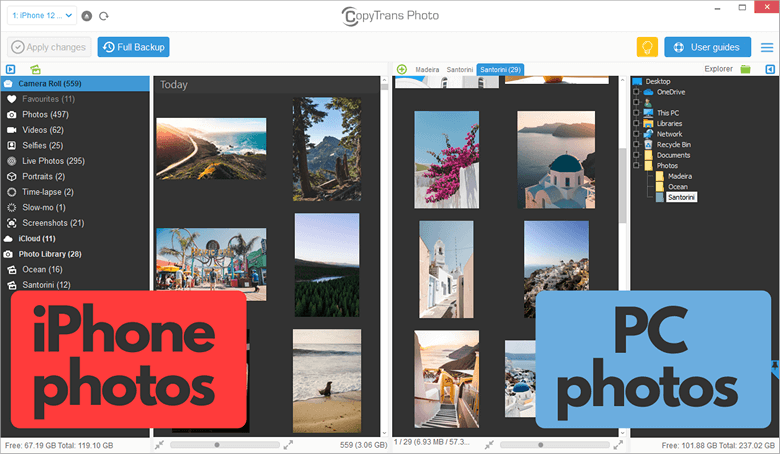
If you are looking for quick instructions on how to get videos from iPhone to computer, we have a solution just for you – CopyTrans Photo. The app has an intuitive interface, gets things done quickly, and you can see thumbnails of all the files you’re managing at any moment.
Advantages of CopyTrans Photo
- Transfer iPhone photos and videos to PC and back
- Do a full backup of your iPhone photos and videos – without duplicates!
- Save photos and videos on your PC or external hard drive
- Delete photos on iPhone
- All photo formats supported
The transfer process is intuitive, but you can always refer to our instructions below.
How to move video from iPhone to PC without iTunes or iCloud:
- Download CopyTrans Photo from the following page: Download CopyTrans Photo
- Install the program. If you need help installing CopyTrans Photo, please refer to the installation guide.
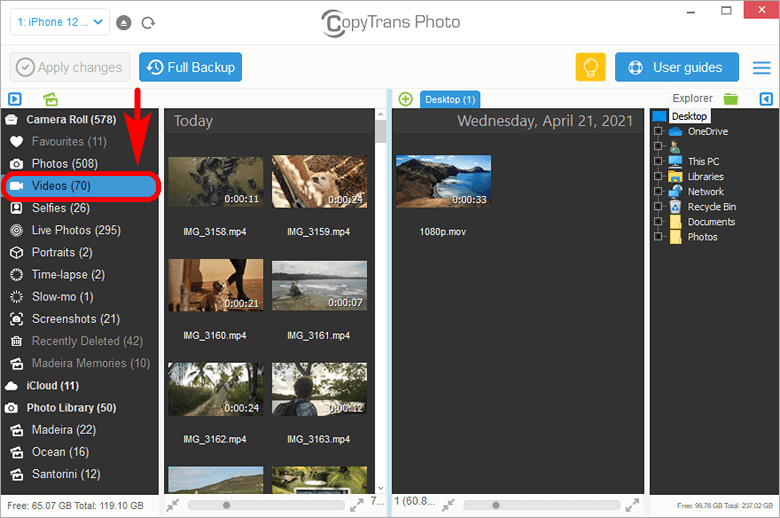
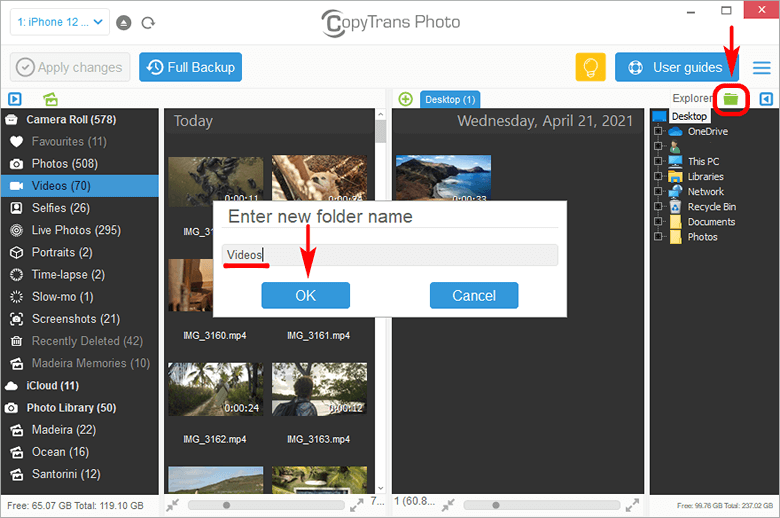
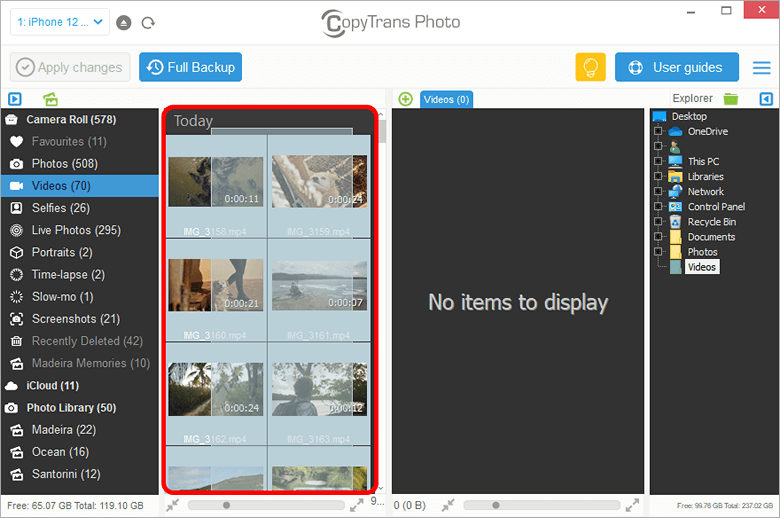
- Start CopyTrans Photo and plug in the iPhone to the PC. iPhone videos and albums will appear on the left-hand side of the program window while PC folders will appear on the right.
- Select Videos from the album list on the left.
- Select or create a PC folder where you wish to put the videos by using the pane on the right-hand side. To create a new folder, click on the Green Folder symbol on top.
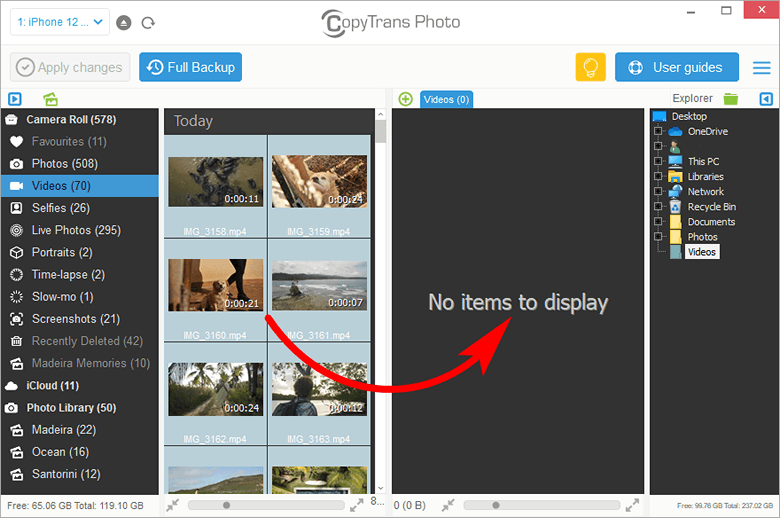
- Choose the videos you want to transfer from iPhone to the computer. To select multiple files, press and hold CTRL on your keyboard while clicking on each video. To select all the videos in the folder, click on an empty area within the iPhone working area and then press CTRL + A.
- Drag and drop the selected videos to the right-hand side.
- Click on Apply changes to save the result of the transfer.
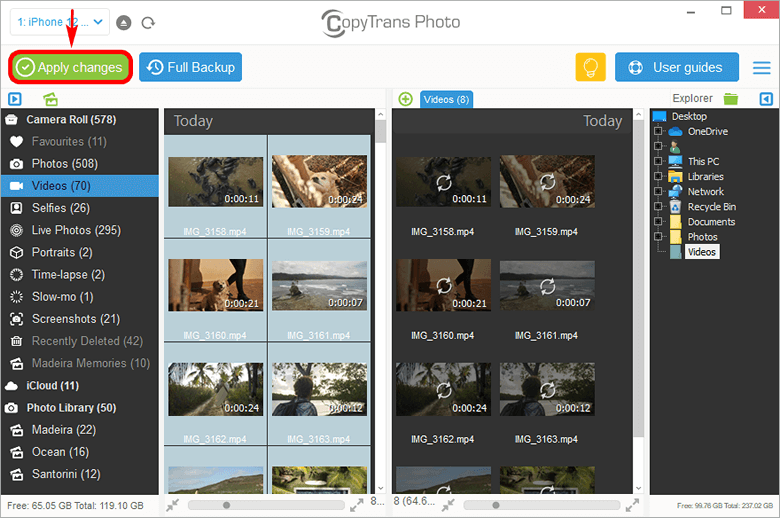
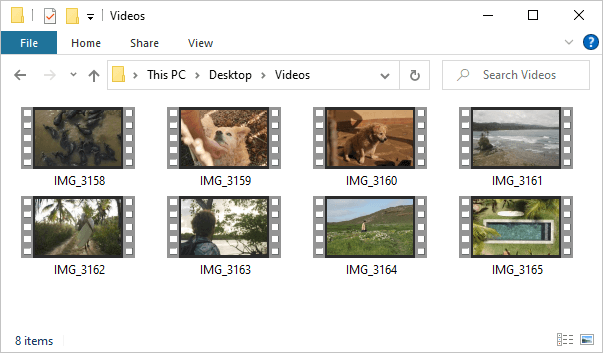
That’s it! Your iPhone videos are now transferred to the PC folder of your choice.
If you prefer to use a program that is integrated into Windows Explorer, I offer CopyTrans Studio.
With CopyTrans Studio, you can easily make a full backup of your Photo Library or drag-and-drop the videos to your PC.
Why you’ll love the new CopyTrans Studio:
- Transfer photos and videos over a Wi-Fi network, without cables
- Create full backups of your iPhone photo library in one click
- Set up automatic scheduled backups and let the program do all the work for you
- Take advantage of Windows Explorer integration: view your iPhone photos as regular folders
- Fully compatible with the latest iOS devices and updates

How to import videos from iPhone to PC
YouTube tutorial
How to upload videos from iPhone to PC
via Windows Photos app
Another way to move videos from iPhone to PC is to use the native Microsoft Photos app (Windows 10 only). But keep in mind that this method will not provide you with an intuitive interface to help choose videos to import, and your album structure won’t be preserved.
How to upload videos from iPhone to computer:
- Connect your iPhone to the PC with a USB cable, then unlock your device.
- Go to Start > Search for Photos app and run it.
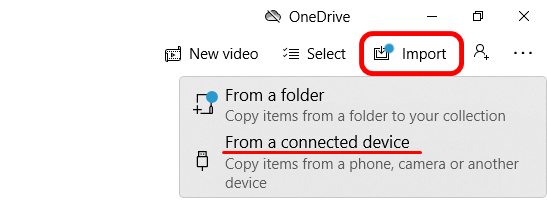
- In the top-right corner, select Import > From a connected device.
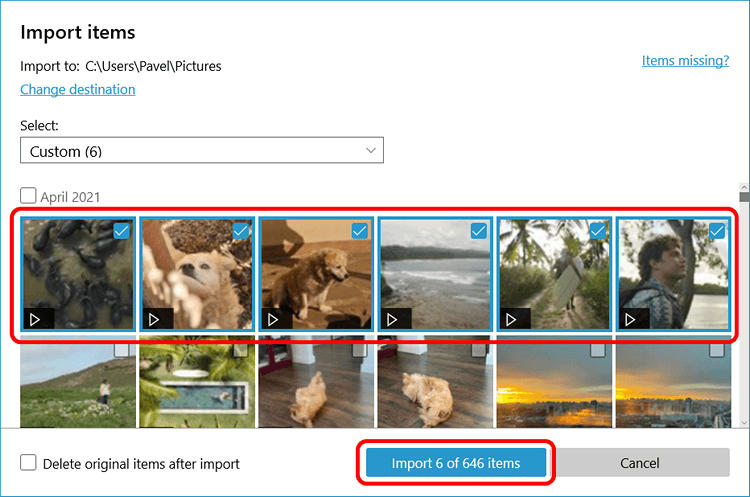
- Select video files you want to save to the PC and click on Import.
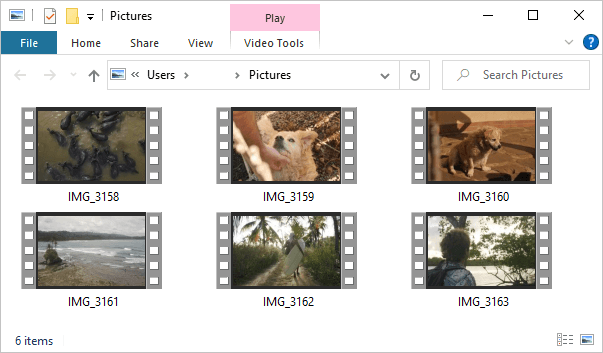
- You’ll find the video in the Pictures folder.
Unfortunately, the Microsoft Photos App is not as convenient as it may sound. As our users report, it’s quite common for the Photos App to not show photos and videos or not open them after the transfer. If it has happened to your videos, opt for another solution.
How to move video from iPhone to PC
via File Explorer
The most straightforward but time-consuming way of importing video from iPhone is through File Explorer (Windows file manager). Please note that File Explorer doesn’t sort pictures and videos. Finding the video you need may take quite a bit of tediously rumbling through random files.
Here is how to transfer videos from iPhone to PC using it:
- Connect your iPhone to the PC using a USB cable.
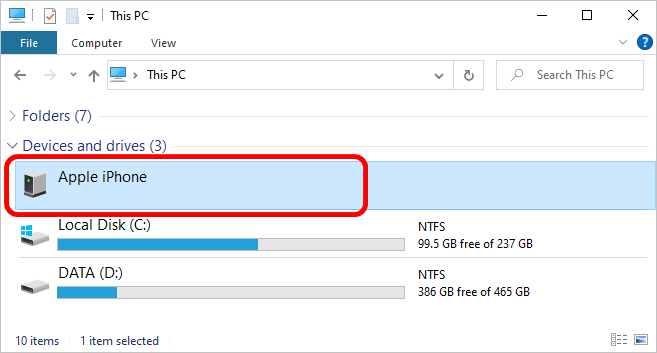
- Open File Explorer. There should be an icon representing your iPhone – double-click on it.
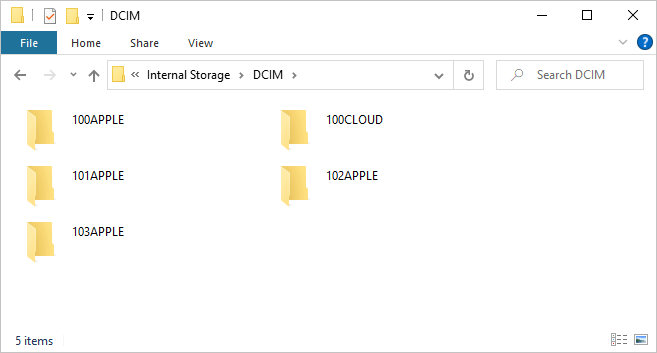
- Open the DCIM folder. The folder contains all the pictures from your iPhone.
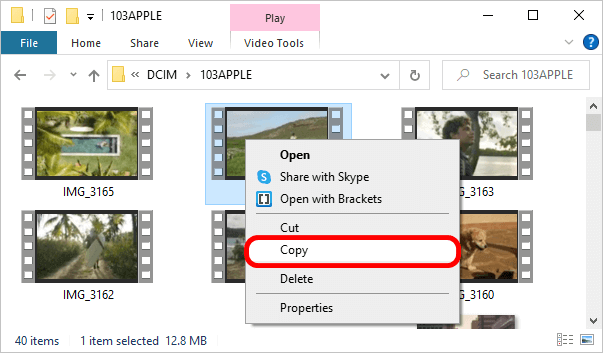
- Find the video > right-click on it and select Copy.
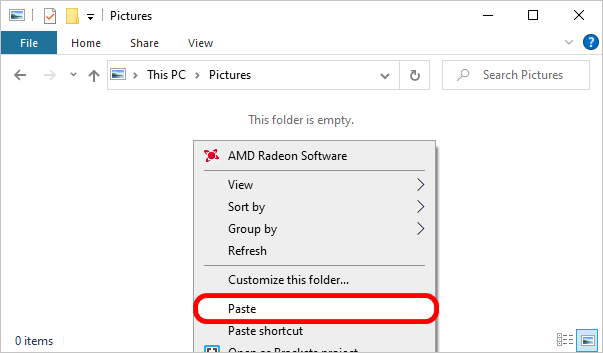
- Navigate to any folder on your PC, right-click again and select Paste. Done.
How to get video from iPhone to computer
FAQ
-
How can I transfer video from my iPhone to my PC?
To transfer video from your iPhone to your PC, you can use various methods. One common way is to connect your iPhone to your PC using CopyTrans Photo.
-
What is the best way to transfer videos from my iPhone to a Windows PC?
You can easily transfer videos from your iPhone to a Windows PC, just choose one of the methods described in this article.
-
Is it possible to transfer videos from my iPhone to a Mac?
Yes, you can transfer videos from iPhone to mac by connecting your iPhone to your Mac using a USB cable and then using the Photos app to import the videos.
-
How do I transfer large videos from my iPhone to a PC?
If you have large video files on your iPhone that you want to transfer to your PC, it’s recommended to use a USB cable connection for faster and more reliable transfer speeds and CopyTrans Photos. This app will help you to move videos quickly.
-
What is the easiest way to transfer multiple videos from an iPhone to a PC?
If you have multiple videos you wish to transfer from your iPhone to your PC, you can do it in a few clicks with CopyTrans Photo. Just drag-and-drop all the videos you wish to your PC.
Transfer video from iPhone to PC
To sum it up, transferring videos from your iPhone to your computer makes it easier to handle your media collection and brings plenty of benefits. Whether you want to free up space on your phone or use fancy editing software on your computer, the ways to transfer we talked about in this article allow for smooth and efficient file import.
It’s also important to consider things like video file size and the storage space on your computer to pick the right transfer method. By making smart choices and using the right tools, you can transfer videos you wish and get your video collection sorted and easy to access. This opens up a world of possibilities for creating backups, sharing those great moments with others, and even exploring your creative side by editing and producing videos.
This guide covers three ways to move video from iPhone to PC:
- Download videos from iPhone to PC without iTunes or iCloud. recommended
- Get video from iPhone to PC with the Windows Photos app.
- Upload videos from iPhone to computer via File Explorer.