

 (196 votes, average: 3.68 out of 5)
You can easily import contacts to Outlook using CopyTrans Contacts. Unlike other transfer methods such as CSV file transfer, CopyTrans Contacts will copy all contact details to Outlook including contact photos, phone numbers, emails and more…
In this guide you will learn how to import contacts into Outlook in just a few clicks.
Choose your way:
Automatically
import contacts into Outlook
Transfer your contacts in just a couple of seconds.
Manually
import iPhone contacts to Outlook
Get more control over which contacts you want to import.
… or watch our YouTube guide.
You can also check our troubleshooting guide if Export Gmail contacts to Outlook.
Advantages of CopyTrans Contacts:
✔️ Save contacts in a few clicks;
✔️ Work with different formats: .xlsx; .vcf; .csv;
✔️ Manage all iPhone, iCloud, Outlook and Gmail contacts;
✔️ Transfer iPhone messages to PC in different formats;
✔️ Manage iPhone and iCloud calendars;
✔️ Enjoy an easy-to-use, intuitive interface.
How to import contacts into Outlook
– from iPhone
-
Download CopyTrans Contacts from the following page:
-
Install the program on your PC. If you need help installing CopyTrans Contacts, please refer to the installation guide.
-
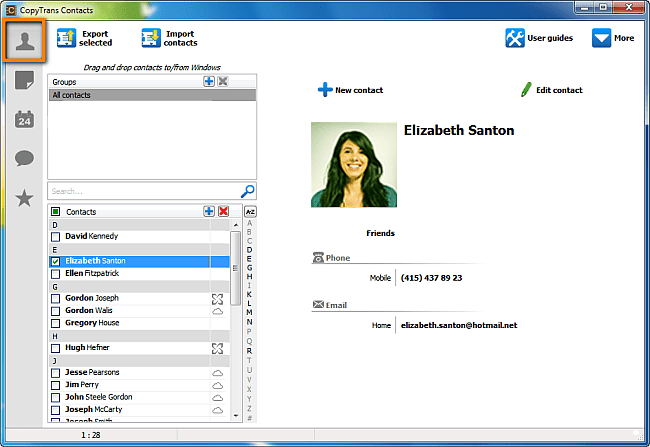
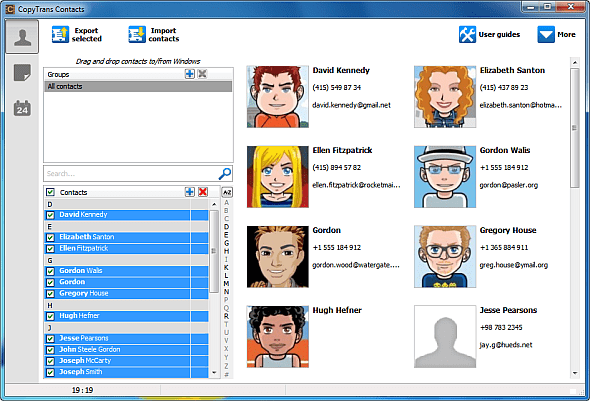
Run CopyTrans Contacts and connect your iPhone. Your iPhone contacts will appear in the main program window.
-
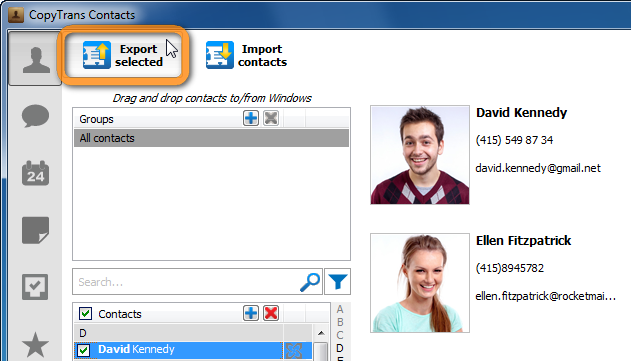
To transfer all iPhone contacts to Outlook, tick the checkbox next to Contacts. To transfer only selected contacts, tick the checkbox next to each contact. Now click the Export selected button to export contacts to Outlook:
NOTE: if you don’t see some or all of your contacts in the program window, please refer to the troubleshooting article.
-
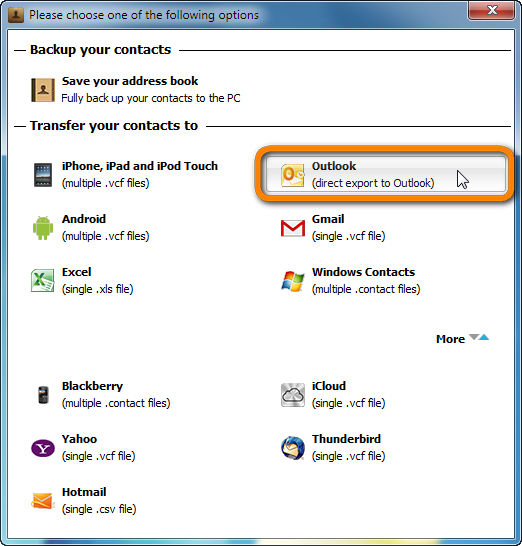
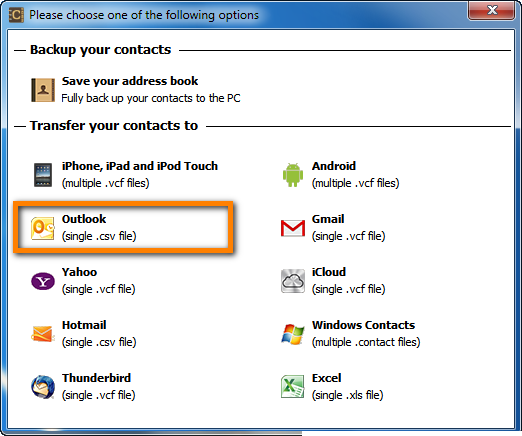
A new window will appear asking you to select the format for the backed up contacts. Select Outlook (direct export to Outlook):
-
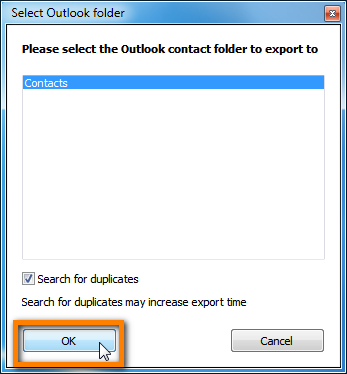
From the next window, select the Outlook contacts folder where you’d like to export your iPhone contacts. This would usually be your default “Contacts” folder. To prevent importing duplicate contacts to your Outlook, check the Search for duplicates option. Click OK:
NOTE: If you’re using a corporate network, this step may last up to 15 minutes because Outlook will search for all folders. Although CopyTrans Contacts looks frozen, please let it continue until the process is complete.
-
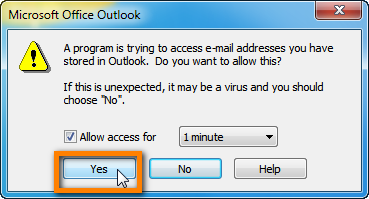
If your Outlook returns the following warning message, check the Allow access for option for at least 1 minute and then click Yes:
-
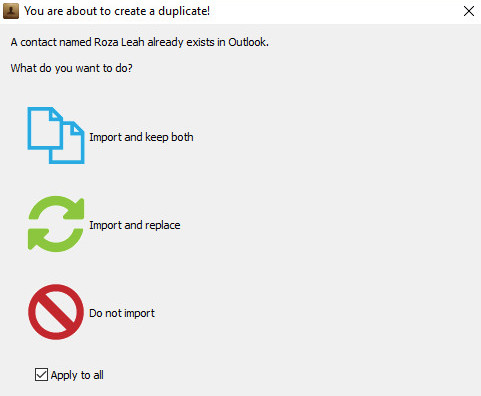
CopyTrans Contacts compares your contact lists in Outlook with the one you are about to import. Once it detects duplicates, the following window appears prompting you to choose what you would like to do with such contacts.
-
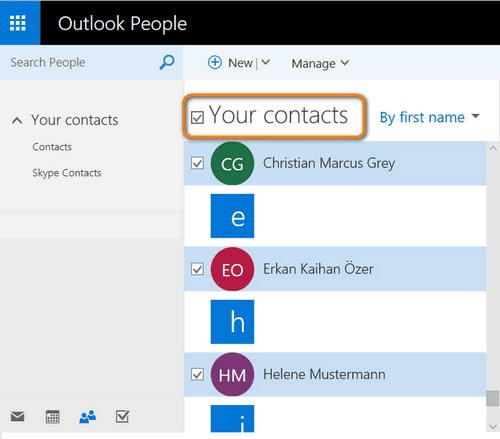
As soon as you are done, CopyTrans Contacts will start the process of importing contacts to Oulook. In a few moments, you will see your iPhone contacts imported to Outlook:
❕ If your iPhone is encrypted, you may be asked for an iPhone backup password. What password?
Import contacts from iPhone to Outlook
How to add contacts to Outlook
If, for some reason, you cannot transfer iPhone contacts directly, here is the manual way to import CSV to Outlook. It is slightly longer, but not too complicated.
Here is how to go about importing contacts to Outlook:
-
If you haven’t done so already, download and install CopyTrans Contacts:
Download CopyTrans Contacts -
Run CopyTrans Contacts and connect the iPhone.
-
Select the contacts you wish to export. You can select all of the iPhone contacts at once by pressing CTRL+A. You can also export a selected group of contacts.
-
Now, simply drag and drop the iPhone contact selection from the CopyTrans Contacts main window to a folder on your PC.

-
A new window will appear asking you to select the file format for the iPhone contact export. Select Outlook (single .csv file).
-
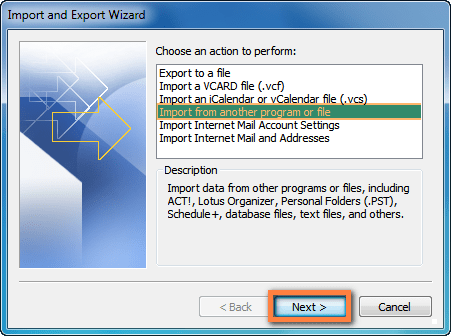
Now it’s time to import contacts to Outlook. Open Outlook and navigate to File > Open and click Import. In Outlook 2007 and 2003, go to File > Import and Export.
-
Select the Import from another program or file option and click Next.
-
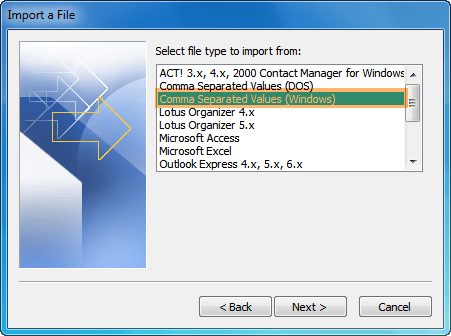
Select Comma Separated Values and navigate to the folder on your PC which contains the CSV file.
-
If your Outlook is in English, just click Finish and you are all set! If it is NOT in English, please proceed to the step below.
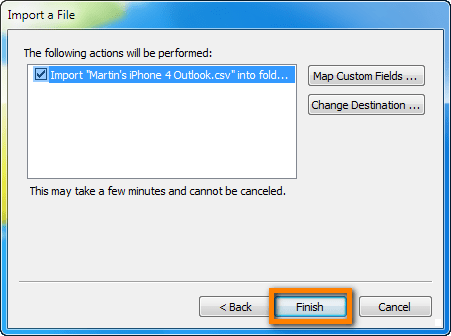
-
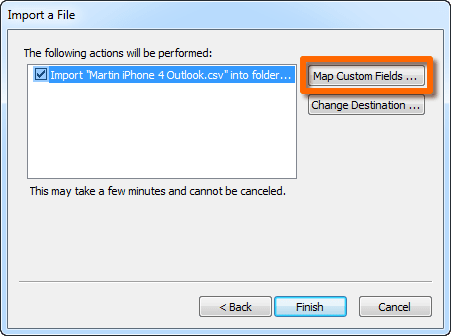
Before you click Finish to import the CSV contact file to Outlook, you’ll need to map the custom fields first. Otherwise, some contact details will not be imported to Outlook.
-
To map custom fields click on the Map Custom Fields… button.
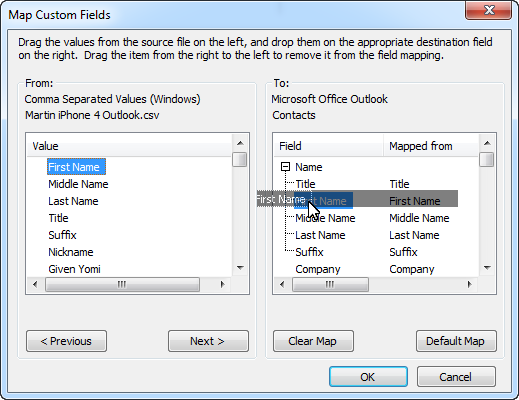
-
Next, drag the values from the source file (*.csv file) on the left to the matching field on the right. You can verify the map custom fields in navigating with “Next >” and “< Previous". Once you make sure all columns from the CSV file are mapped to the desired Outlook address book fields, click "OK" and finally click "Finish". Now, all of the contacts contained within the CSV file are successfully imported to Outlook.
If you need help installing CopyTrans Contacts, please refer to the installation guide.
❕ If your iPhone is encrypted, you may be asked for an iPhone backup password. What password?
This is how to import contacts to Outlook from iPhone.
Export Gmail contacts to Outlook
Connecting Gmail a Outlook should be a very simple process, but sometimes there is an issue with Outlook and Gmail. The problem is that Outlook keeps asking to provide a username and a password no matter how many times you enter it correctly. So, if you can’t import contacts from Gmail to Outlook, then CopyTrans Contacts will help you. It’s just a few small steps to solve the problem:
-
Download and install CopyTrans Contacts:
Download CopyTrans Contacts -
Run CopyTrans Contacts and connect the iPhone.
-
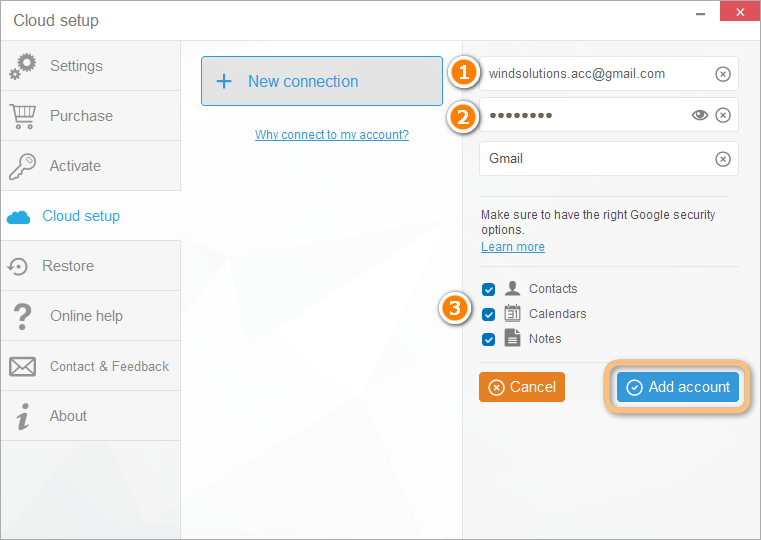
So, how to import contacts from Gmail to Outlook? First, add you Google account to CopyTrans Contacts. Please, follow our full guide on how to connect your CopyTrans Contacts to your Gmail account.
-
Now you can see all your Gmail contacts in the main window. Select the contacts you want to move to Outlook and follow the steps described above to import Contacts to outlook.
❕ If your iPhone is encrypted, you may be asked for an iPhone backup password. What password?
So, if importing Gmail contacts to Outlook directly seems like a daunting task to you, there is always another reliable way to import contacts from Gmail to Outlook using CopyTrans Contacts.