

 (8 votes, average: 3.63 out of 5)
I know how it is exciting to get a new iPhone — it’s like unwrapping a little box of magic. But I also get how stressful it can be when things don’t go as planned. I recently faced the same struggle. I tried using Quick Start, but it didn’t work as smoothly as I hoped. So, how do you switch iPhones without losing your precious data? If you’ve been asking yourself questions like these:
❓ Why does my iPhone Transfer keep failing?
❓ Why is my new iPhone saying “Cannot transfer data”?
❓ How long does it take to transfer data from one iPhone to another?
This can be annoying, but it’s a pretty common issue. The fear of losing important memories, contacts, or files is very real. I’ve been there, and I know how it feels when transferring data to your new iPhone after setup doesn’t go smoothly. But with the right steps, you can avoid those issues entirely and make the transition effortlessly.
In this guide, I’ll walk you through everything you need to know to switch iPhones seamlessly. By the end, you’ll have all the tools to transfer your data without the headaches or hiccups.
Ready? Let’s get started!
⭐ How to transfer data from one iPhone to another
- Step 1. Back up your old iPhone
- Step 2. Turn off your old iPhone
- Step 3. Turn on your new device
- Step 4. Restore your new iPhone from the backup
⭐ How to switch iPhones without backup: Quick start
⭐ How to transfer music from iPhone to iPhone?
⭐ How to transfer apps from iPhone to iPhone?
⭐ Not all my photos were transferred to my new iPhone. What to do?
How to transfer data from one iPhone to another
You are sure to be faced with a number of questions before we learn how to transfer data to new iPhone.
- I don’t want to cram my new iPhone with all the data from my old iPhone. I want to transfer data from one iPhone to another selectively. But iTunes and iCloud can’t do that. What should I do?
- How to transfer music from iPhone to iPhone? Restoring from iCloud or iTunes backup doesn’t do that.
- How to transfer apps from iPhone to iPhone? Again, iCloud and iTunes are of little help.

In a nutshell, switching iPhones is done in 4 steps:
- Back up your old iPhone.
- Turn off your old iPhone.
- Turn on your new device.
- Restore a new iPhone from the backup you made.
To transfer data to new iPhone you can use iCloud, iTunes, or a third-party app (like CopyTrans Shelbee).
Step 1. Back up your old iPhone
How do I transfer everything from my old phone to my new phone? Make sure you back up your iPhone on the day of the transfer so that you do not lose any recent changes.
There is more than one way to back up your iPhone. We described all of them in detail in our article “How to back up your iPhone”:
| CopyTrans Shelbee (for Windows users only) |
iTunes | iCloud | |
| Advantages |
✔ Doesn’t store your data on a remote server; ✔ Automatically encrypts your backup and lets you validate the password; ✔ You can select data types to restore; ✔ Can restore apps that are no longer on the AppStore (provided that you backed them up when they still were); ✔ One of the lowest prices on the market (here’s the store). |
✔ Doesn’t store your data on a remote server; ✔ It is free; |
✔ Automatically encrypts your backup, ensuring data safety. |
| Disadvantages | ❌ Paid software with a trial mode (backing up is possible in trial mode if you uncheck the “save the apps” box – we only allow that in full mode). |
❌ iTunes restore will overwrite all iPhone data; ❌ Doesn’t allow to choose which backup to do: full or incremental; ❌ Doesn’t validate your backup; ❌ It’s not possible to choose a backup folder; ❌ Can’t restore apps. |
❌ Requires a Wi-Fi connection; ❌ Your data will be stored on the Apple servers; ❌ Restoring from iCloud overwrites all iPhone data; ❌ iCloud backup doesn’t include the data that are synced to iCloud; ❌ You only have 5 Gb of free storage. If you need more, you have to pay. |
For MacOS Catalina users: don’t panic if you can’t find iTunes on your Mac. In this OS, you will need to use the Finder app instead of iTunes.
The Finder app icon looks like this:

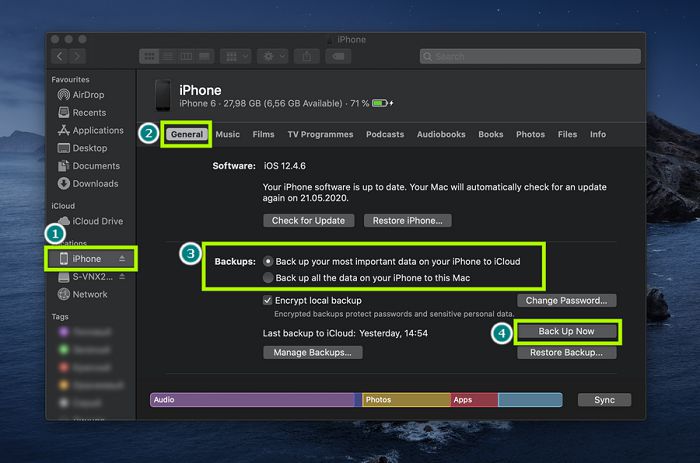
To back up your iPhone with the help of this little guy, do the following:
- Connect your device to Mac.
- Click on the Finder App.
- Select your device on the left side of the Finder App.
- Click on “General”.
- Select where you want the backup to be placed: on your Mac or in iCloud. To protect your data with a password, tick the checkbox next to “Encrypt local backup”.
- Click on “Back up now”
Step 2. Turn off your old iPhone
Before turning off your old iPhone:
- Prepare your Apple ID and password. You will be prompted to enter your credentials.
- Unpair your Apple Watch: once you unpair your Apple watch, it will be backed up automatically with all your health data.
Turn off your old device. If you have a SIM card you want to use, you can switch that from your old iPhone to the new one now.
Step 3. Turn on your new device
Turn on and set up your new iPhone over a Wi-Fi connection. You can read more about how to set up a new iPhone from the Apple support article.
Now how to transfer data from old iPhone to new? You’ll be asked whether you want to set up your iPhone as a new device or restore it from a backup. If you choose the latter option, select either “restore from iCloud” or “restore from Mac or PC” and follow the instructions to get the data onto your new iPhone.
You can also leave restoring from a local backup (made with iTunes or CopyTrans Shelbee) for later. Just select “Don’t transfer Apps and Data” upon startup and then restore your iPhone following the guides described in the next section.
Step 4. Restore your new iPhone from the backup
How to transfer data from one phone to another? There are several methods you can use to restore your iPhone when switching iPhones. We described all of these methods in our article How to restore iPhone. Just click on the link you are interested in: they contain detailed guides for each restore method and their pros and cons.
| Restore without iTunes (CopyTrans Shelbee) |
Restore iPhone from iTunes | Restore from iCloud | |
| Advantages |
✔ Doesn’t require Internet connection; ✔ You can select the data type to restore; ✔ Can restore apps, even if they are no longer on the AppStore. |
✔ It’s free; ✔ Overwrites all iPhone data; ✔ Can’t restore apps. |
✔ Restores WhatsApp; |
| Disadvantages | ❌ Not free, but has a trial mode (one of the lowest prices on the market). |
❌ Overwrites all iPhone data; ❌ Can’t restore apps. |
❌ Overwrites all iPhone data; ❌ Requires a Wi-Fi connection; ❌ Can’t restore apps and data that are already stored in iCloud. |
How to transfer data to new iPhone
selectively | without iTunes
Imagine a situation: you bought an iPhone and have been using it for a while. You have taken some cool photos and got some important messages. Now it is time to transfer data from one iPhone to another.
❗ Restoring with iCloud or iTunes will completely overwrite the data, which means goodbye to the new photos and messages.
To avoid this, use CopyTrans Shelbee: it has a custom restore feature. You can select the types of data to transfer to your new iPhone.
We have prepared a little summary of all the methods that prove helpful in switching iPhones:
| CopyTrans Shelbee | iTunes | iCloud | |
| Full backup | Yes | Yes | Yes |
| Select backup type: full vs late changes |
Yes | No | No |
| Encrypted backup | Yes | Yes | No |
| Check backup integrity | Yes | No | No |
| Check for password issues | Yes | No | No |
| Choose backup folder | Yes | No | No |
| Move default backup location | Yes | No | No |
| Backup to external drive | Yes | No | No |
| Backup apps in .ipa format | Yes | No | No |
| Backup Password, Wi-Fi settings, browsing history |
Yes *only with encrypted backup |
Yes *only with encrypted backup |
Yes |
| Full restore | Yes | Yes | Yes |
| Restore selected data | Yes (only contacts or messages, etc) |
No | No |
| Restore of backup saved on PC | Yes | Yes | No |
| WhatsApp Restore | Yes | Yes *restore ALL data, not only WhatsApp |
Yes *restore ALL data, not only WhatsApp |
| Apps restore (no longer exist in App Store) |
Yes *apps must be backed up before deletion |
No | No |
| Restore Password, Wi-Fi settings, browsing history |
Yes *only with encrypted backup |
Yes *only with encrypted backup |
No |
| Restore from iCloud backup | No | No | Yes |
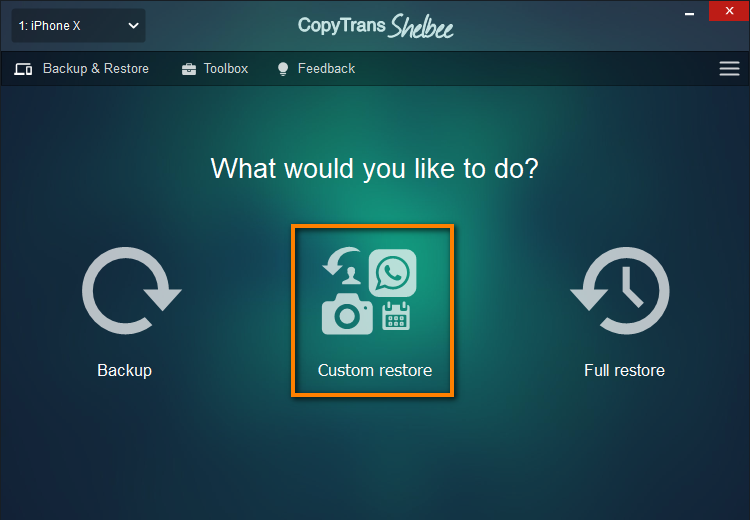
How to set up new iPhone from old iPhone? With CopyTrans Shelbee, you can choose which type of data you want to restore. Here’s how to swap data to new iPhone selectively:
- Download CopyTrans Shelbee from the following page: Get CopyTrans Shelbee
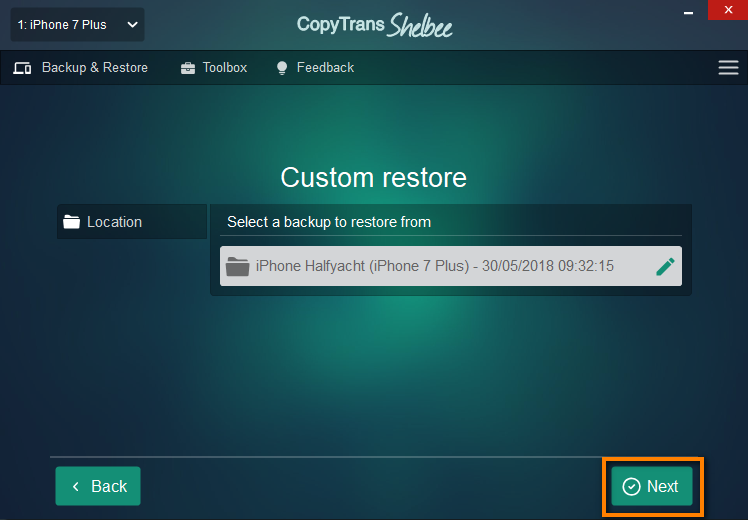
- Click on “Custom Restore”.
- Click on the pencil icon to select the backup with the data you need. Once you have chosen the backup, click on “Next”.
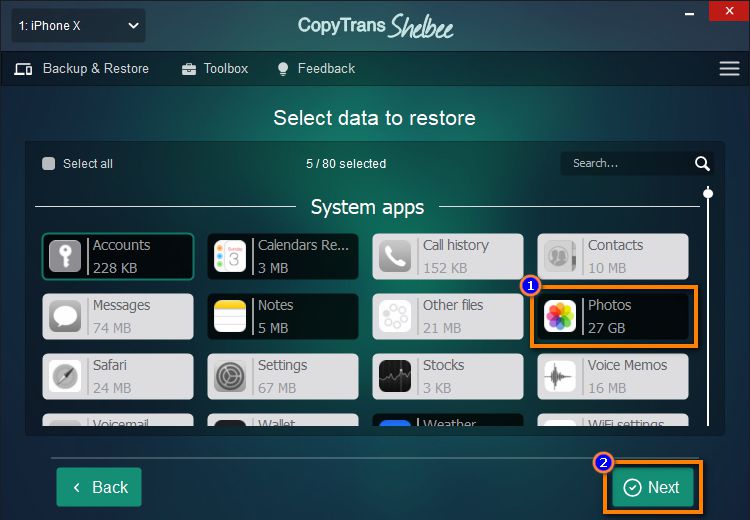
- Select the data type (or types) for restoration. For example, you can choose to restore contacts only. Just select “Contacts”, then click on “Next”. You will also be offered to restore calendars, notes, WhatsApp etc., in the same way. Press “Next”.
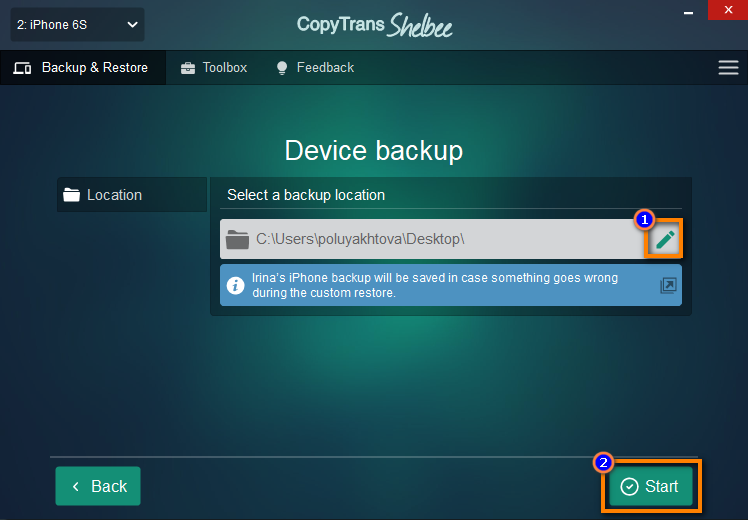
NOTE: The data you selected will be overwritten. This way, if you restore contacts, the old contact set will be replaced with that from the backup. - Next you will be asked to choose the directory to back up your device. Select the destination and click on “Start”.
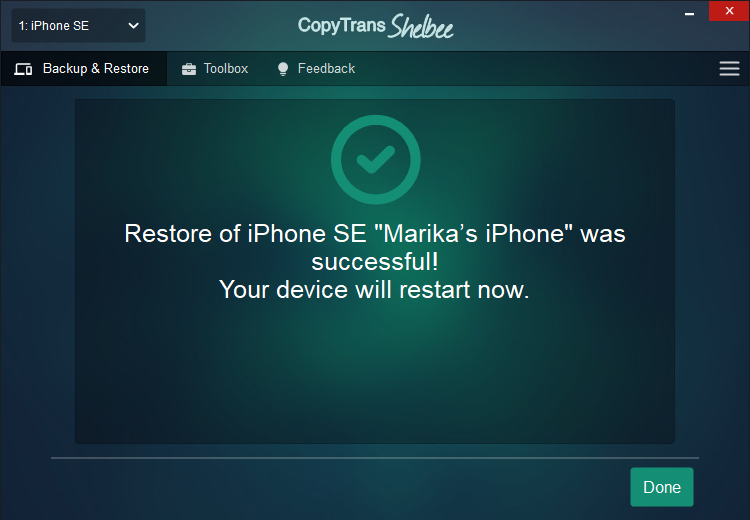
- That’s it! That is how to switch phones. Your device will now restart.
💡 To sum up: iCloud and iTunes are both suitable methods to switch iPhones, but only if you have a brand new device. They don’t have a selective restore feature: so, all the data on the iPhone will be replaced with that from the backup. If you already have some data on your new iPhone and you would rather not lose it – our advice is to to use CopyTrans Shelbee instead.
Unlike iTunes, CopyTrans Shelbee will:
✔️ restore full iPhone backup or just some selected data;
✔️ allow you to restore all your apps or just some of them;
✔️ do full or incremental backup;
✔️ allow to choose the folder to save backup;
✔️ validate backup made;
✔️ compatible with iTunes backup;
✔️ support encrypted iPhone backup;
How to switch to new iPhone
without backup | Quick start
Starting from iOS 11, you will be offered a new option upon initial iPhone startup: Quick Start. It is very similar to iCloud restore, only it saves you time and effort. All you need is to place the older and newer iPhones next to each other, ensuring they have a stable Wi-Fi connection.
Learn how to use Quick Start.
Note: both of your devices should run iOS 11 or later.
How to transfer music from iPhone to iPhone?
You will not be able to transfer music from iPhone to iPhone using any of the above methods.
But you can easily accomplish that with our programs, CopyTrans and CopyTrans Manager.
Here is how to transfer your music between devices:
How to transfer music from one device to another
How to transfer apps from iPhone to iPhone?
You will not be able to transfer your apps from iPhone to iPhone using iCloud or iTunes. If you need to migrate them, CopyTrans Shelbee will come to the rescue.
Follow this simple step-by-step guide to transfer your apps: How to transfer iPhone apps to another iPhone.
Not all my photos were transferred to my new iPhone. What to do?
The methods above will help you transfer the photos that are part of the Camera Roll. However, if you have iCloud Photos enabled on your device, the originals of your images may be stored in Cloud. In such case, you will need to get them from iCloud directly:
I can’t find my photos in the backup
How to change iPhones
FAQ
How long does it take to transfer data from one iPhone to another?
The time it takes to transfer data depends on the amount of data being moved and the method used. Typically, Quick Start takes around 10-30 minutes, while iCloud backup can take longer, especially with large amounts of data. Be patient, and make sure both devices are fully charged or plugged in during the transfer.
Why isn’t Quick Start working to set up my new iPhone?
If Quick Start isn’t working, it could be due to connectivity issues, software glitches, or incorrect settings. Ensure both devices are running the latest version of iOS and connected to Wi-Fi. If the problem persists, try restarting both phones or using an alternative method, like iCloud or iTunes backup.
Why is my new iPhone saying “Cannot transfer data”?
If your new iPhone is showing a “Cannot transfer data” message, check the following:
- Both devices must be connected to a stable Wi-Fi network.
- Ensure Bluetooth is enabled on both devices.
- Make sure both phones are updated to the latest iOS version. If the problem persists, try restarting both devices or using a different method like CopyTrans Shelbee, iCloud or iTunes.
How to switch to new iPhone
Conclusion
And just like that, your iPhone journey has a happy ending! Now that you know exactly how to transfer everything from one iPhone to another, your new iPhone is set up and ready to go. I know it seemed like a big task at first, but once you follow the right steps, setting up your new iPhone from your old iPhone becomes an easy and stress-free process.
Now, your new iPhone is ready to take on the next chapter of your life, with all your favorite apps, photos, and files right where they should be. If I could do it, so can you — and I’m thrilled to have been part of making your switch as smooth as possible.
Enjoy your new device, and trust me, you’re ready for whatever comes next in your iPhone adventure! ✨