
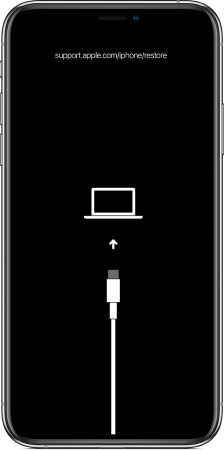
Have you gotten a black screen on your iPhone followed by the support.apple.com/iphone/restore link? And now you’re clueless as to how to turn the iPhone back on, especially without losing all its data?
What could’ve caused the issue:
? Motherboard damage
? iOS 15 Beta update problems
The motherboard damage is usually caused by the mechanical damage when you, for instance, drop your iPhone.
iOS 15 Beta update may have some missing components and be incompatible with your device. Hey, it’s Beta after all 😉.
When your iPhone is stuck on restore screen, it can lead to unpleasant consequences.
What can possibly go wrong if you don’t take any actions:
✘ Cannot do anything with your iPhone
✘ Potential data loss
We’ve compiled a list of actions for you to follow to get your iPhone back on track after the Apple restore screen and keep all your data untouched!
iPhone is stuck on restore screen
Restart and restore iPhone
Before you start, connect your iPhone to the PC via the lightning cable. This is a crucial step!
First off, you need to restart your iPhone. The restart process depends on your iDevice model:
- iPhone 8 & later models: press and release the Volume Up button, then press and release the Volume Down button. Lastly, press and hold the Power button until you see the Apple logo.
- iPhone 7 & iPhone 7 Plus: hold the Power button and the Volume Down button until you see the Apple logo.
- iPhone 6s & earlier models: hold the Power button and the Home button until you see the Apple logo.
Now that you’ve restarted your iPhone, you need to restore iPhone with iTunes:
- Make sure you’ve got the latest iTunes version installed on your Windows PC.
- Confirm that your iPhone is still plugged in and you see the message: “There’s a problem with the *THE NAME OF YOUR DEVICE* that requires it to be updated or restored”.
- Be careful! Click Update (do not click Restore) to update the iOS and keep your personal data. Don’t disconnect your iPhone while it’s updating.
If you accidentally clicked Restore or want to restore your iPhone data from a backup, follow the steps below.
iPhone stuck at restore screen
Restore iPhone from a backup
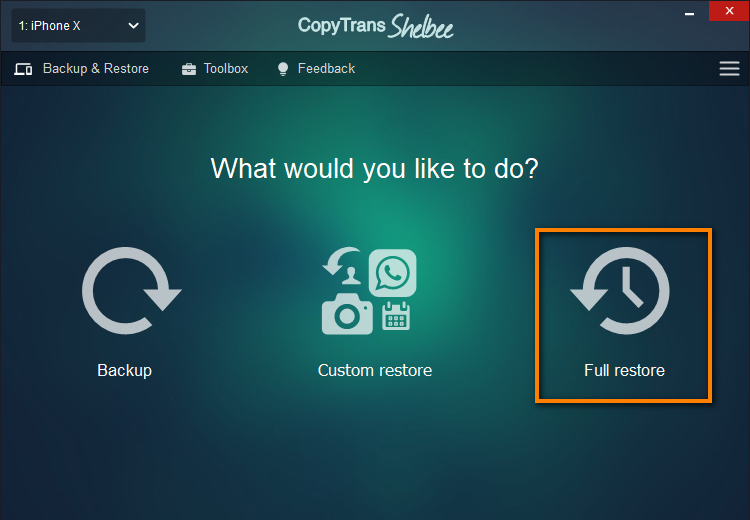
In case you’ve lost all your iPhone data after you’ve got iPhone restore screen, you can restore all the data back to your iPhone from a backup using CopyTrans Shelbee!
When restoring iPhone without iTunes with CopyTrans Shelbee remember:
⚠ the data restored from a backup will not be merged with the one on your iPhone;
⚠ backup from an iPhone with a newer iOS version cannot be restored to a device with an older iOS version.
Follow these steps to restore data with CopyTrans Shelbee:
- Download and install CopyTrans Shelbee. If you need help, refer to the installation guide. Download CopyTrans Shelbee
*100% clean and safe - Run CopyTrans Shelbee and connect the iOS device.
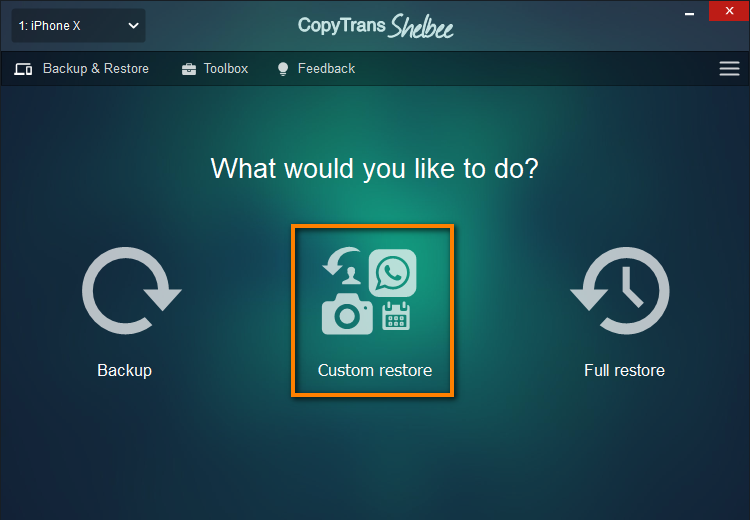
- Click on Full restore.
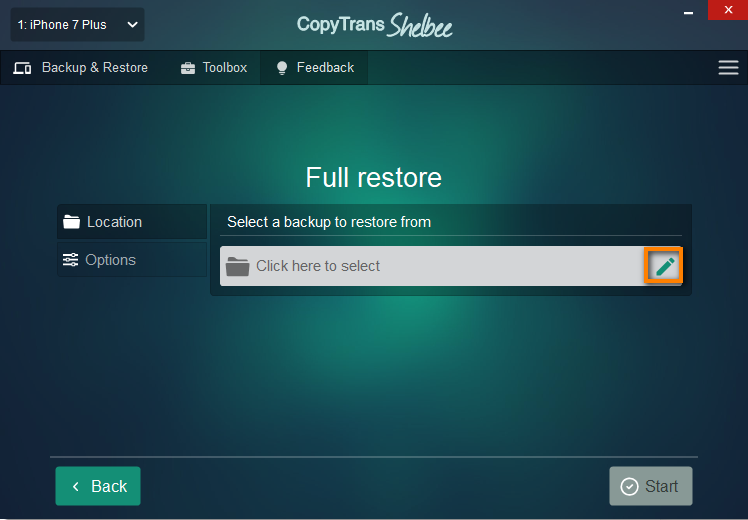
- Click on the green pencil icon on the right-hand side to select a backup to restore from.
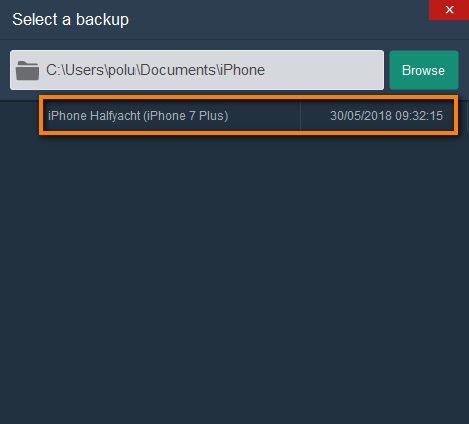
- In the newly-opened window, select the backup file that you wish to restore from. If you made multiple backups, you will see all the backups stored in the chosen folder.
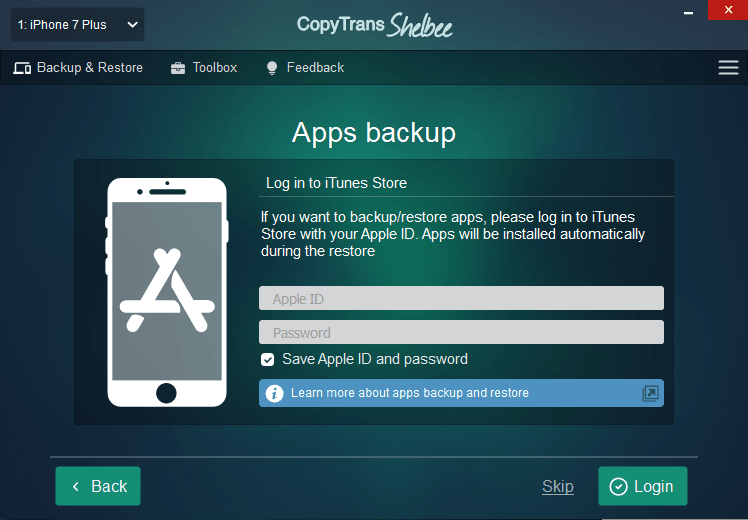
- If you wish to restore your apps as well, please log in to iTunes Store with your Apple ID.
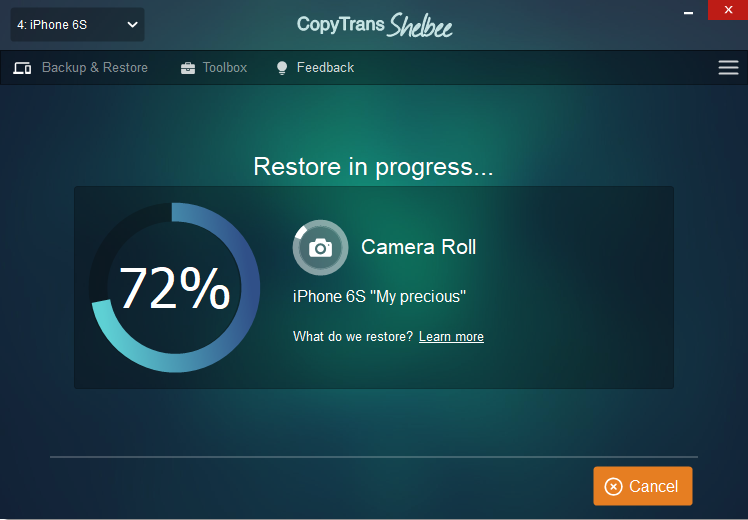
- Wait until the restore process finishes.
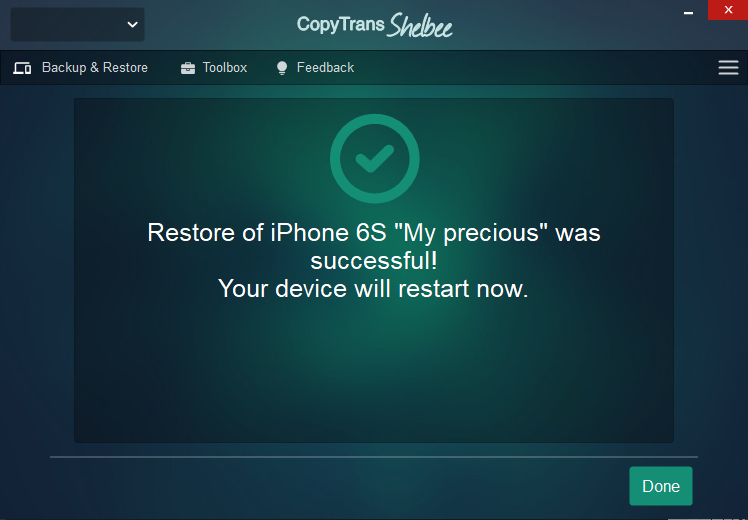
- That’s it. You’ve restored your iPhone from backup without iTunes!
NOTE
While restoring, CopyTrans Shelbee may ask you to enter the iOS backup password to decrypt the data in the backup. What is an iOS backup password?
Restore iPhone from backup selectively
With CopyTrans Shelbee, you can also choose data you want to restore. Learn about the data types below:
☑️ SMS Messages, iMessage, MMS pictures and videos;
☑️ Camera Roll Photos;
☑️ Reminders;
☑️ Call history;
☑️ App documents;
☑️ Keychain, passwords for email accounts, Wi-Fi and websites*;
☑️ App accounts and passwords*;
☑️ Settings.
* requires the backup to be encrypted
Here’s how to restore selected data to iPhone without iTunes:
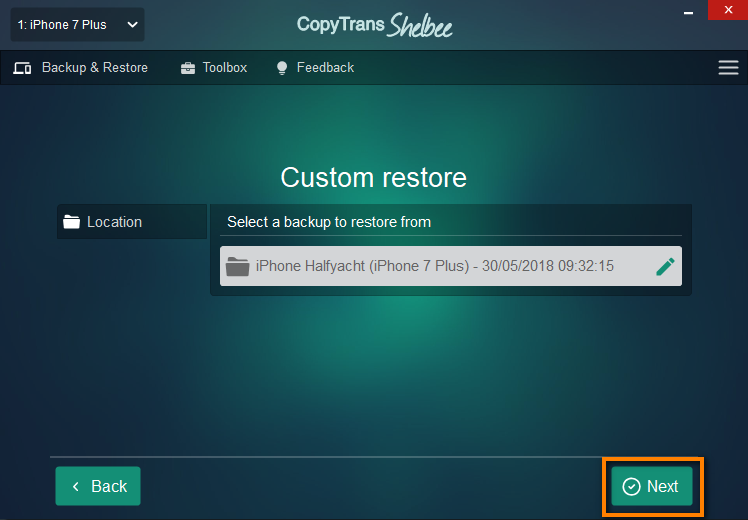
- Open CopyTrans Shelbee and connect your iPhone. Click on Custom restore.
- Click on the green pencil icon to select the backup you want to restore your data from.

- After you’ve chosen the right backup file, click Next.
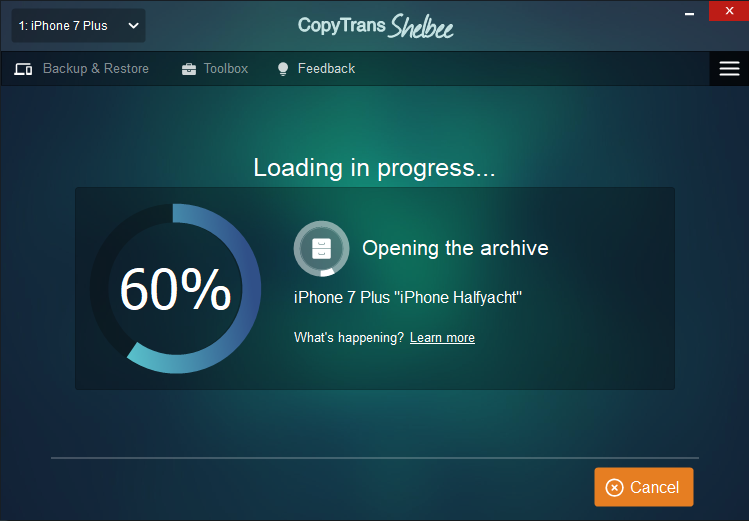
- Wait until the loading process finishes.
- Select the data you wish to restore. For example, it is possible to only restore photos from an iPhone backup. Just select Photos, then click Next.
For contacts, the process is the same: select Contacts, then click Next. You can select as many items as you want. Restore calendars, WhatsApp, Notes – in any combination you want!
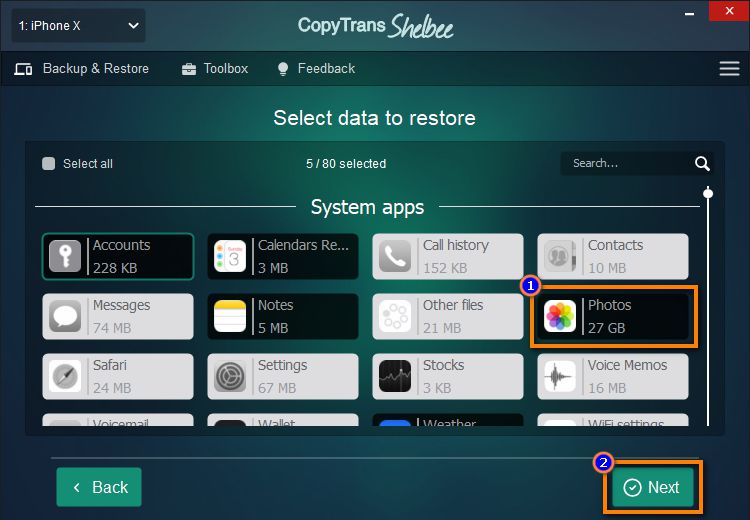
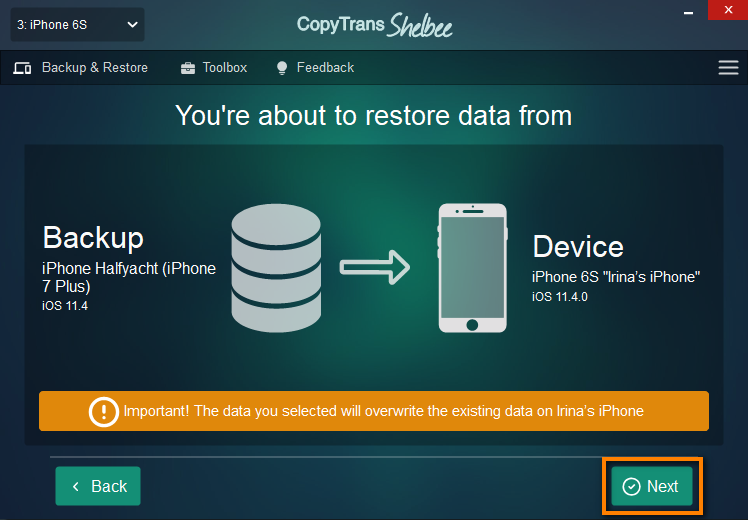
- Please note that the data you selected will be overwritten. So, if you want to restore contacts, the device contacts will be replaced with the ones from the backup.
 Click Next.
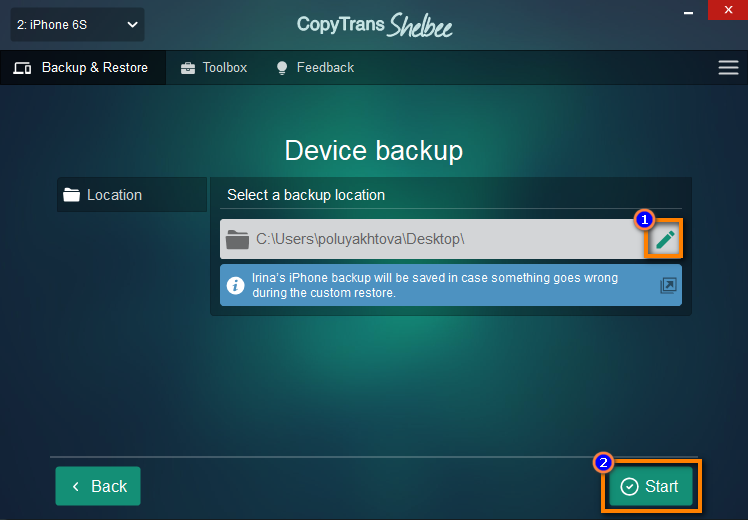
 - CopyTrans Shelbee will ask you to choose where you want to save the backup of your device in case something goes wrong during Custom restore. Select the destination and click Start.
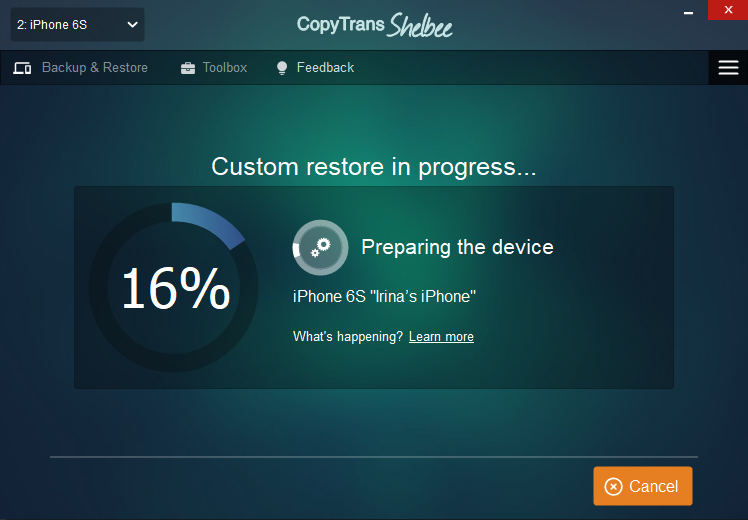
- Wait until the restore process finishes.
NOTE
If the restore fails for some unknown reason, see the troubleshooting steps for when the backup is corrupt.
- That’s it! Your device will restart now.
NOTE
While restoring, CopyTrans Shelbee may ask you to enter the iOS backup password to decrypt the data in the backup. What is an iOS backup password?
With CopyTrans Shelbee, you can:
✔ Restore selected data;
✔ Restore apps to any iOS device with ease even if they have been removed from the App Store after *;
✔ Restore data from an iTunes backup;
✔ Restore data from a corrupted iTunes backup;
✔ Restore an encrypted backup.
* provided you made a backup with CopyTrans Shelbee (v2.1 or higher) before the apps were removed from the App Store.
iPhone is stuck on restore screen
Extract iPhone data from a backup to the PC
After getting the support.apple.com/iphone/restore message on your iPhone restore screen, you might also want to keep the iPhone files like photos and contacts on your PC in case something goes wrong with your iPhone again. You can extract all your iPhone data from a backup using CopyTans Backup Extractor.
- Download and install CopyTrans Backup Extractor. If you need help, refer to the installation guide.
Download CopyTrans Backup Extractor
*100% clean and safe - Start the program and click on Find Backups.
☁️To see iCloud backups, click on iCloud Backups and log in to your iCloud account first.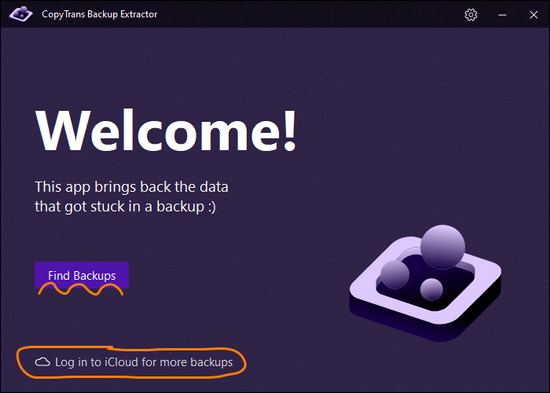
- You will see a list of all available backups: choose the one that contains your photos. If you are restoring from iTunes backup, you may be asked for a backup password. What password?
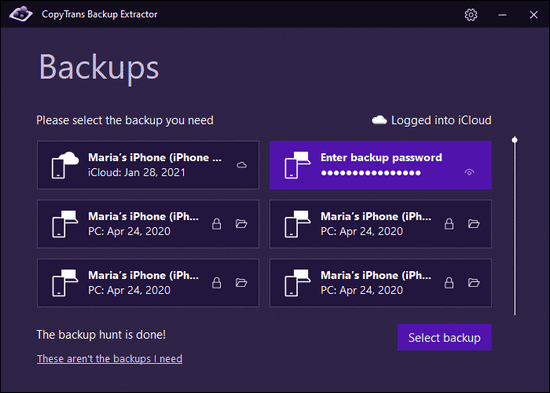
iCloud backups are never password protected. - Select Photos, then click Extract.

- Choose the destination folder and confirm. Wait… CopyTrans Backup Extractor is wielding magic.
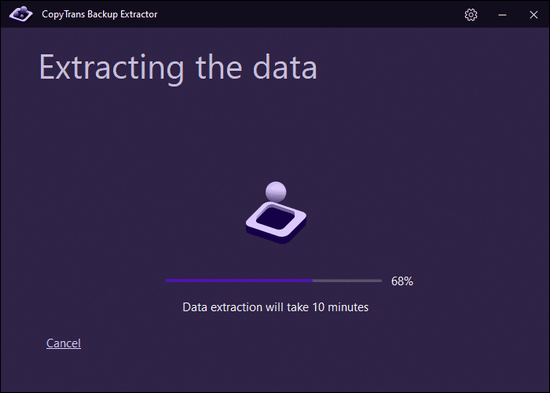
- Voilà!
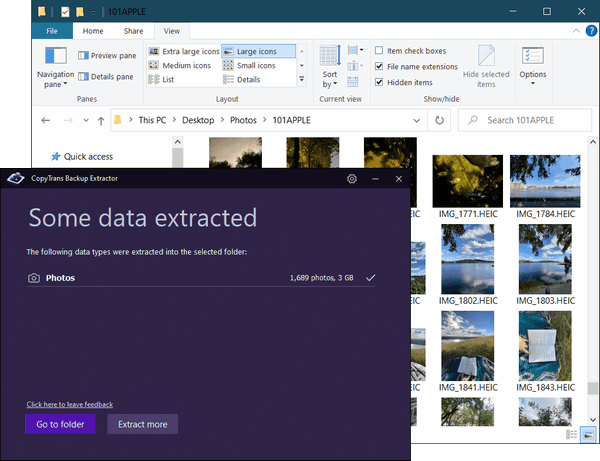
Now you can click on Go to folder to see all the photos migrated there. You can now transfer recovered photos back to iPhone.
With CopyTrans Backup Extractor, you can:
✔ find all your iTunes and iCloud backups (automatically!)
✔ extract your deleted photos to PC
✔ extract other data types to PC
You can then transfer your recovered photos back to iPhone.
Let’s hope you’ll never encounter the support.apple.com/iphone/restore error on your iPhone. But if you ever do, you’ve learnt the importance of a backup and how to restore your iPhone when you get the iPhone restore screen.