
 (13 votes, average: 4.23 out of 5)
For all music lovers, it is vital to organize their music in a particular way to set the mood for the day ahead. Some, however, may be wondering how to make a playlist and organize it for their liking. You’ll find all the tips and tricks regarding the playlist organization in this guide using our free software – CopyTrans Manager.
Manage your playlists:
- Make a playlist – Without iTunes
- iPhone playlist – How to organize
- Transfer playlist – From iPhone to the PC
Make a playlist
Without iTunes
It’s actually pretty easy to make a playlist on iPhone without iTunes. All you need is CopyTrans Manager – a free iTunes alternative that helps you add, delete, and edit playlists on any Apple iDevice, including iPhone 13 and iPhone 13 Pro.
- Download CopyTrans Manager on your PC. Download CopyTrans Manager
- Install the program. If you need help installing CopyTrans Manager, please refer to the Installation guide.
- Run CopyTrans Manager and connect your iPhone to the computer. The program will load your music library. The playlists are located in the left column.

- To add a new playlist to your iPhone, click on the blue + button in the Playlists pane.
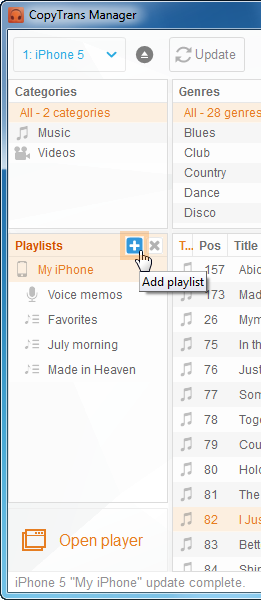
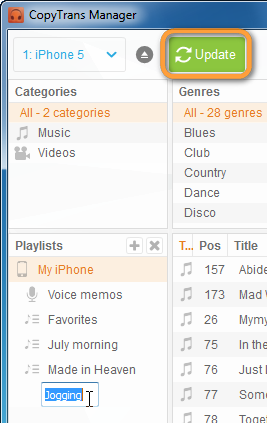
- Give the new playlist a name and hit the green Update button on top to apply the changes. It will save your playlist on your iPhone.
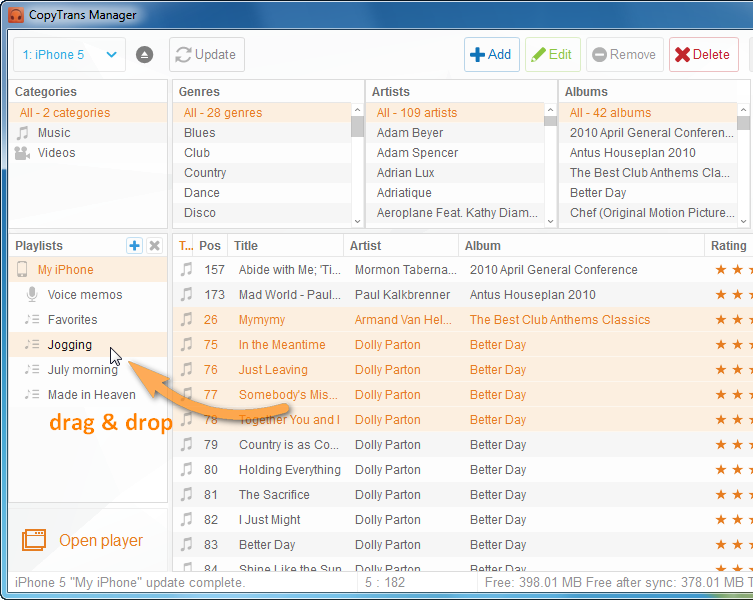
- Populate your new playlist with tracks via drag and drop. Alternatively, you can add music from the computer by using drag and drop.
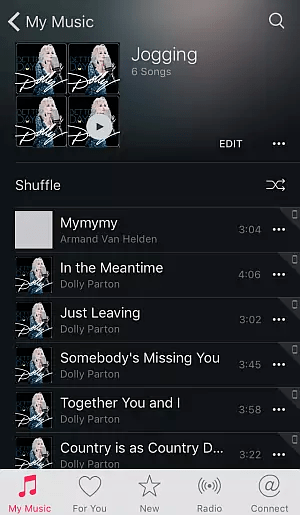
- That’s it. You’ve added a playlist to your iPhone and populated it with music.
iPhone playlist
How to organize
Organizing songs in the perfect order can be a hassle on iPhone. Don’t worry! You can use CopyTrans to easily rearrange the order of the songs in your playlists and albums.
Please select:
- I would like to change the order of tracks within a playlist
- I would like to change the order of tracks within an album
To change the order of tracks in a playlist:
- With your CopyTrans Manager window open, point to a playlist in the Playlists column and select it.
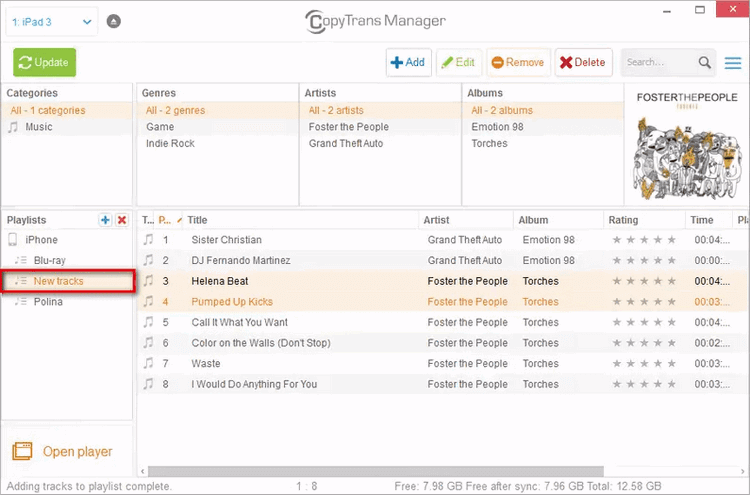
- Choose a song from the playlist and drag it to the desired position. In this case, we selected song #5 and moved it to the last place.
- Click on the Update button to save the changes to your device.
- That’s it! Now you have changed the order of tracks within a playlist.
NOTE: Due to Apple limitations imposed on the device, the master playlist cannot be sorted. It means that files outside custom playlists will only appear sorted by alphabetical order.
To change the order of tracks in an album:
- With your CopyTrans Manager window open, point to an album in the Albums list and select it (red arrow).

- Select the tracks that you want to edit, right-click on the selected tracks and choose Edit.
- Change the Track # to a number of your choice from the Tag Editor. Proceed to the next song using the arrow keys at the bottom of the window. Accept the changes you made by clicking the Apply button once you finished.
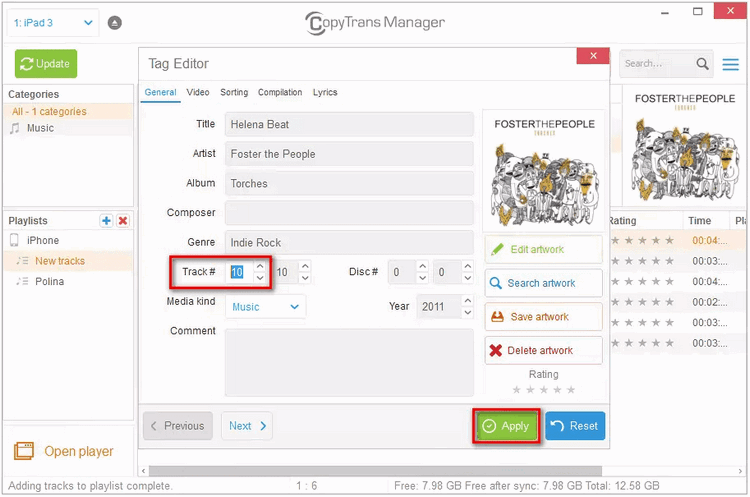
- Don’t forget to apply the changes made to your device by hitting the Update button.
- That’s it! Now you have changed the order of tracks within an album.
Transfer playlist
From iPhone to the PC
Have you been creating the most perfect playlists for any occasion on your PC and now, all of a sudden, they’re gone? If you still have an iPhone playlist, you’re a lucky one as you can transfer playlist back to your PC in no time!
The following tutorial demonstrates how to backup and transfer an iPhone playlist to a computer. The method also allows you to back up playlists from any other Apple iOS device such as iPod or iPad.
- Download CopyTrans from the following page. Download CopyTrans
- Install the program. If you need help installing CopyTrans, please refer to the installation guide.
- Close iTunes and start CopyTrans.
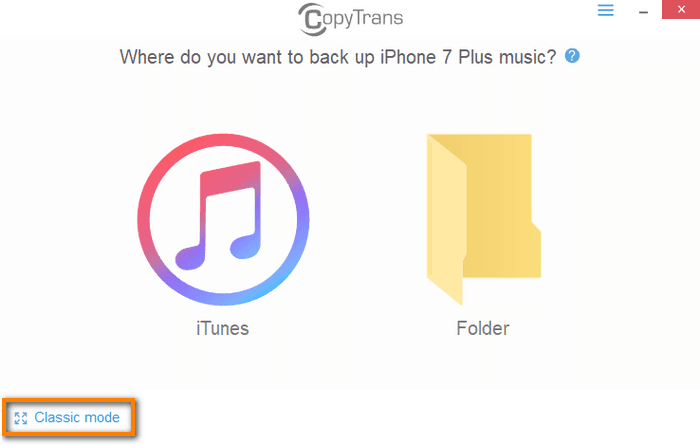
- Connect the iPhone with the playlist you wish to transfer to the computer. Click the Classic mode button:
- The playlists will appear on the left-hand side.
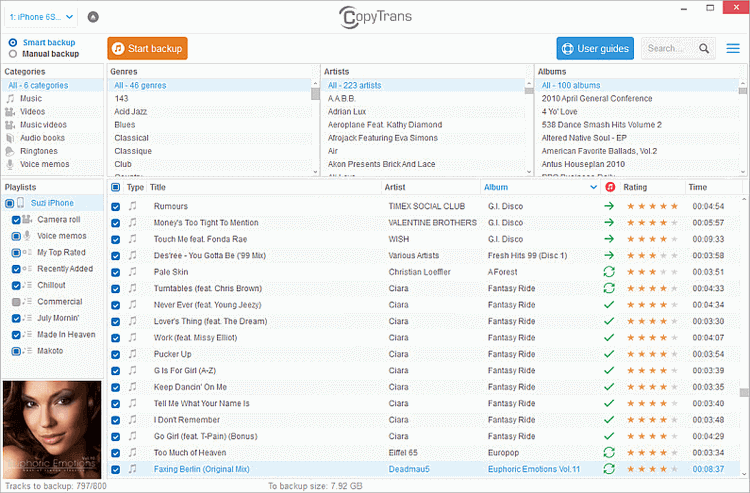
NOTE: playlists that were created directly from within the iPhone will not be displayed. To transfer those playlists to the PC, you need to sync the iPhone with iTunes, but only AFTER ensuring that all iPhone tracks and playlists are already loaded in your iTunes library. Otherwise, you risk iTunes deleting some or all of the iPhone tracks. - Now select what you would like to do next:
- Transfer selected iPhone/iPod/iPad playlists to iTunes
- Transfer selected iPhone playlists to a PC folder
Transfer selected iPhone/iPod/iPad playlists to iTunes
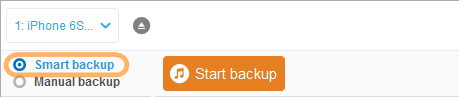
- To transfer all the needed playlists with their contents to iTunes on the PC, check that Smart backup is selected and click Start backup.
- CopyTrans will now begin the backup operation. Only songs and playlists that are not already in iTunes on your PC will be transferred. Hence, duplicate tracks or playlists will not be created.
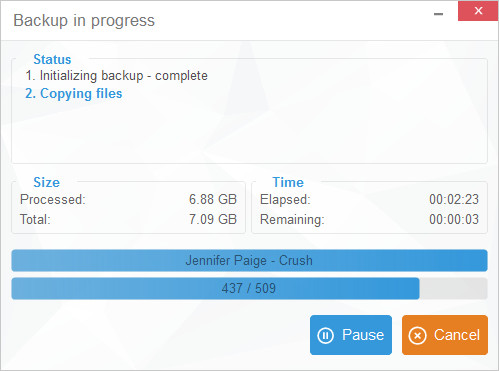
- At the end of the operation, disconnect the iPhone and close CopyTrans. Run iTunes. All the needed iPhone playlists and their contents are transferred over.

Transfer selected iPhone playlists to a PC folder
You can alternatively transfer and backup only iPhone playlists you choose. To do so:
- Run CopyTrans and connect the iPhone.
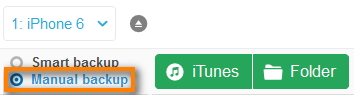
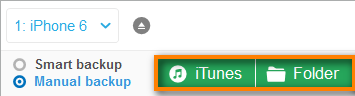
- Select Manual backup from the top of the main program window.
- Choose the iPhone playlists you wish to transfer to the PC from the Playlists panel by checking the box next to each playlist entry. If you want each of your playlists saved in a separate folder, you’ll need to transfer your playlists one by one.
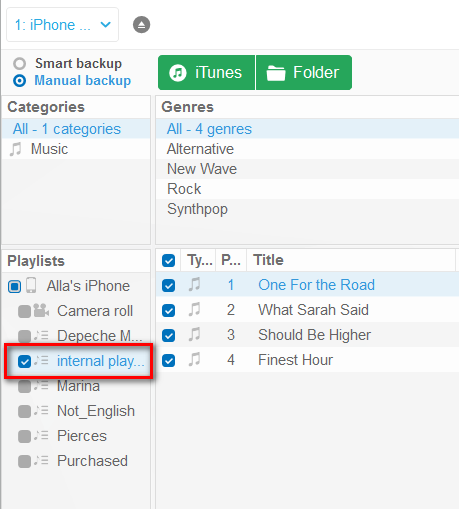
- To back up the playlist to a selected computer folder, click Folder.
- Click the blue pencil sign to choose the Destination folder.
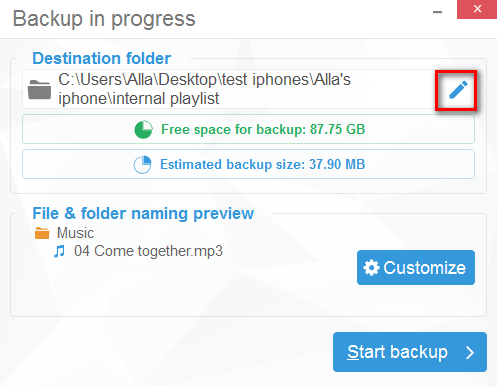 Then click the Create new folder button and name the new folder after your playlist.
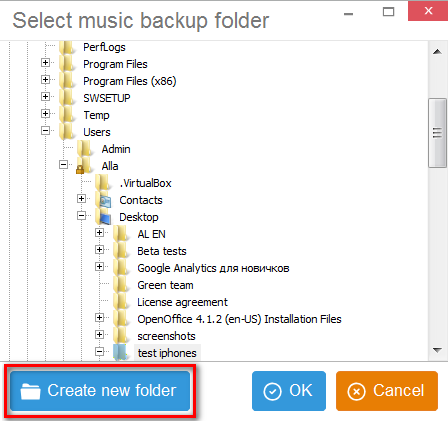
- To choose how to organize your music inside the folder, click Customize.
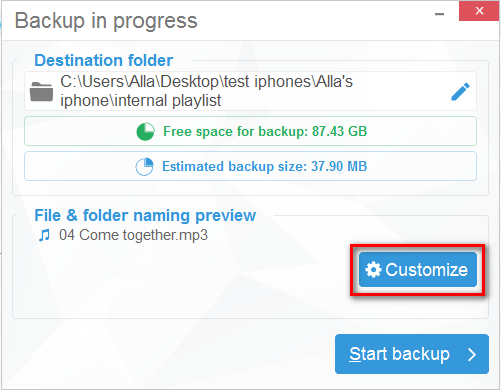 If you prefer keeping all the songs from a single list in one folder without creating new subfolders, leave all the fields empty.
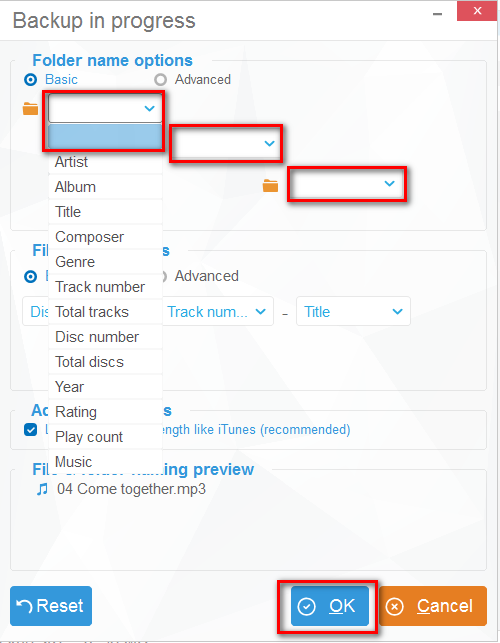
- After you have adjusted your backup settings, click OK and start the backup process.
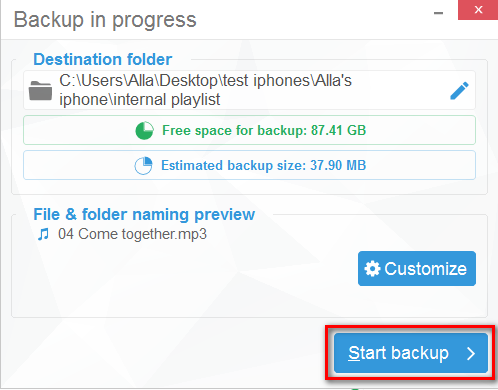
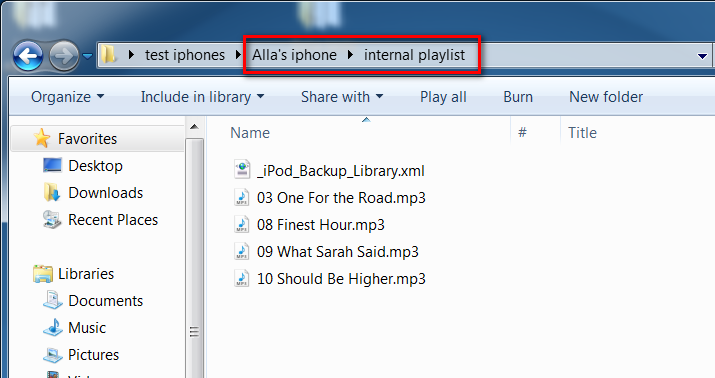
- Here you go! The selected iPhone playlists are transferred to your PC.
Restoring your iPhone playlist to the PC is no longer a problem! CopyTrans is an easy tool to transfer playlist back to the PC.