(5 votes, average: 4.20 out of 5)
As explained on the Synology official website, CalDAV Server (Synology NAS in our case) is a calendar management application that allows you to easily sync and access your calendars. Calendar events on the Synology network-attached storage (NAS) can be accessed from any CalDAV client, should it be a cellphone (iPhone, iPad, iPod touch) or a computer. Refer to the following article for more details: How to host a calendar server using the Synology NAS.
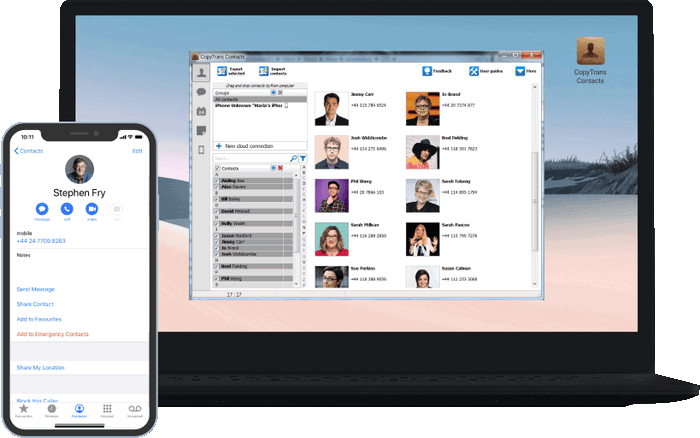
In this article we’ll show you how to securely manage your calendars sourced from the Synology NAS using CopyTrans Contacts. 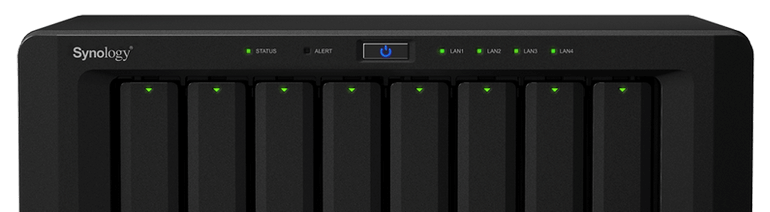
With CopyTrans Contacts, you can access and manage your NAS calendars and move them between your iOS devices, such as iPhone, iPad, or iPod touch. You can also transfer your Synology calendars between iCloud, Gmail and Outlook accounts.
In our guide, we use Synology Model DS713+ with the operating system DSM 6.0.2.
- Installing WebDAV Server and enabling CalDAV
- Access Synology calendars over the internet
- Set up your Synology CalDAV on your iPhone
- Manage Synology calendars with CopyTrans Contacts
Installing WebDAV Server and enabling CalDAV
-
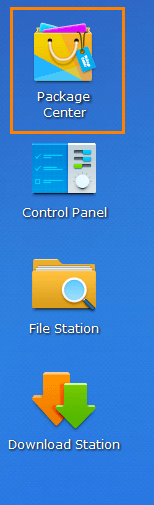
Open the Package Center from your desktop:
-
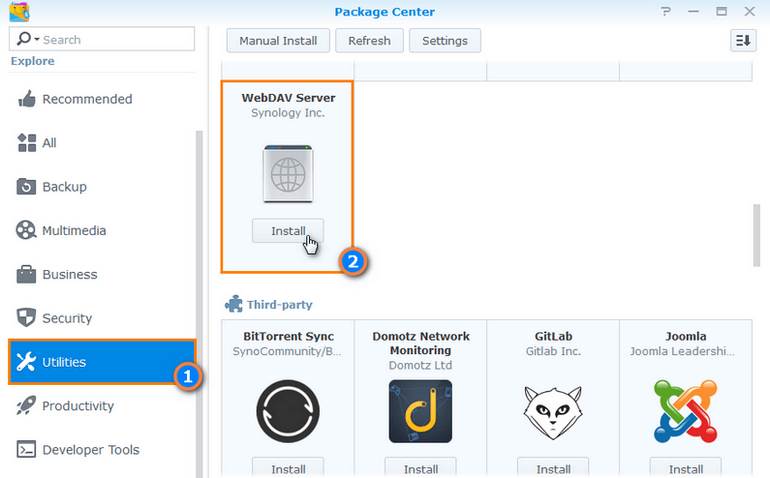
Find the tab Utilities from the list on the left-hand side > WebDAV Server > Install:
-
Wain until the WebDAV Server gets installed and automatically started. After this, you can open the app.
-
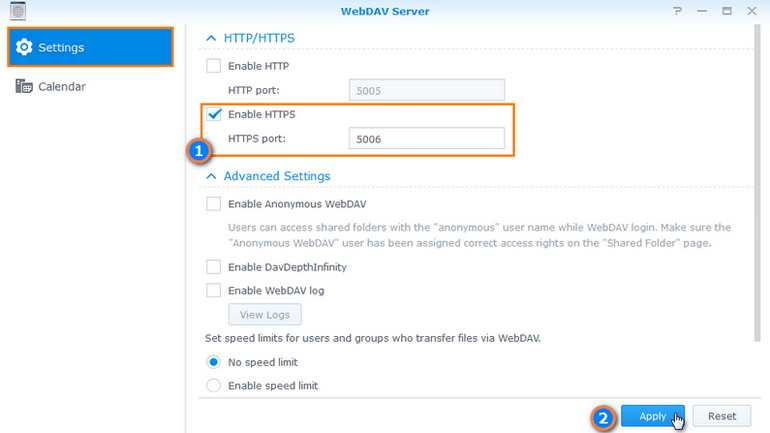
For security reasons, it is recommended to enable HTTPS in the application and change the port. By default, we use the secure port 5006. Click Apply:
-
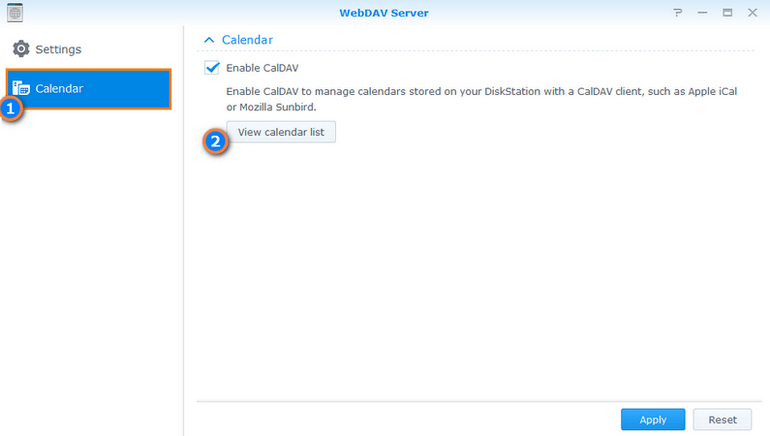
Now choose Calendar from the left-hand pane. Here you can enable CalDAV and apply the changes:
-
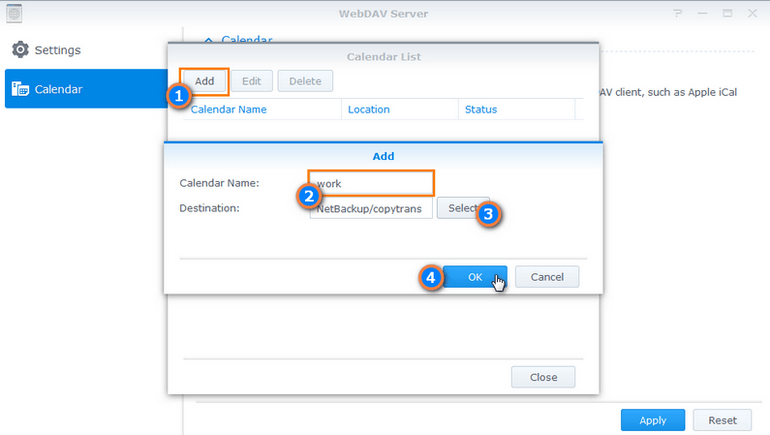
Create a new calendar. Tap on the View Calendar List button > Add. Enter the name of your calendar(s) and choose the destination. Click OK to confirm:
-
Remember the calendar address. Hover the mouse over the calendar location to view the full URL address of the calendar:

Access Synology calendars over the internet
Now let’s make sure that your calendars sourced from the Synology NAS can be accessed over the internet.
-
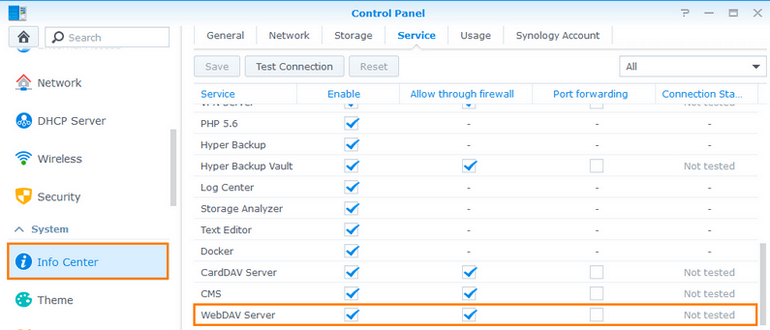
As an administrator, navigate to the Control Panel > Info Center > and open the Service tab.
-
Choose WebDAV from the Packages list:
-
The service should be enabled. Check the box in the Allow through firewall column. Now apply the changes and test the connection again. In the far right column, the “Internet accessible” status will appear:

Set up port forwarding on a router:
-
Navigate to the administrative section of the router.
-
Log into your router and find the appropriate menu item.
-
Forward secure HTTPS requests to TCP port 5006 from outside to the port 5006 on Synology (local IP address).
-
Test the connection on Synology NAS again.
Set up Synology CalDAV on your iPhone
-
If you are running iOS 11, open the Settings app > Accounts & Passwords > Add Account > Other > Add CalDav Account.
If you are running iOS 10, navigate to the Settings > Calendar > Accounts > Add Account > Other > Add CalDAV Account.
For iOS 9, 8, 7, go to the Settings app > Mail, Contacts, Calendar > Add Account > Other > Add CalDAV account. -
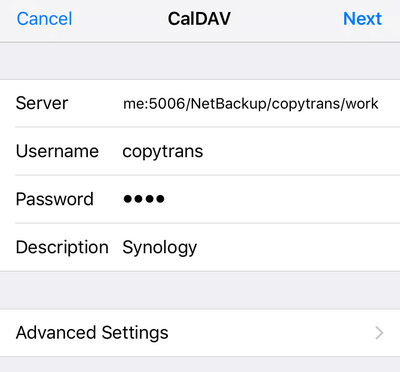
You’ll be requested to type in the server address (external IP address of Synology NAS), username, and password. We entered Synology to the Description field. Confirm by clicking Next:
-
Voilà! The account has been successfully added. Your device itself will select the secure port. You can check this in the Advanced settings of the newly added account.
-
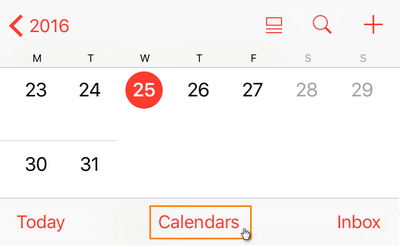
Now you can find your Synology calendars in the Calendar app on your iPhone. If you want to view the Synology calendar only, navigate to Calendars on your device:
-
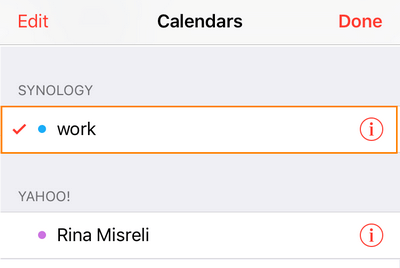
Choose Hide All Calendars, tick the Synology calendar and click on Done to confirm:
Manage Synology calendars with CopyTrans Contacts
If you have Synology access set up on your iPhone, these calendars will be displayed as read-only in CopyTrans Contacts. You can export these calendars to your hard drive or Outlook, but you can not edit them. To edit your Synology calendars, you’ll need to add them to CopyTrans Contacts.
- To download CopyTrans Contacts, navigate to the following page:
Why is CopyTrans Contacts exactly what you need?
🚀 With it, you can export iPhone, Google, Outlook and iCloud calendars to the PC;
🚀 Manage iPhone and cloud calendars on the PC;
🚀 Transfer separate events or whole calendars from one cloud service to another (iPhone, Google, and Outlook);
🚀 Edit, add and remove all types of events. -
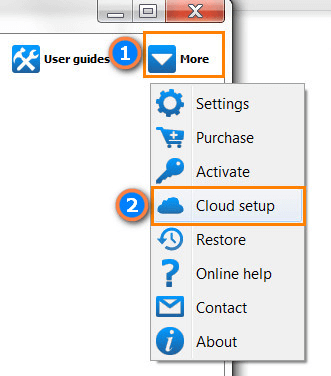
On the top right of the main program window, click on More > and choose Cloud Setup from the dropdown menu:
-
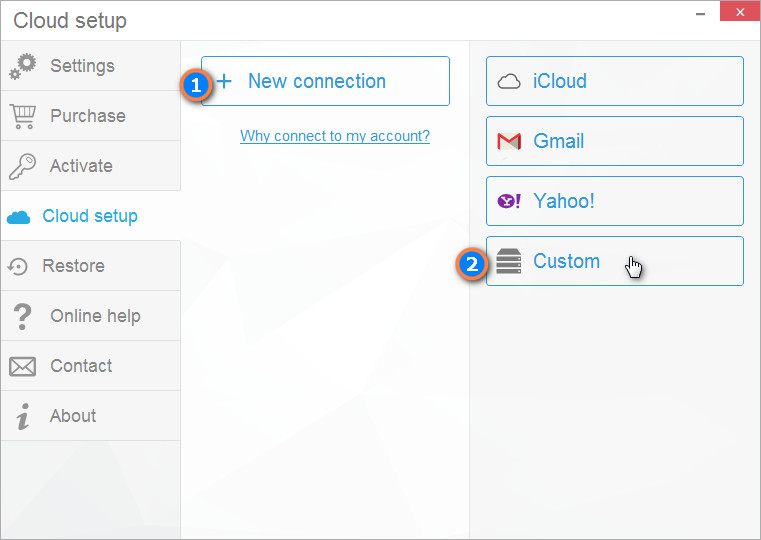
Tap on New Connection > select Custom from the right:
-
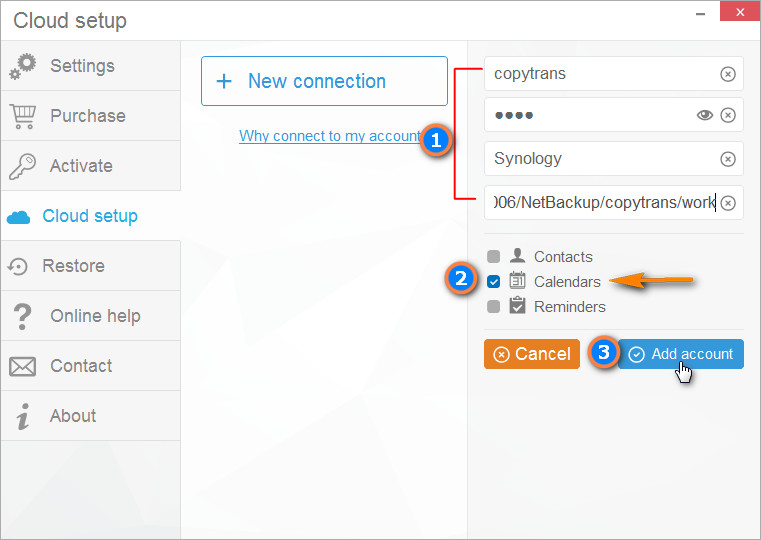
Enter your Synology credentials into the Email and Password fields. Type in the full URL address of the calendar: http://EXTERNAL SYNOLOGY ADDRESS:WebDAV_Port_Number/Calendar_Location/CALENDAR_NAME (in our case, it’s https://IP address:5006/NetBackup/copytrans/work). Check the box against “Calendars” and click on “Add account”:
-
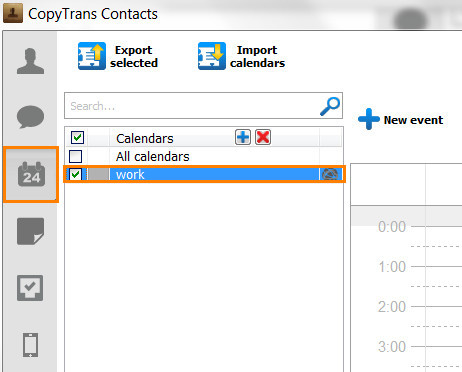
Close the Cloud Setup window and wait until the loading of calendars from your Synology NAS is finished. After the loading is complete, you can edit them:
Install the program. If you need help installing CopyTrans Contacts, please refer to the Installation guide.
Using CopyTrans Contacts, you can:
🌑 Look through all your SMS, WhatsApp, Viber and Line chats on PC;
🌑 Export messages to computer in PDF, DOC, etc.;
🌑 Save photos and attachments in a separate folder;
🌑 Manage your contacts, notes, and calendars.