

 (11 votes, average: 3.55 out of 5)
According to the Synology Knowledge Base, CardDAV Server (Synology NAS in our case) is a contact management application that allows you to easily sync and access your address book. Address books on CardDAV Server can be edited and viewed using any CardDAV client such as mobile phones and computers. Any changes made to contacts will be synced to all CardDAV client devices connected to CardDAV Server.
In this article we’ll show you how to securely manage contacts sourced from your Synology network attached storage (NAS) using CopyTrans Contacts.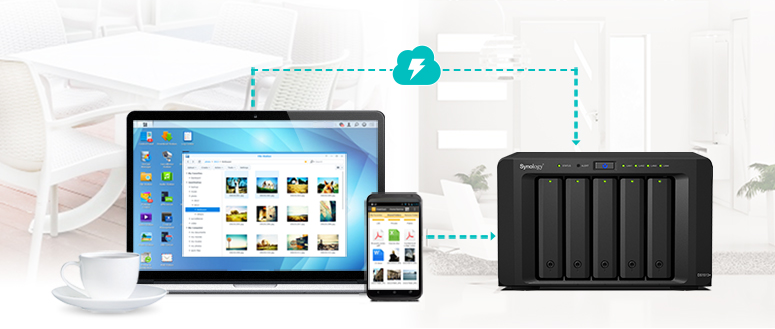
CopyTrans Contacts provides a convenient way to manage your Synology contacts and allows you to access, transfer or sync them with your iPhone, iPad, iPod touch or iCloud / Gmail / Outlook.
In our guide, we use Synology Model DS713+ with the operating system DSM 6.0.2.
- Set up the CardDAV Server on your Synology NAS
- Access your Synology NAS address book over the Internet
- Set up your iOS device for use with Synology CardDAV
- Manage your Synology address book with CopyTrans Contacts
Set up the CardDAV Server on your Synology NAS
-
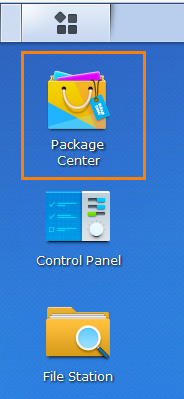
Open the Package Center:
-
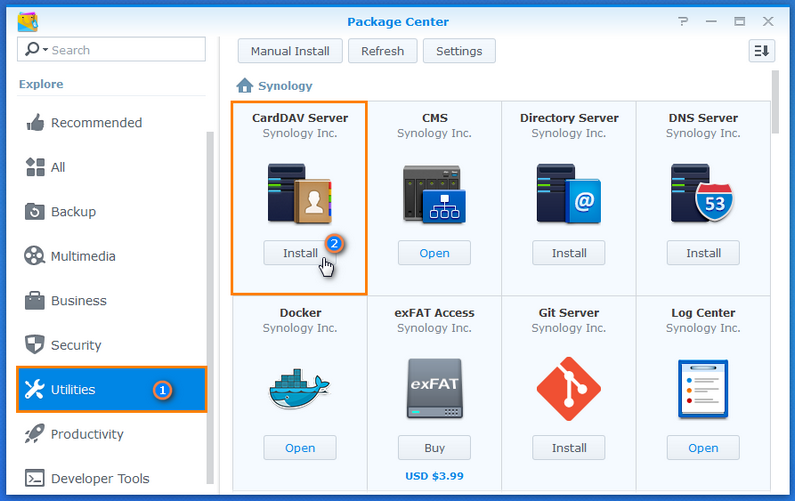
Select “Utilities” from the left-hand category list and install the CardDAV Server:
-
After the CardDAV Server is installed and automatically started, you can open the application.
-
We recommend you to enable HTTPS in the application and redirect HTTP to HTTPS. We use a secure port 8443.
The alternate URL addresses of the address book:
-
Easy connection: http: // EXTERNAL IP YOUR DISK STATION: 8008 / address books / users / [USERNAME] / addressbook /
-
HTTPS connection: https: // EXTERNAL IP YOUR DISK STATION: 8443 / address books / users / [USERNAME] / addressbook /
Access your Synology NAS address book over the Internet
Now let’s make sure that you can access your Synology NAS address book over the Internet.
-
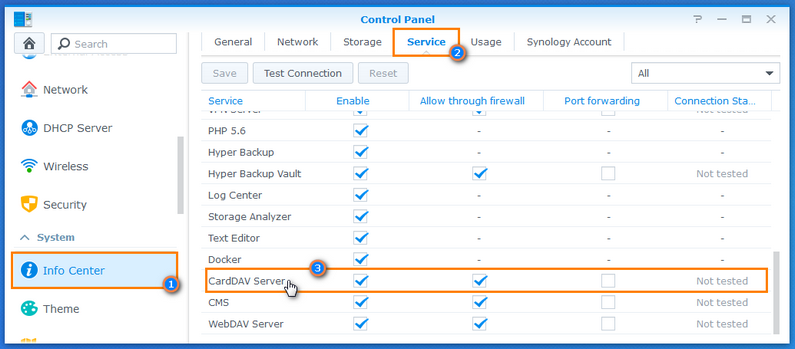
As an administrator, go to the Control Panel > Info Center and open the Service tab. After this, select the CardDAV Server in the Packages section:
-
The service will be activated. Also, select Enable and Allow through firewall. Save the changes and test the connection. In the Connection Status column the CardDAV Server status will change to “Internet accessible”:

If you want a different test result, set the port forwarding on your router:
-
Go to the administrative interface of your router.
-
Locate the appropriate menu item after logging into your router.
-
Set the forwarding for secure HTTPS requests to TCP port 8443 from the outside to port 8443 from Synology (local IP address).
-
Test the connection again in your Synology NAS.
Set up your iOS device for use with Synology CardDAV
-
For iOS 13/12 users: Open the Settings app > Passwords & Accounts > Add Account > Other > Add CalDav Account.
For iOS 11 users: Open the Settings app > Accounts & Passwords > Add Account > Other > Add CalDav Account.
For iOS 10 users: Open the app settings > Contacts > Accounts > Add Account > Other > Add CardDAV account.
For iOS 9, 8, 7 users: Open the Settings app > Mail, Contacts, Calendar > Add Account > Other > Add CardDAV account. -
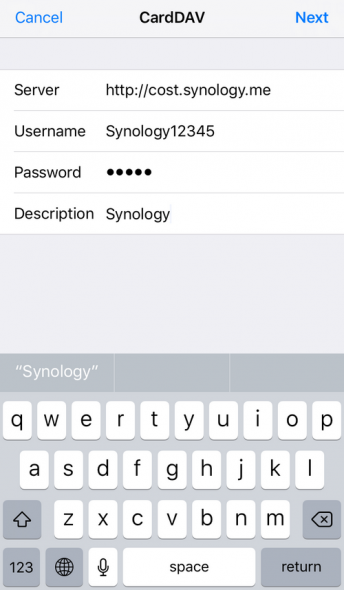
Enter the server address (external IP address of Synology), username and password. In the description field we entered “Synology”. Click Next:
-
The account has been added. The device itself selects the secure port. You can check this in Advanced settings of the newly added account.
-
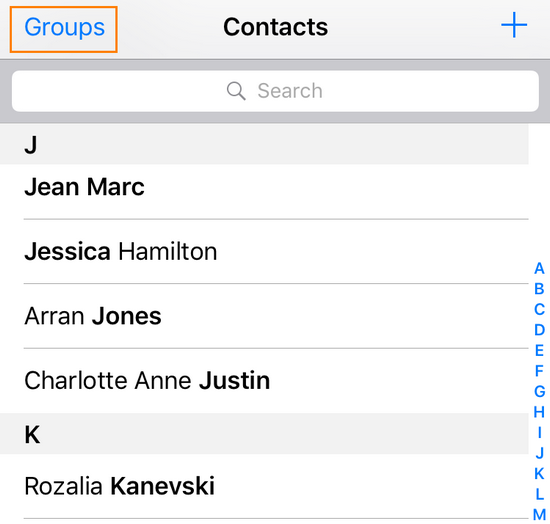
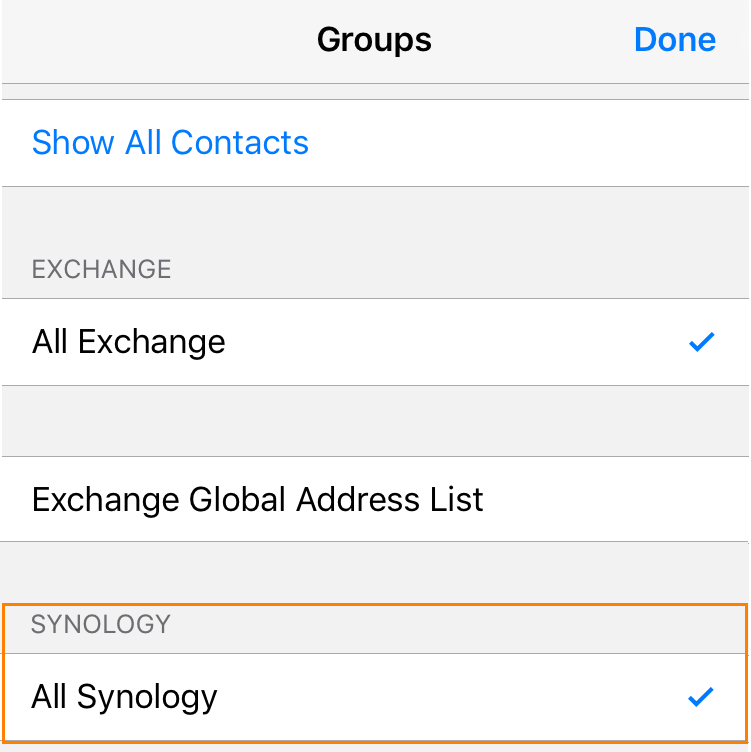
Your Synology contacts are now displayed in the Contacts app. To view only Synology contacts, go to Groups:
-
Select “All Synology” and then tap on Done:
Manage your Synology address book with CopyTrans Contacts
-
If you have Synology access set up on your iPhone, the contacts sourced from this network attached storage will be in read-only mode in CopyTrans Contacts. This means that you can export these contacts to a hard drive or Outlook, but you cannot edit or delete them. To edit these contacts, connect Synology to CopyTrans Contacts as explained below.
-
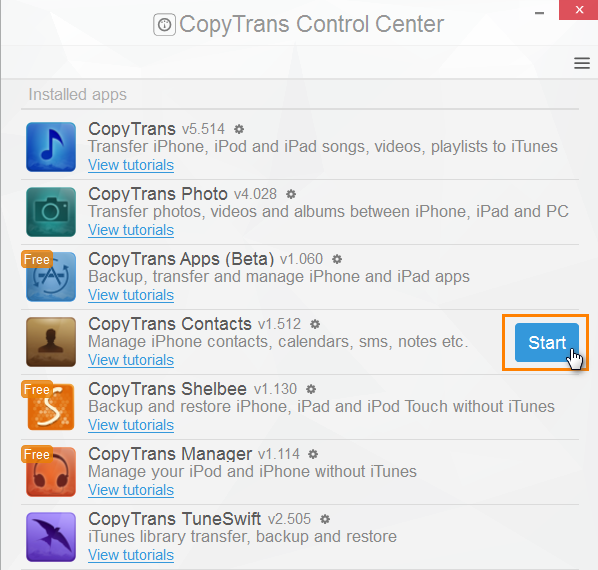
Open CopyTrans Contacts from the CopyTrans Control Center:
-
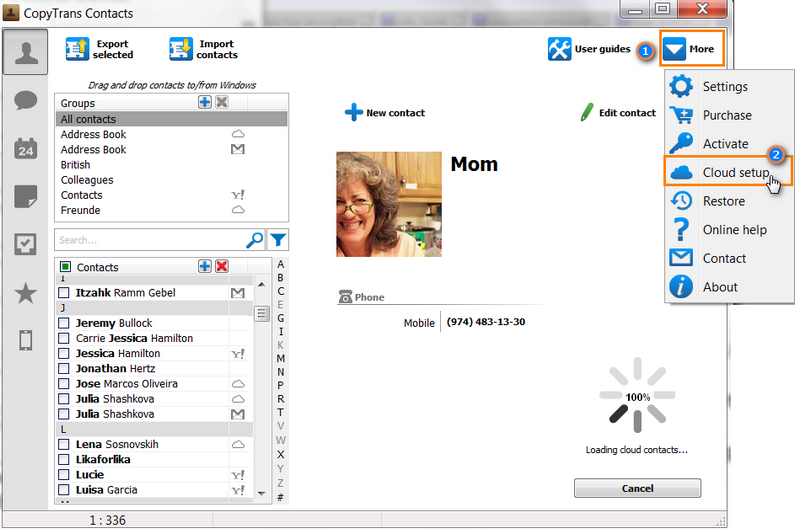
In the top right corner of the main program window, click on More > Cloud Setup:
-
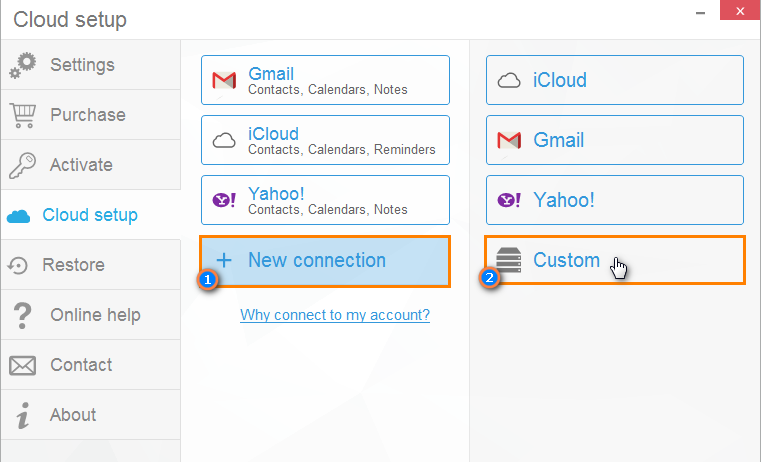
In the Cloud Setup window, tap on New Connection and choose Custom from the list on the left:
-
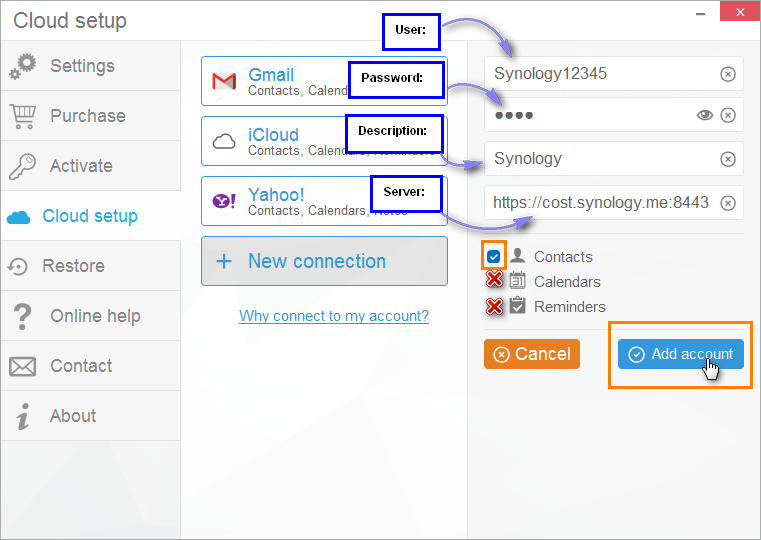
Fill in the Email and Password fields with your Synology username and password. We typed “Synology” into the Name field, and added the server address: https://IP address:8443/. After this, uncheck Calendars and Notes boxes leaving only Contacts box checked and tap on “Add Account”:
-
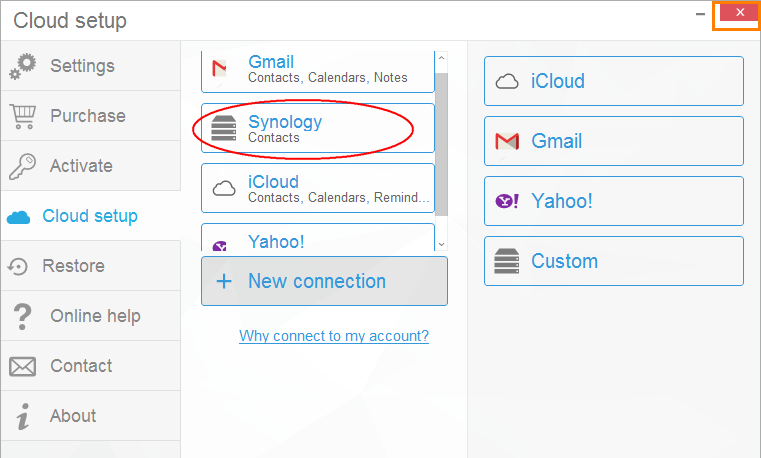
Now that your Synology NAS has been connected to CopyTrans Contacts, tap on the red cross and close the Cloud Setup window:
-
After the contacts from your Synology address book are loaded, you can edit them. If you want to view only Synology contacts in CopyTrans Contacts, tap on the Funnel icon, from the drop-down menu choose Filter > Synology:
