Why is backing up iTunes to an external USB drive such a good idea? You don’t want to lose a carefully organized collection of songs and playlists in a snap PC crash. But clogging your PC storage with a backup copy of the entire library is not wise.
So why not back up the iTunes library to an external USB drive? Besides this allows you to bring the iTunes copy with you and access it on any PC where iTunes is installed. The steps below show how to make an automated complete iTunes backup in 6 clicks or less.
Let’s make a copy of your iTunes library to a USB drive
-
Get CopyTrans TuneSwift on the PC containing the iTunes library Click here to download CopyTrans TuneSwift
-
Install the program. If you need help installing CopyTrans TuneSwift, please refer to this article
-
Connect the external drive or USB stick to your PC
-
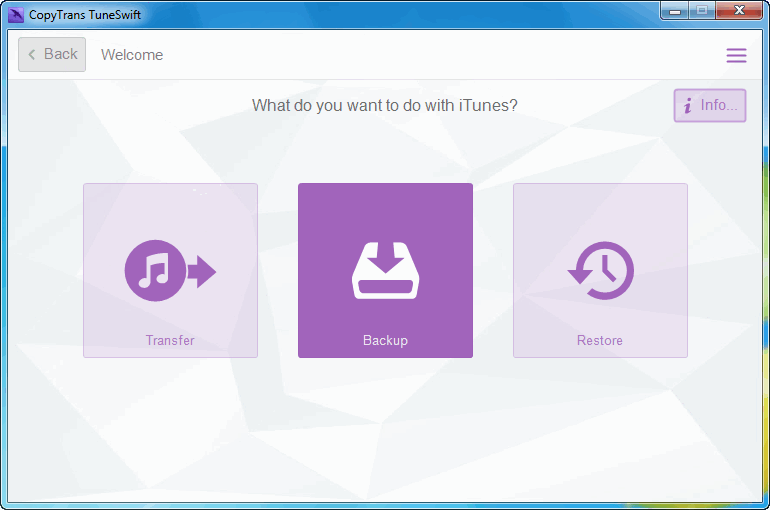
Start CopyTrans TuneSwift and choose “Backup”
-
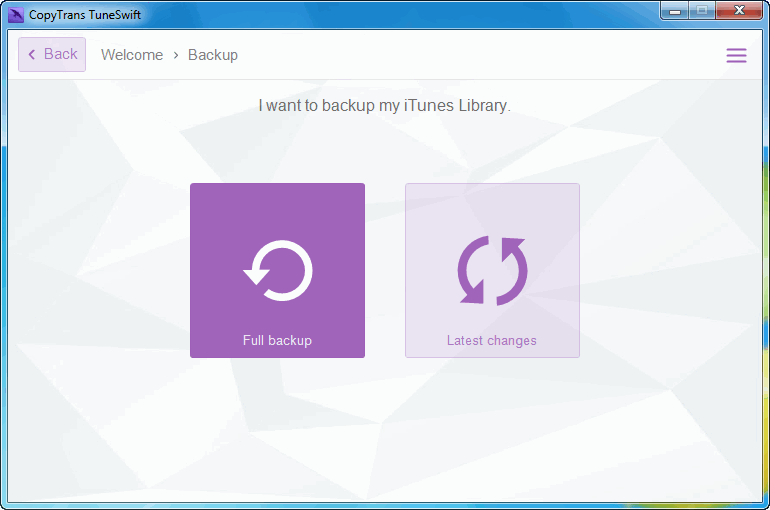
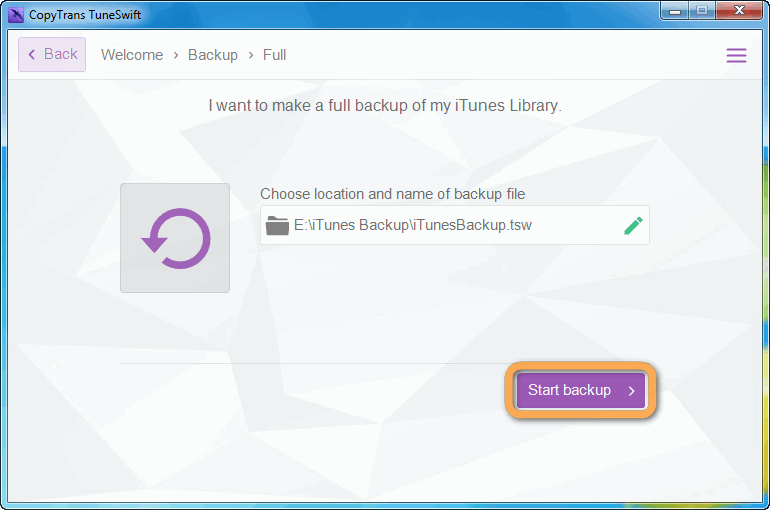
Click on the “Full backup” button
-
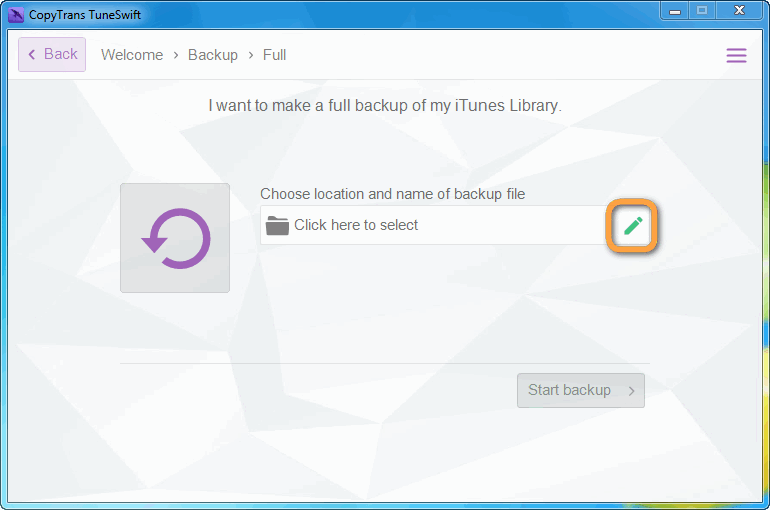
Now navigate to the external drive by clicking on the Green Pencil symbol
-
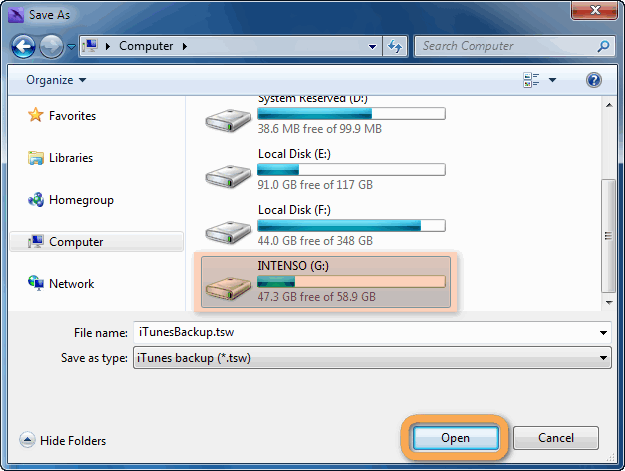
Select the USB stick or external hard disk where to make the iTunes copy
-
Hit “Start Backup”
-
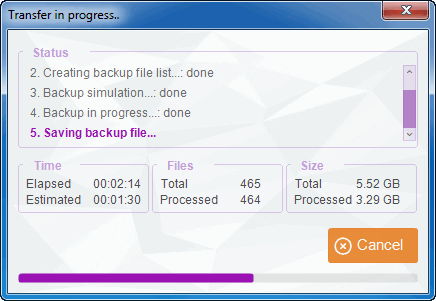
CopyTrans TuneSwift copies all contents of your iTunes library including songs, playlists, books, podcasts and any other media tracks into a series of backup files
-
Once the backup completes, you’ll be prompted to validate it. We recommend doing so to confirm the integrity of the backup copy.

You now have a copy of your iTunes library exactly as you left it at the time of backup. The copy is saved into TSW files to the external drive. Use CopyTrans TuneSwift at any point in the future to restore back the iTunes library to another PC. 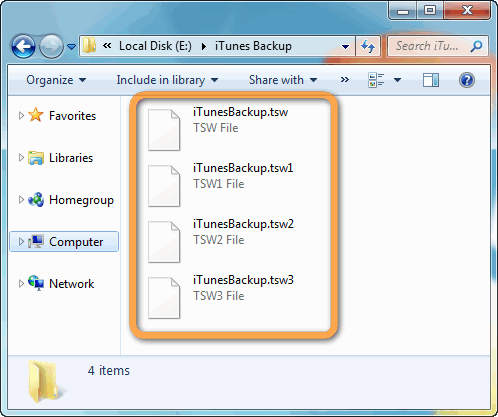
How to back up iTunes to external drive
YouTube tutorial
YouTube tutorial
This is how to back up the iTunes library to an external drive or a USB stick.