


 (11 votes, average: 3.55 out of 5)
The most observant users have already noticed yet another change in iOS 11 – new photo and video formats, called HEIF and HEVC respectively. This move to new formats means that you probably encountered some problems transferring pictures to your Windows PC, the biggest being that your computer doesn’t support the new formats.
In this article, we are going to provide a simple solution to make your HEIC files compatible with Windows PC without losing quality. Click here to jump straight to the instructions.

What’s HEIC?
HEIC is a new file format introduced by Apple at WWDC in June 2017. The photo format is now called HEIF, which stands for High Efficiency Image Format and the video format is called HEVC, which stands for High Efficiency Video Coding.

The idea behind this implementation is truly noble – almost everyone has seen that infuriating popup that says “Cannot take photo. There is not enough available storage to take a photo. You can manage your storage in Settings.” The new formats are intended to take up less valuable space on your iDevice. According to Apple and several independent tests, it can save up to 50% on storage needs compared to other formats.
Which devices support HEIC?
Not all devices support the new file formats. Since 2017, HEIF files have been supported by both iOS (iOS 11 and later) and macOS (macOS High Sierra and later) operating systems and can be viewed with Apple Preview and Apple Live Photos and iOS Photos.
How to turn it off
If you are not convinced and would like to go back to jpeg then here’s what you will have to do: go to Settings, then Camera and click Formats. As you might have guessed, High Efficiency is the new format, whereas Most Compatible is jpeg. Choose the latter to turn off HEIC and make sure your future pictures will always be in jpeg. Please note that your previous pictures taken in the HEIC format won’t be converted to jpeg.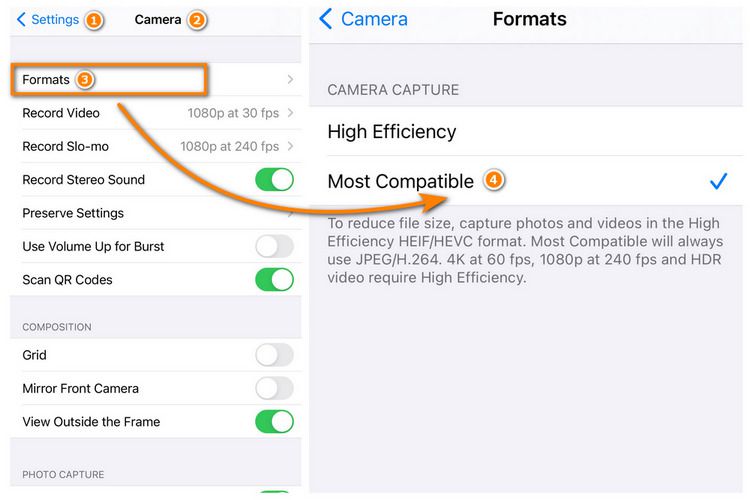
Transfer your HEIC pictures to Windows PC
Since the formats are completely new, many apps don’t yet support them. The biggest problem for Windows users is that the format is not readable on the PC. In this article, I’ll describe methods of downloading your HEIC pictures to PC in heic and jpeg, along with how to view the heic files on PC.
Transfer HEIC to PC with CopyTrans Photo
It’s incredibly easy to transfer your heic pictures to your PC. All you need is CopyTrans Photo. Let’s start!
-
Download CopyTrans Photo from the following page:
-
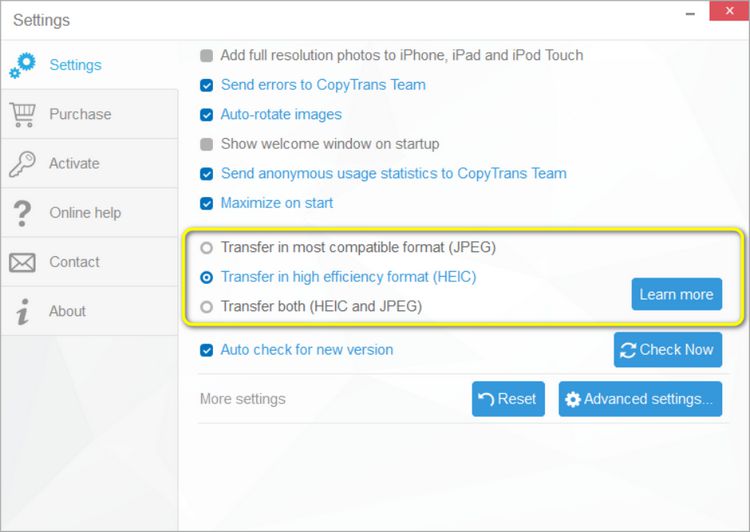
In the Settings tab, make sure that you have the HEIC format selected. If you want to convert them to jpeg, click here for detailed instructions.
-
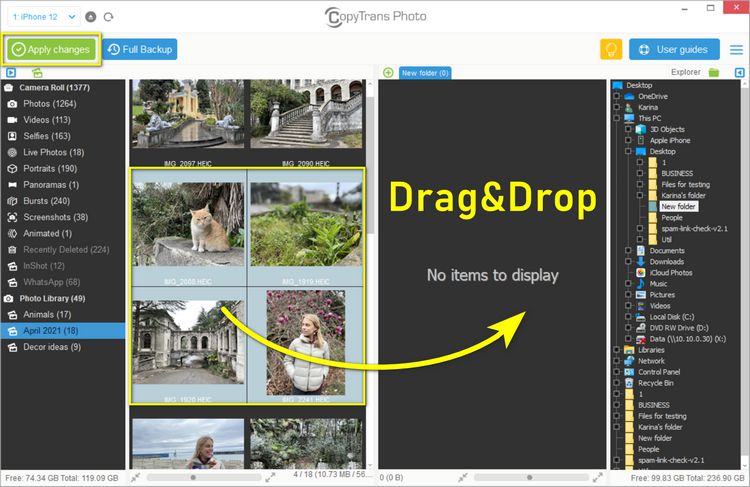
Make sure your Apple device is unlocked, connect it to your PC, locate the heic picture you wish to transfer, and just drag and drop it to the PC side. Then, apply changes.
-
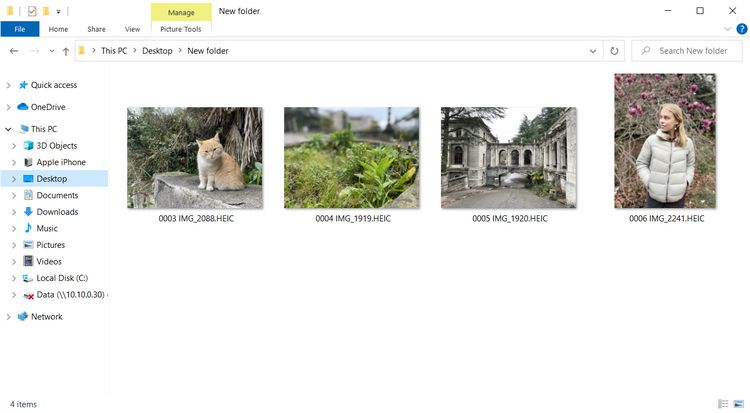
Navigate to the folder where you transferred the photo and enjoy! Important: make sure that you have the plugin to view HEIC files on PC.
BONUS: CopyTrans Photo stands not only as a reliable program to transfer photos from iPhone to PC and back, but as a HEIC to JPG converter for files stored on your PC. It is another marvellous feature of the program, isn’t it? See how we do it:
- Launch CopyTrans Photo and navigate to the folder on your PC where you have a HEIC to convert;
- Select the photo you want to convert to JPEG. Right-click and choose “Save to JPEG”:

View HEIC photos on Windows
So, you got your files transferred to your computer. The bad news is that Windows doesn’t support HEIC files yet. We at CopyTrans decided not to wait for Windows to solve this issue and made CopyTrans HEIC for Windows – a simple tool that allows you to open and view HEIC files using the native Windows Photo Viewer and Windows Explorer – no third-party app necessary.
Convert HEIC to JPEG with CopyTrans Studio
If you would like to back up your photos in the program that is integrated in the Windows Explorer, then I advise you to choose CopyTrans Studio.
Download CopyTrans Studio-
Download CopyTrans Studio and set it up.
-
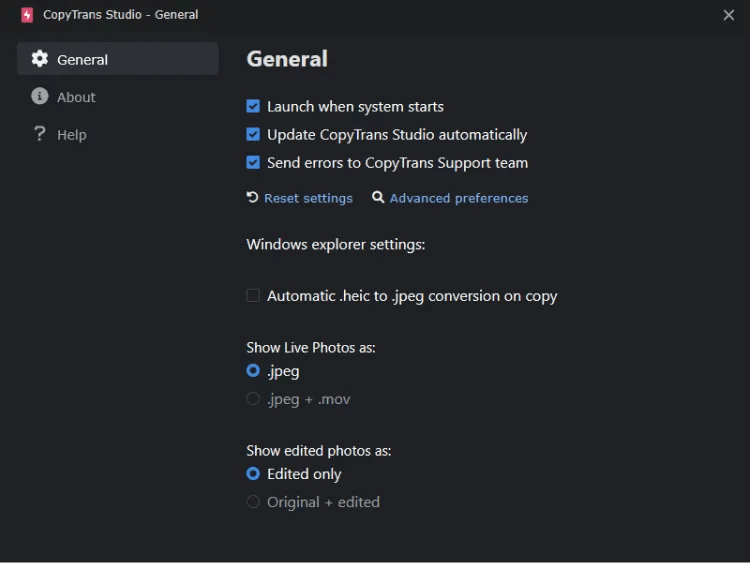
Open the CopyTrans Studio Settings and choose “Automatic convertion to HEIC”.
-
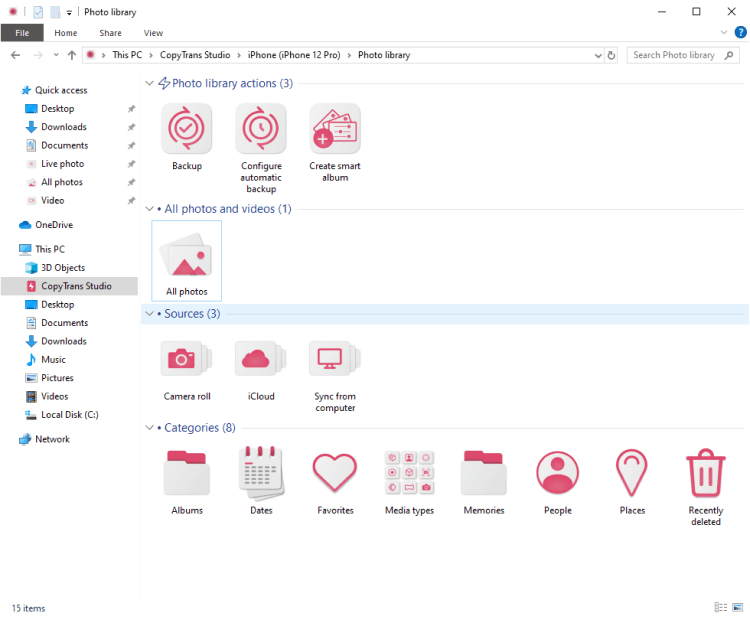
Now you can open the program and then choose your iPhone and click on Photo Library.
-
Now, when you save photos to PC (full backup or just drag-and-drop), the photos will be saved in JPEG.
We also recommend you to do convert HEIC to JPG with CopyTrans Studio.
Transfer HEIC to PC with iCloud
If you use iCloud Photo Library, you can download your photos directly from the iCloud website. Go to the site and log in to your iCloud account. As soon as your photos are loaded, click on the download icon in the top right corner of the interface. You’ll see a familiar download pop-up.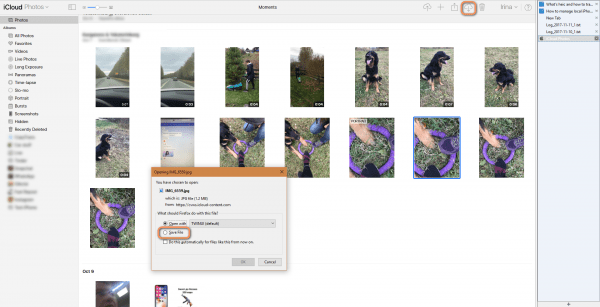
NOTE: If you want to select several photos in iCloud Photo Library, you have to go one by one. If you need to back up a large amount of pictures, use CopyTrans Photo.
If there’s anything else you’d like to know about heif and hevc, leave your questions in the comments!