
 (90 votes, average: 4.01 out of 5)
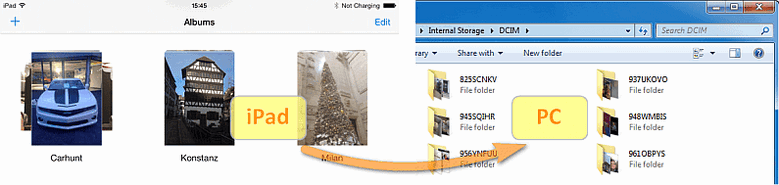
If you are reading this, you probably spend a lot of time organizing iPad photos in albums. You might wonder how to share album from iPhone or iPad to your PC. All you see when you access the iPad on your computer is a set of random photo folders that have nothing to do with the albums created on the device. So what’s next?
⭐ You can now create cutom albums with your iPhone photos and easily share them to your PC with Smart Albums function by CopyTrans Studio.
Transferring your photo albums from your iPad to the PC should be easy. However, some users may face issues that will prevent a smooth transfer of their memory collection:
❌ Incompatible HEIC format
❌ Unable to transfer in big batches
❌ Missing drivers
Don’t worry, we have a solution! Whether your photos are stored locally on an iPad or saved on iCloud:
How to get photos from iPhone to computer?
Photos are stored locally on the device
If the photos in your albums are stored locally on your iPhone or iPad, this solution is just for you! You can effortlessly transfer your iPad albums using CopyTrans Photo:
Advantages of CopyTrans Photo:
⚡ shows all your device photos in one place;
⚡ backs up your Live Photos from your iPhone to the PC and back;
⚡ keeps the original EXIF data, such as quality, date taken, location, and filters;
⚡ converts HEIC photos to JPEG if necessary.
Transfer all albums created on iPad to PC
If you need to back up all iPad photo albums, follow these steps:
- Download CopyTrans Photo to your PC: Download CopyTrans Photo now
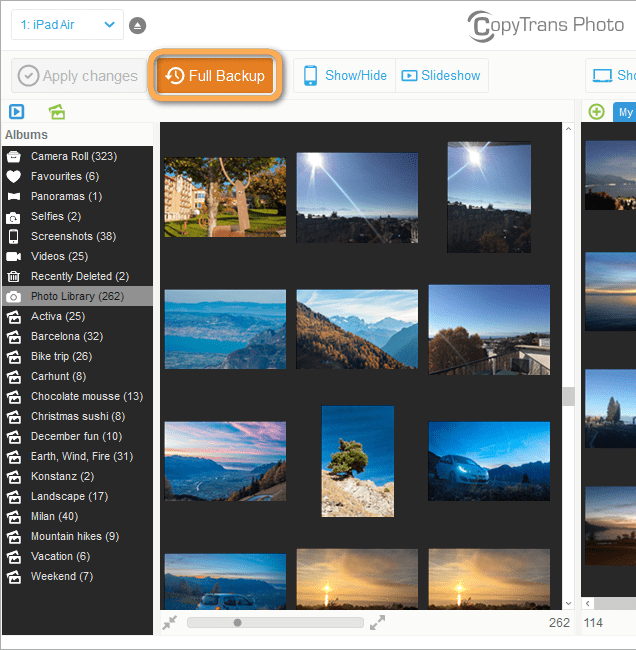
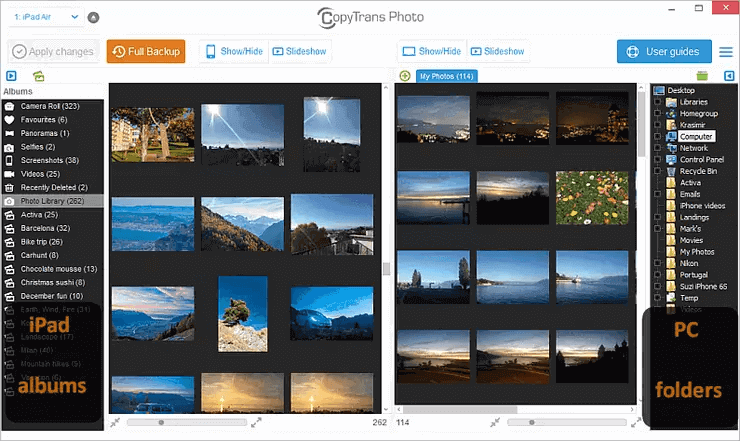
- Install and run CopyTrans Photo and connect the iPad. The iPad albums appear listed in the leftmost pane.
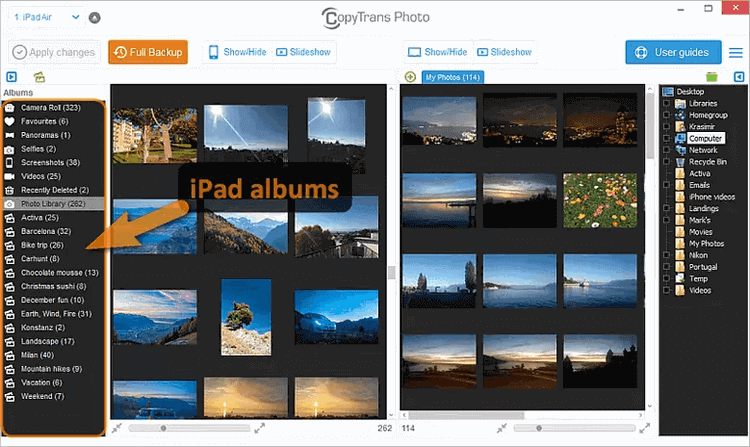
- Click on Full Backup.
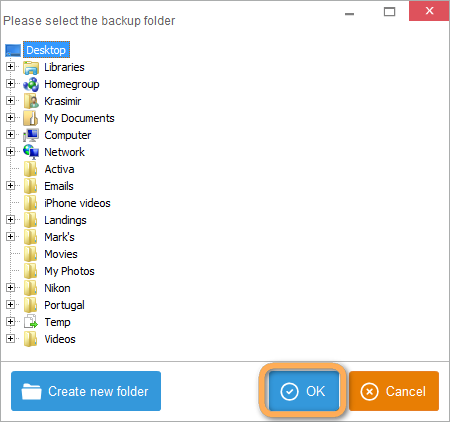
- Select or create the folder to back up the iPad photos and albums and click OK.
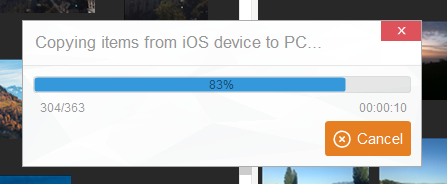
- The backup is in progress. Stand by until it completes.
All the iPad albums and their photo contents are now transferred to the PC folder of your choice.

Transfer specific photo album from iPad to PC
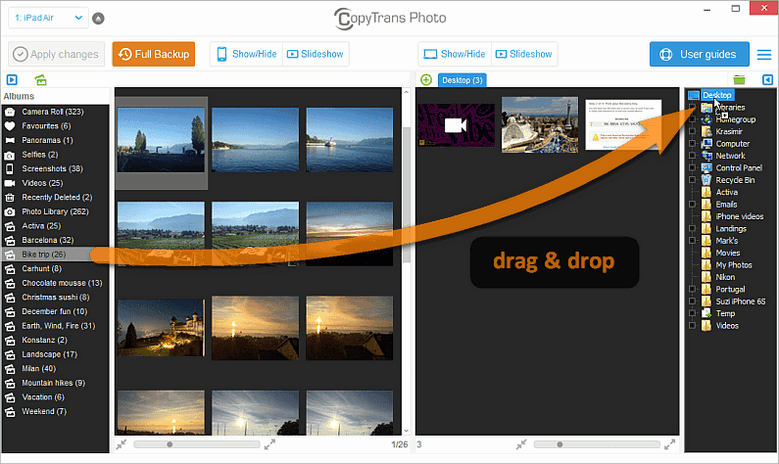
- Download CopyTrans Photo and connect the iPad. The iPad albums show on the left-hand side pane, while the PC folders appear on the far right side.
- Now drag and drop the iPad album from left to right, from iPad to PC.
- Click on Apply changes.
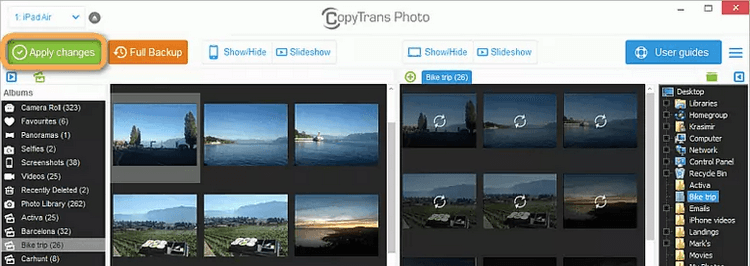
The photos from the iPad album are transferred to the PC folder with the same name.
This is how to move albums created on iPad to PC.
One more easy way to save albums to PC is to use CopyTrans Studio that is integrated into Windows Explorer.
Why you’ll love the new CopyTrans Studio:
- Transfer photos and videos over a Wi-Fi network, without cables
- Create full backups of your iPhone photo library in one click
- Set up automatic scheduled backups and let the program do all the work for you
- Take advantage of Windows Explorer integration: view your iPhone photos as regular folders
- Fully compatible with the latest iOS devices and updates

YouTube guide
Now you know how to download iPhone photos to a PC. Only the photos may not be in JPEG.
By default, your iPhone saves images in HEIC format – and if you import them to a PC, you will just see broken icons instead of thumbnails.
To view your HEIC pictures on Windows, use CopyTrans HEIC for Windows – a free tool to view HEIC images in Windows Explorer.
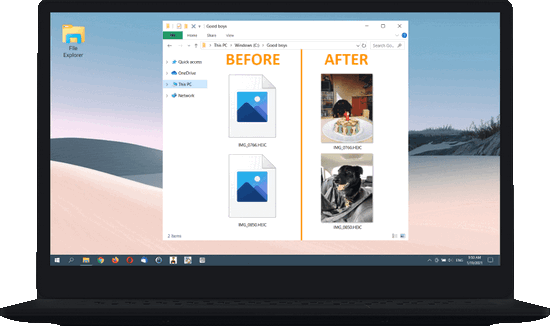
It works automatically and allows you to convert up to 100 HEIC images to JPEG at a time.
Import photos from iPhone to pc
Photos are stored on iCloud
If your photos are displayed as blank icons, don’t worry – they are probably just in HEIC format, which your PC doesn’t recognize. Install our free solution for viewing HEIC files, and they will display fine.
If your photos weren’t transferred or with poor resolution, they are probably sitting in iCloud – this is why CopyTrans Photo couldn’t pull the originals from your device.
You can Disable iCloud Photos and try again or use CopyTrans Cloudly to pull photos from iCloud. All the iCloud photos will be downloaded in one click.
Advantages of CopyTrans Cloudly:
✔️ downloads all the photos and videos at once;
✔️ preserves original format, size, and quality;
✔️ saves your iCloud album structure;
✔️ operates faster than both iCloud.com and iCloud for Windows.
- First, let’s download photos from iCloud to a computer. For that, please install CopyTrans Cloudly:
Click to download CopyTrans Cloudly - Run CopyTrans Cloudly. You will see a login screen. Enter your Apple ID and password.
NOTE: We use a secure SSL connection and do not store your account data unless you want us to save it for faster login.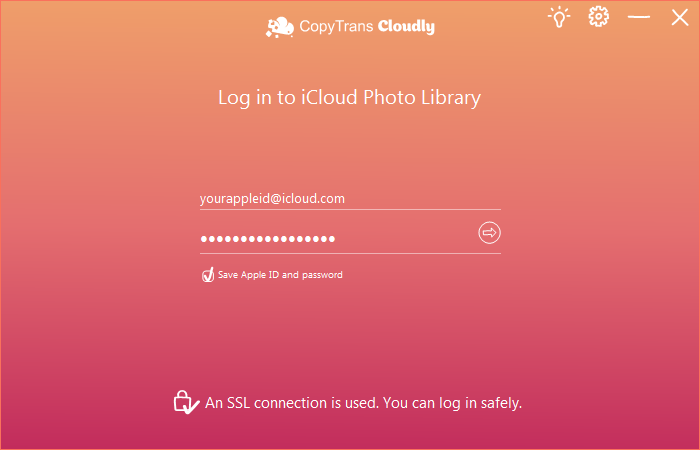
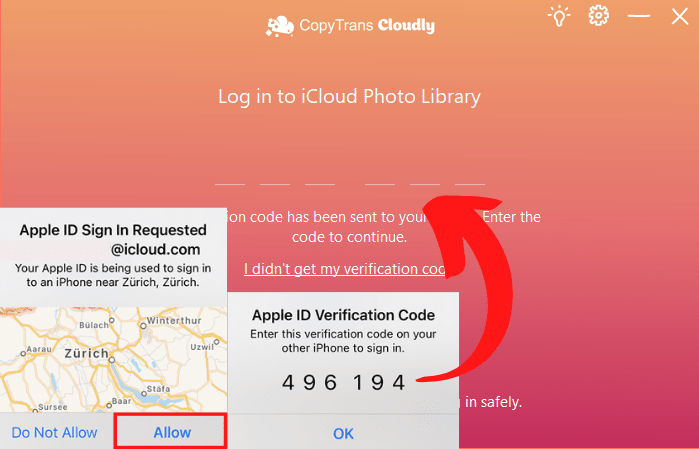
- If you have two-factor authentication enabled, make sure to allow the connection on your device.
- Wait until your iCloud photo library is loaded. To download all photos from iCloud, click Download and select the destination folder.
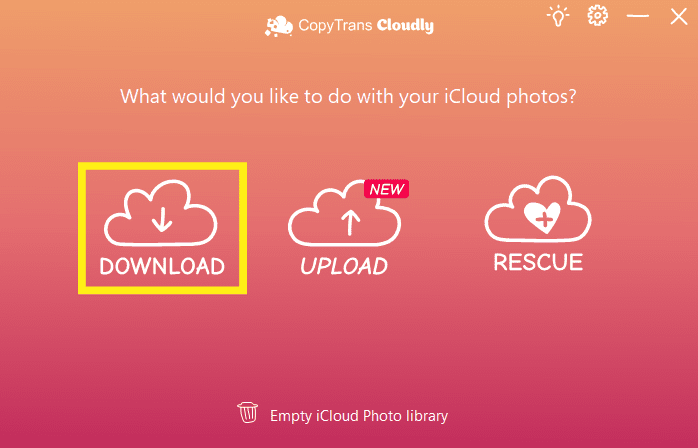
- That is it! Your iCloud photos were saved to your computer.
CopyTrans is your personal assistant that will help you transfer photos from iPhone to pc, including album structure, whether you have them right on the device or saved them to iCloud!